There’s something profoundly comforting about a warm baked apple. That sweet, tender fruit with its caramelized filling, wafting cinnamon-spiced steam as you take your first bite. But who has time for traditional oven baking when a craving strikes?
That’s where the microwave baked apple changes everything.
I discovered this shortcut years ago during a particularly busy autumn when I wanted apple pie flavors without the fuss. What started as a desperate dessert hack has become one of my most-used recipes. In just 5 minutes, you can transform a humble apple into a decadent, soul-warming treat that tastes like it took hours.
Why This Recipe is Awesome
This Microwave Baked Apple is a game-changer for so many reasons.
First, it delivers all the satisfaction of a traditional baked apple in a fraction of the time. We’re talking 5 minutes versus 45 minutes in the oven!
The beauty here is in the simplicity. With just one apple and pantry staples, you can create a perfectly portioned dessert with no waste.
It’s incredibly adaptable too – dress it up with ice cream for guests or keep it simple for a healthier weeknight treat.
What I love most is how this recipe preserves the apple’s natural goodness while transforming its texture into something utterly dessert-worthy. The microwave creates a perfectly tender fruit that maintains its shape while the inside becomes gloriously soft and infused with warm spices.
Equipment needed: Microwave, microwave-safe bowl, knife, spoon, measuring spoons
Microwave Baked Apple
Ingredients
- 1 medium apple Honeycrisp, Gala, or Granny Smith work best
- 1 tablespoon brown sugar light or dark
- ¼ teaspoon ground cinnamon
- 1 tablespoon butter
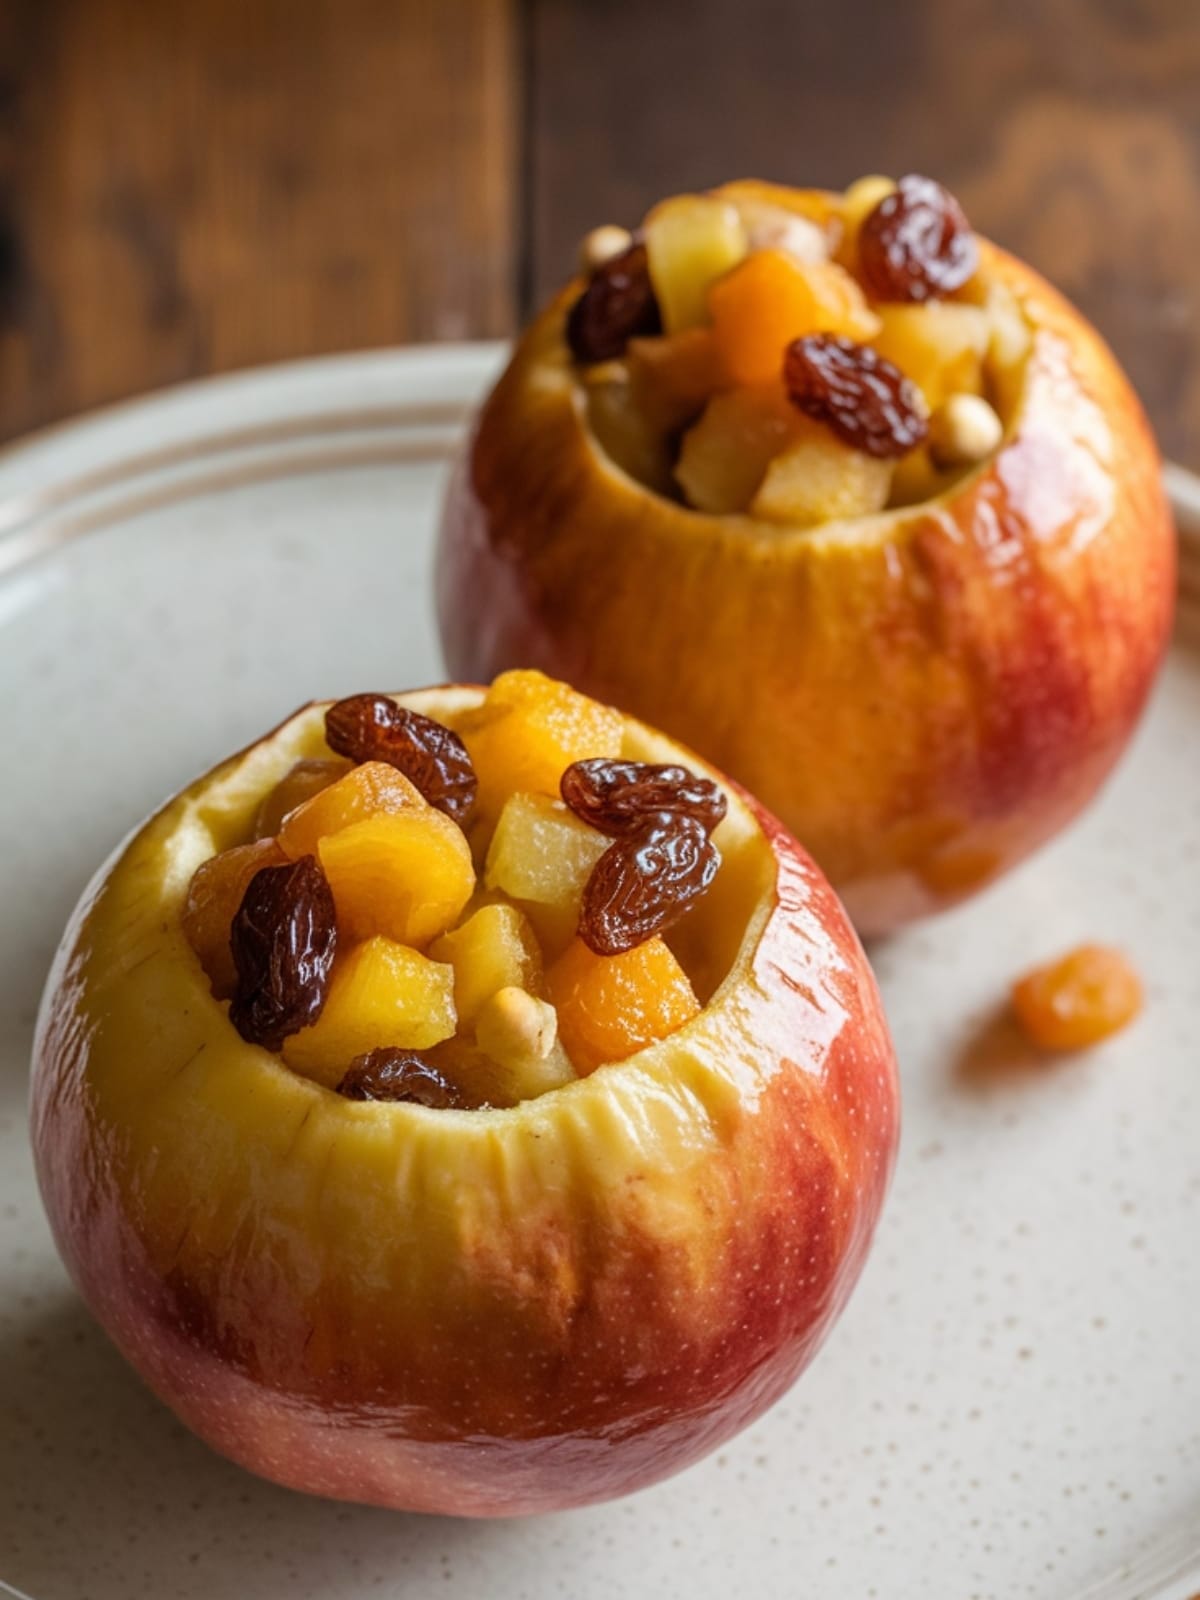
- 1 tablespoon chopped nuts walnuts or pecans – optional
- 1 tablespoon raisins or dried cranberries – optional
- Splash of water about 1 tablespoon
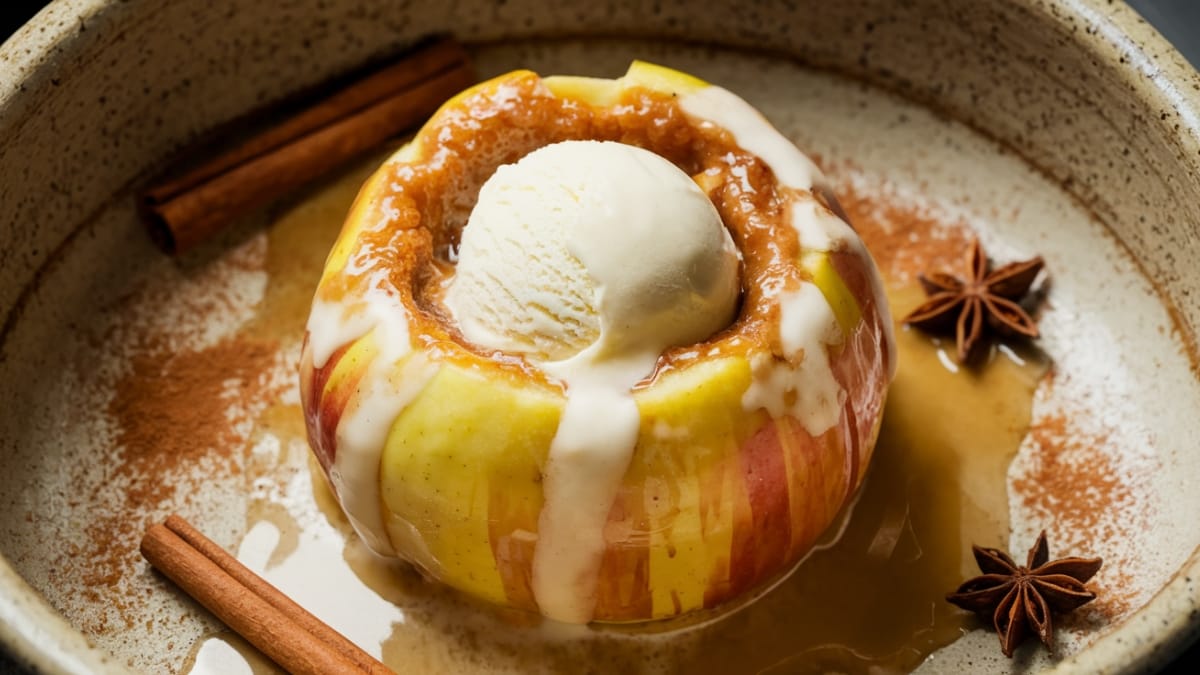
- Vanilla ice cream or whipped cream for serving optional
Instructions
- Core the apple without cutting all the way through the bottom. Leave about ¼ inch intact to create a bowl effect for the filling. Remove the seeds and tough center, creating a 1-inch diameter hole.
- Mix the filling in a small bowl by combining brown sugar, cinnamon, butter, and optional nuts and dried fruit until well incorporated.
- Stuff the apple cavity with your filling mixture, packing it in well but not overflowing. The filling will melt and bubble during cooking.
- Place the apple in a microwave-safe dish and add a splash of water to the bottom. This creates steam that helps cook the apple evenly.
- Cover loosely with a microwave-safe lid or microwave-safe plastic wrap with one corner vented.
- Microwave on high for 3-4 minutes until the apple is tender when pierced with a fork. Cooking time may vary depending on your microwave’s power and the apple’s size.
- Let stand for 2 minutes before serving as the filling will be extremely hot and will continue cooking slightly.
- Serve warm with a scoop of vanilla ice cream or a dollop of whipped cream if desired.
Notes
- Firmer apple varieties like Honeycrisp, Gala, or Granny Smith hold their shape best during microwaving.
- For a dairy-free version, replace butter with coconut oil.
- The apple skin helps the fruit maintain its shape during cooking, so leave it on.
- You can prepare several apples in advance (steps 1-3) and refrigerate until ready to microwave.
- If you prefer a softer apple, simply microwave for an additional 30-60 seconds.
Calories & Nutritional Info
- Calories: Approximately 200-250 calories per apple (without ice cream)
- Carbohydrates: 40g (primarily from natural fruit sugars and added brown sugar)
- Fat: 8g (primarily from butter)
- Protein: 1g
- Dietary considerations: Gluten-free, vegetarian, can be made vegan with coconut oil substitution
Common Mistakes to Avoid
- Cutting through the bottom of the apple – This allows all your delicious filling to leak out during cooking. Always leave about ¼ inch intact at the bottom.
- Skipping the water in the dish – The small amount of water creates steam that helps cook the apple evenly without drying it out.
- Overcooking – Apples quickly go from perfectly tender to mushy. Start with 3 minutes and check for doneness before adding more time.
- Not letting it rest – The filling gets extremely hot in the microwave and needs time to cool slightly before eating.
- Using too small a dish – Choose a bowl with room for expansion as the filling may bubble up during cooking.
Alternatives & Substitutions
- Sweeteners: Replace brown sugar with honey, maple syrup, or coconut sugar. Each brings a unique flavor profile.
- Spices: Add nutmeg, cardamom, or ginger along with cinnamon for more complex flavors.
- Filling extras: Try mini chocolate chips, shredded coconut, or a teaspoon of orange zest.
- Fruit variations: This method works well with firm pears too. Adjust cooking time down by about 30 seconds.
- Topping options: Greek yogurt makes a protein-rich alternative to ice cream, or try a drizzle of caramel sauce.
FAQs
Why does my apple sometimes burst during cooking?
This happens when steam builds up inside. Make sure to create a generous cavity for the filling and score the skin a few times with a knife to allow steam to escape.
Can I make multiple microwave baked apples at once?
Yes! For each additional apple, add about 1-2 minutes to the cooking time, and make sure they’re arranged with space between them in the dish.
Is this healthy enough for breakfast?
Absolutely! Reduce the sugar to 1 teaspoon, skip the ice cream, and serve with a dollop of Greek yogurt for a nutritious morning treat that’s still satisfying.
My microwave doesn’t have a turntable.
Will this recipe still work? Yes, but you’ll need to stop halfway through cooking and rotate the dish manually to ensure even cooking.
How do I know when my apple is perfectly done?
The apple should be easily pierced with a fork but still hold its shape. The skin may look slightly wrinkled, and the filling should be bubbling.
Final Thoughts
This Microwave Baked Apple is proof that sometimes the simplest recipes bring the most joy. There’s something magical about transforming a single apple into a warm, comforting dessert in minutes. Whether you’re cooking for yourself after a long day or surprising someone with an effortless sweet treat, this recipe delivers homemade comfort with practically no effort. Give it a try – I think you’ll find it becomes a regular in your quick-dessert rotation.


