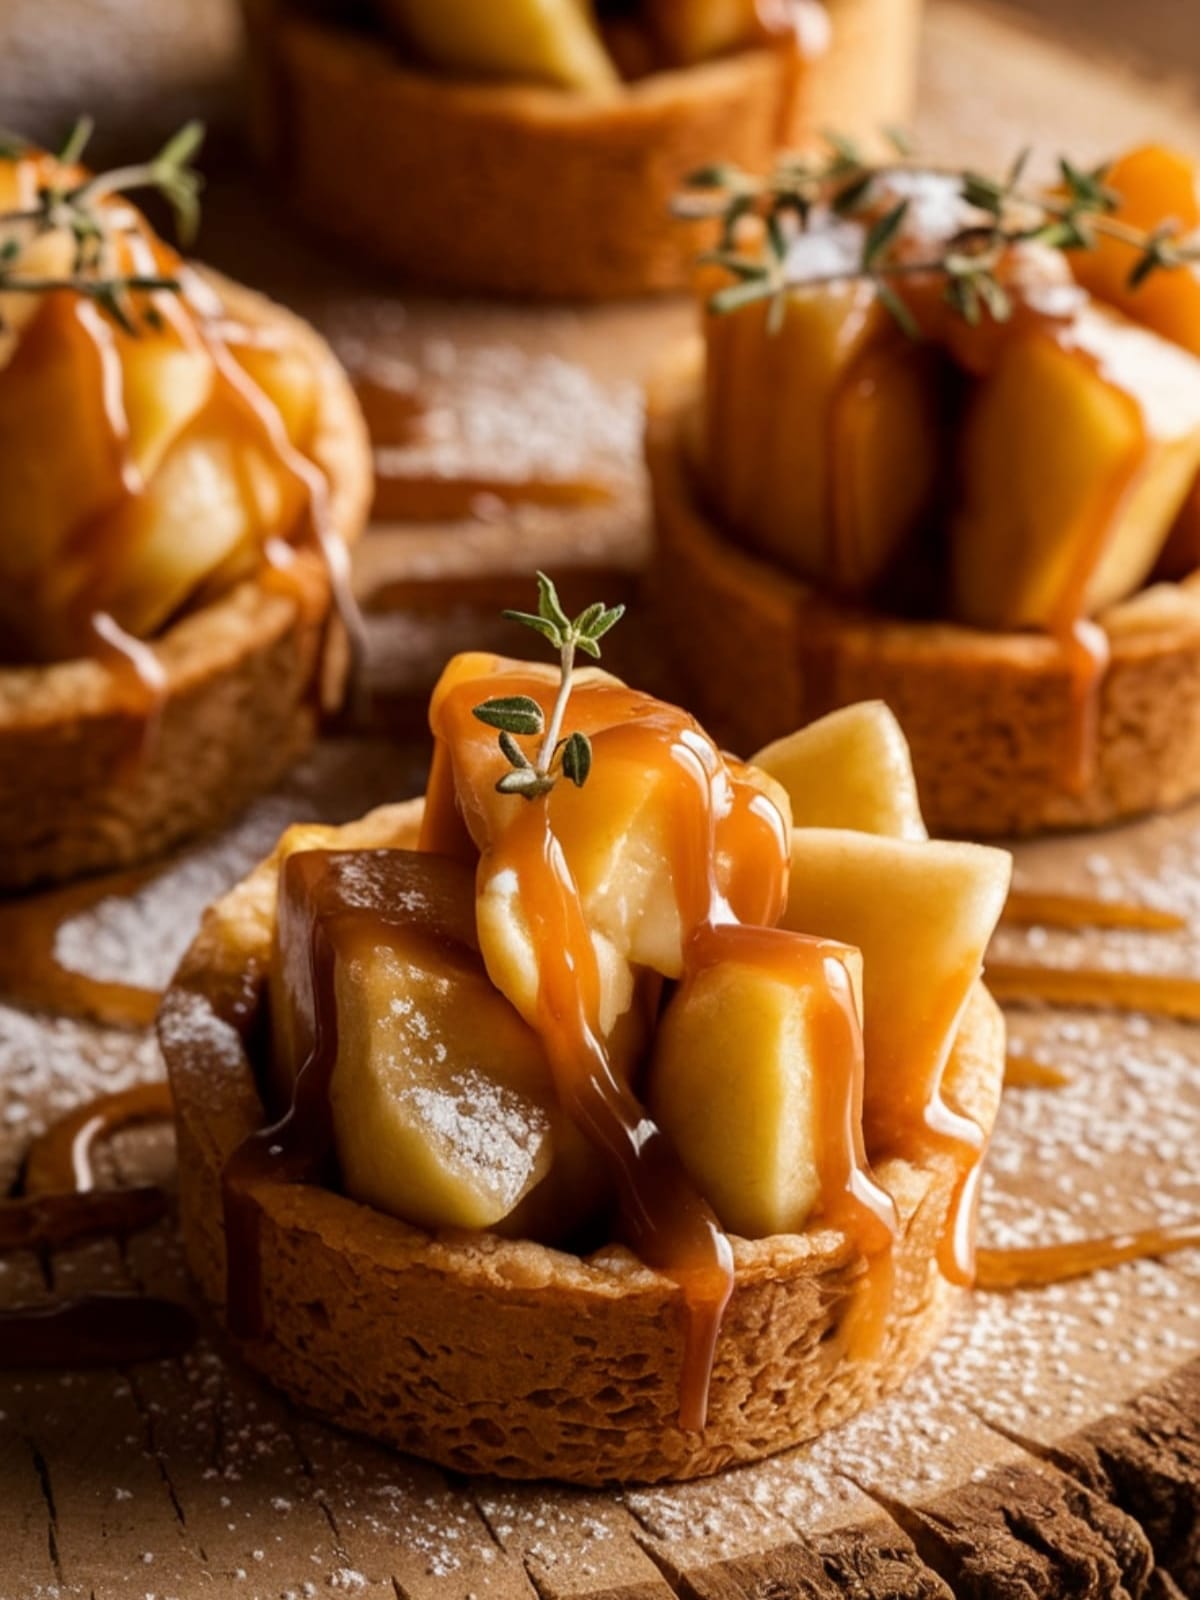
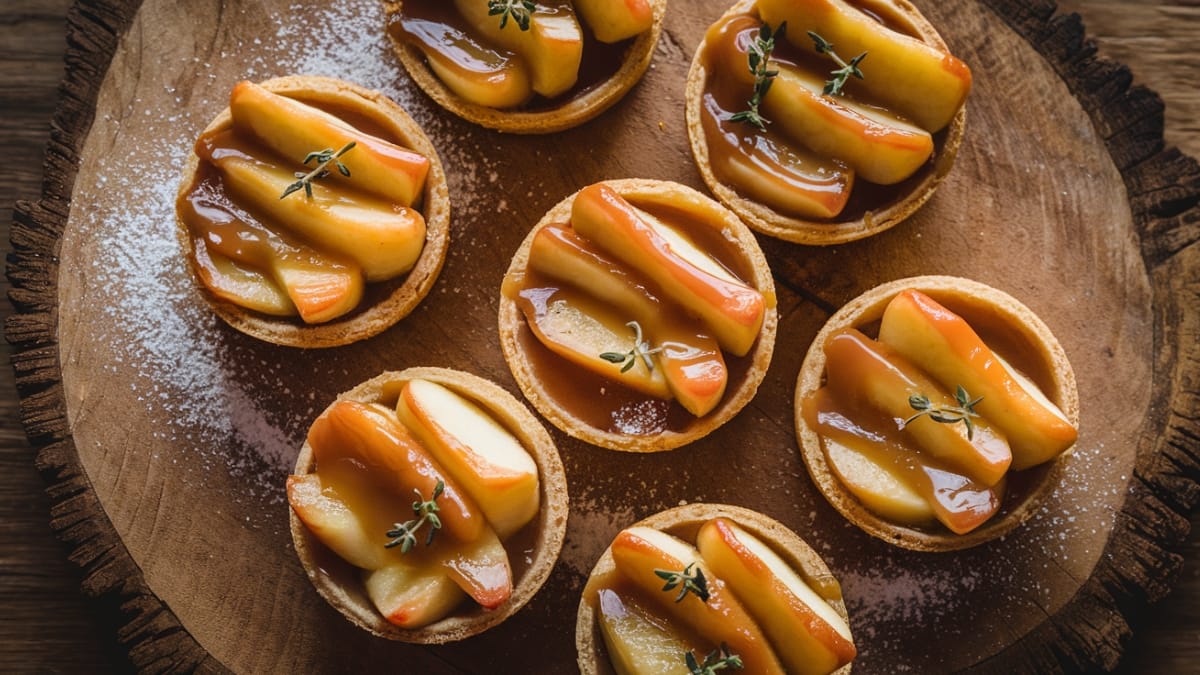
There’s something magical about the first crisp autumn day when you crave those warm, comforting flavors that signal the season has changed. Caramel Apple Dessert Cups capture that exact feeling in a single spoonful. These individually portioned treats combine tart apples bathed in buttery caramel, all nestled into a crisp, cinnamon-scented crust that shatters perfectly with each bite. They’re like apple pie’s sophisticated cousin who studied abroad—familiar yet somehow more special.
Why This Recipe is Awesome
What makes these Caramel Apple Dessert Cups truly special is their perfect balance of textures and flavors.
Unlike traditional apple pie, these individual portions caramelize more thoroughly, creating pockets of gooey goodness that simply can’t be achieved in a standard pie. The cup format also creates the ideal ratio of filling to crust in every bite—no more fighting over the perfect slice! These cups are surprisingly versatile too.
They’re elegant enough for dinner parties yet simple enough for weeknight treats. I’ve been perfecting this recipe for years, adjusting the spice blend and caramel consistency until it hits that sweet spot where the apples retain their structure while still melting in your mouth.
Equipment needed: Muffin tin, mixing bowls, apple peeler, pastry cutter or food processor

Caramel Apple Dessert Cups
Ingredients
For the Crust
- 2 cups all-purpose flour
- 2 tablespoons granulated sugar
- 1/2 teaspoon salt
- 3/4 cup cold unsalted butter cubed
- 4-6 tablespoons ice water
- 1 teaspoon cinnamon
For the Filling
- 4 medium Granny Smith apples peeled and diced (about 4 cups) – Honeycrisp or Braeburn work well too
- 1/2 cup granulated sugar
- 1/4 cup brown sugar packed
- 2 tablespoons all-purpose flour
- 1 teaspoon ground cinnamon
- 1/4 teaspoon ground nutmeg
- Pinch of salt
- 1 tablespoon lemon juice
For the Caramel
- 1/2 cup granulated sugar
- 2 tablespoons water
- 1/4 cup heavy cream
- 2 tablespoons unsalted butter
- 1/2 teaspoon vanilla extract
- Pinch of sea salt
Instructions
- Prepare the pastry dough by combining flour, sugar, salt, and cinnamon in a food processor. Pulse in cold butter until mixture resembles coarse crumbs. Gradually add ice water until dough just comes together. Form into a disk, wrap in plastic, and refrigerate for 30 minutes.
- Make the caramel sauce by combining sugar and water in a medium saucepan over medium heat. Do not stir! Let it cook until it turns amber (about 5-7 minutes). Remove from heat, carefully whisk in cream (it will bubble vigorously), then butter, vanilla, and salt until smooth. Set aside to cool slightly.
- Prepare the apple filling by tossing diced apples with both sugars, flour, spices, salt, and lemon juice in a large bowl. Let sit for 10 minutes to allow flavors to meld and juices to release.
- Preheat your oven to 375°F (190°C) and grease a standard 12-cup muffin tin generously with butter or cooking spray.
- Roll out the chilled dough to about 1/8-inch thickness on a floured surface. Cut into 4-inch circles (a large cookie cutter or bowl works well). Gently press each circle into muffin cups, allowing the edges to extend slightly above the rim.
- Spoon the apple mixture evenly into each pastry cup, filling them almost to the top. Drizzle each with about 1-2 teaspoons of the prepared caramel sauce, reserving some for serving.
- Bake for 25-30 minutes until the crust is golden brown and the filling is bubbling. Look for caramelized edges—that’s where the magic happens!
- Cool in the pan for 10 minutes, then carefully remove cups using a knife to gently loosen the edges. Transfer to a wire rack to cool for another 10-15 minutes.
- Serve warm with an additional drizzle of caramel sauce and a small scoop of vanilla ice cream if desired.
Notes
- For the flakiest crust, make sure all your ingredients are cold, and don’t overwork the dough.
- You can prepare the pastry dough and caramel sauce up to 3 days ahead and store in the refrigerator.
- To save time, use store-bought caramel sauce, but warm it slightly before drizzling.
- These cups can be fully baked and frozen for up to 1 month. Reheat in a 350°F oven for 10-12 minutes.
- For extra texture, sprinkle a few chopped toasted pecans on top before baking.
- A touch of bourbon or apple brandy in the caramel sauce adds wonderful complexity.
Calories & Nutritional Info
- Calories: Approximately 320 per dessert cup
- Carbohydrates: 45g
- Fat: 15g
- Protein: 3g
- Fiber: 2g
- Allergens: Contains wheat, dairy
- Dietary notes: Can be made gluten-free with a 1:1 gluten-free flour blend
Common Mistakes to Avoid
- Overworking the pastry dough – This results in tough, shrinking crusts. Mix just until combined for maximum flakiness.
- Cutting apples too large – Dice them small (about 1/4 inch) so they cook through properly during baking.
- Walking away from the caramel – Sugar can go from perfectly amber to burnt in seconds. Stay vigilant!
- Under-greasing the muffin tin – These cups can stick stubbornly; be generous with your butter or cooking spray.
- Removing the cups too soon – They need those 10 minutes in the pan to set up, or they might fall apart.
Alternatives & Substitutions
- For a gluten-free version: Substitute the all-purpose flour with a 1:1 gluten-free baking blend.
- For dairy-free needs: Use plant-based butter and coconut cream instead of heavy cream.
- No time for homemade caramel? Quality store-bought caramel sauce works in a pinch.
- Fruit variations: Substitute or mix in pears, peaches, or berries for a different flavor profile.
- Lower sugar option: Reduce the granulated sugar by 25% and add a pinch more cinnamon to enhance perceived sweetness.
- Spice alternatives: Cardamom, ginger, or allspice can replace or complement the cinnamon and nutmeg.
FAQs
Can I make these Caramel Apple Dessert Cups ahead of time?
Absolutely! You can prepare all components separately up to 3 days ahead. Assemble and bake just before serving for the freshest result, or bake completely and reheat at 325°F for 10 minutes to restore that just-baked quality.
Why did my caramel crystallize?
Crystallization usually happens when sugar crystals form on the side of the pan. Prevent this by avoiding stirring during the initial cooking phase and using a pastry brush dipped in water to wash down any sugar crystals on the sides of the pan.
Can I use pre-made pie crust for this recipe?
Yes! Store-bought pie crust works perfectly for a time-saving shortcut. Just be sure to roll it slightly thinner than it comes packaged and add a sprinkle of cinnamon for that extra flavor dimension.
How do I know when the dessert cups are done baking?
Look for three indicators: golden brown crust edges, bubbling filling, and most importantly, caramelized edges where the filling meets the crust. This caramelization is essential for that rich, complex flavor.
Can I make these in a mini muffin tin for bite-sized versions?
Definitely! For mini versions, cut the dough into 2.5-inch circles and reduce the baking time to 18-20 minutes. They make perfect two-bite desserts for parties.
Final Thoughts
These Caramel Apple Dessert Cups have become my signature fall dessert for good reason. There’s something deeply satisfying about creating these little vessels of autumn joy, where the humble apple transforms into something truly special. Whether you’re serving them at a dinner party or enjoying one with your evening tea, I hope they bring the same comfort and delight to your table that they’ve brought to mine.


