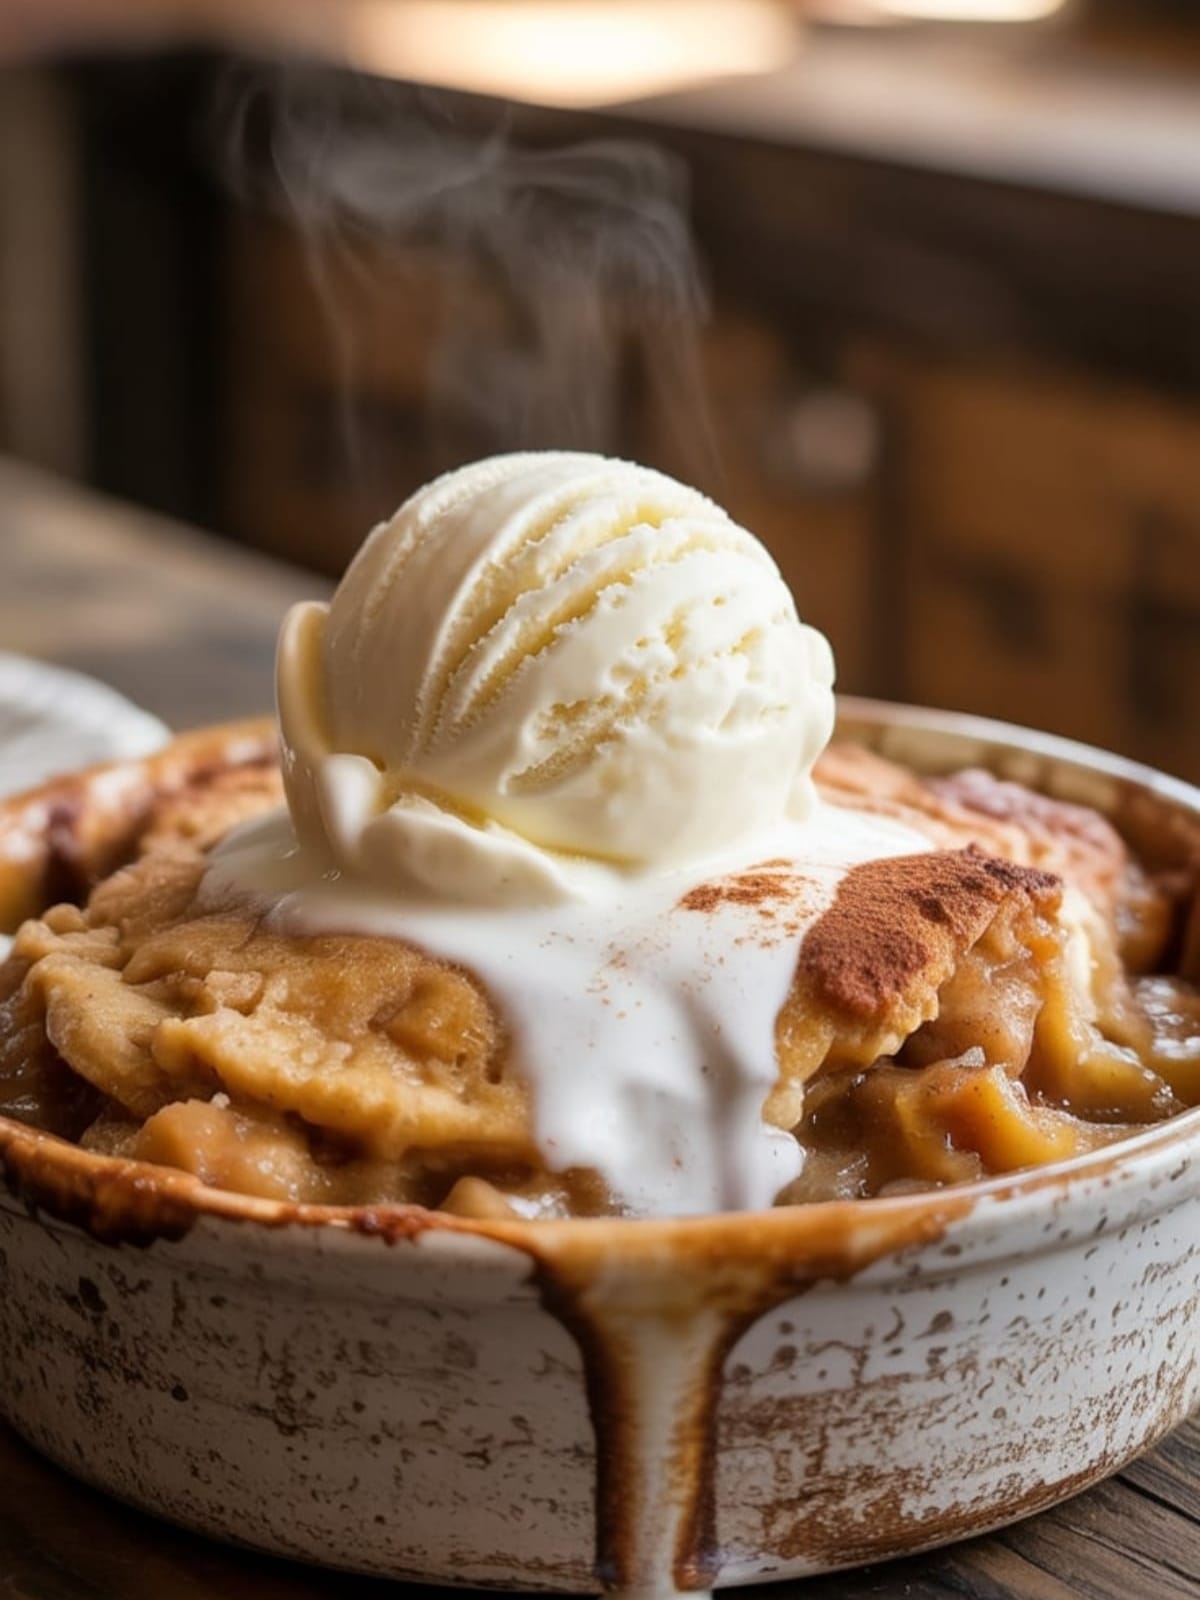
There’s something magical about the aroma of cinnamon-spiced apples bubbling beneath a golden, buttery crust that fills your home with warmth. That first spoonful of Apple Cobbler, with its perfect balance of tender fruit and crisp topping, brings comfort in the most delicious way possible. This isn’t just dessert—it’s a hug in a baking dish, the kind of recipe that creates memories around your table.
Why This Recipe is Awesome
What makes this Apple Cobbler special is its beautiful simplicity paired with extraordinary flavor.
Unlike fussy desserts that demand precision, this cobbler forgives minor measurement variations and still turns out wonderfully every time.
The magic happens in the contrast of textures—those perfectly softened apples swimming in their own cinnamon-infused syrup, topped with a buttery crust that’s crisp on top yet tender where it meets the fruit. It’s rustic in the best possible way.
This recipe strikes the perfect balance between tartness and sweetness, letting the natural flavor of the apples shine while complementing them with warm spices. Best of all, it requires ingredients you likely already have in your pantry, making it perfect for last-minute entertaining or satisfying a sudden dessert craving.
Equipment needed: 9×13 baking dish, mixing bowls, measuring cups, measuring spoons, knife, cutting board
Apple Cobbler
Ingredients
- 6 medium apples preferably a mix of Granny Smith and Honeycrisp
- ¾ cup granulated sugar
- ¼ cup brown sugar packed
- 2 tablespoons all-purpose flour
- 1 tablespoon fresh lemon juice
- 1 teaspoon ground cinnamon
- ¼ teaspoon ground nutmeg
- ¼ teaspoon salt
- 2 tablespoons butter cut into small pieces
For the topping
- 1 cup all-purpose flour
- ½ cup granulated sugar
- 1 teaspoon baking powder
- ¼ teaspoon salt
- 6 tablespoons cold butter cubed
- ¼ cup boiling water
- Vanilla ice cream for serving optional but highly recommended
Instructions
- Preheat your oven to 375°F (190°C) and lightly grease a 9×13 inch baking dish.
- Prepare the apples by peeling, coring, and slicing them into ¼-inch thick slices. You want them thin enough to become tender but not so thin they disintegrate.
- In a large bowl, combine the sliced apples with granulated sugar, brown sugar, 2 tablespoons flour, lemon juice, cinnamon, nutmeg, and salt. Toss until the apples are evenly coated.
- Transfer the apple mixture to your prepared baking dish and spread it out evenly. Dot the surface with the 2 tablespoons of butter pieces.
- Make the topping by whisking together the flour, sugar, baking powder, and salt in a medium bowl.
- Cut in the cold butter using a pastry cutter or your fingertips until the mixture resembles coarse crumbs. The butter should be about pea-sized—this creates that perfect cobbler texture.
- Pour the boiling water over the flour mixture and stir just until combined. The dough will seem wet, but this creates a wonderful crust.
- Drop spoonfuls of the topping over the apples, covering most of the surface but allowing some gaps for the filling to bubble through.
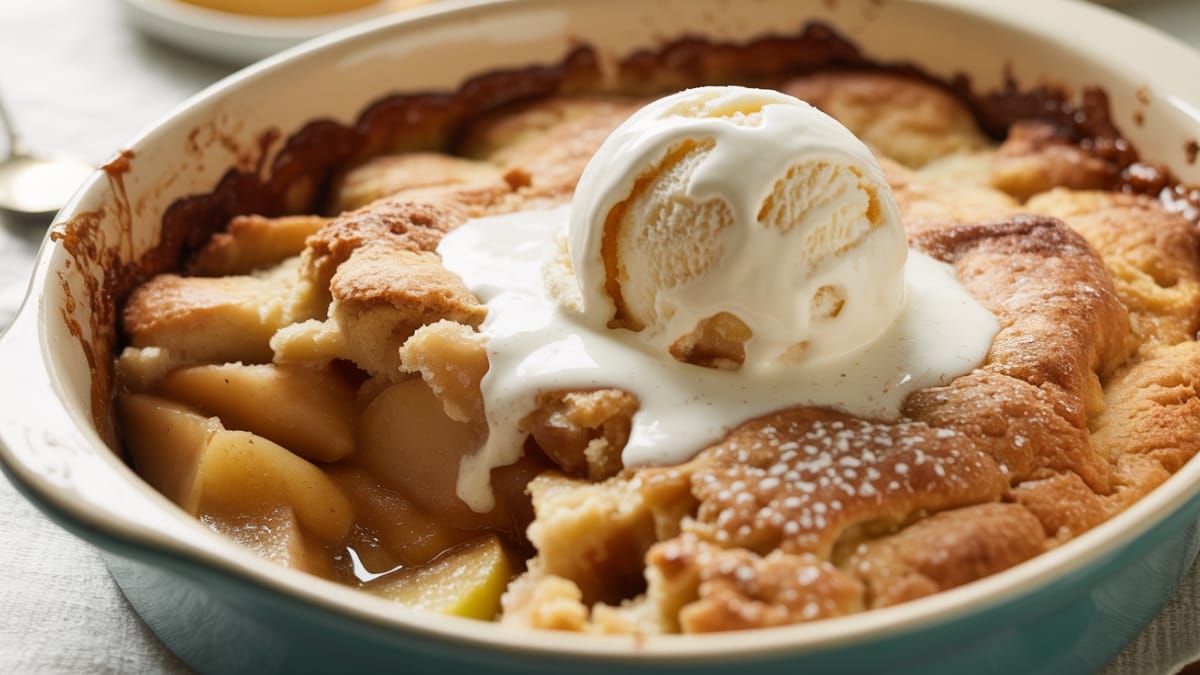
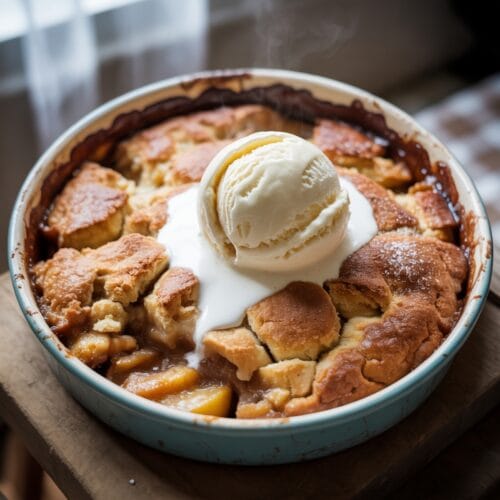
- Bake for 40-45 minutes until the topping is golden brown and the filling is bubbling around the edges.
- Allow to cool for at least 15 minutes before serving warm with a scoop of vanilla ice cream if desired.
Notes
- For the best flavor, use a mix of tart and sweet apples. Granny Smith provides structure and tartness, while Honeycrisp or Gala adds sweetness.
- The cobbler will thicken as it cools. If you prefer a more set filling, let it rest for 30 minutes before serving.
- This cobbler can be made up to a day ahead and reheated in a 300°F oven until warm.
- Store leftovers covered at room temperature for up to 2 days, or refrigerate for up to 5 days.
- For a deeper flavor, try adding ½ teaspoon of vanilla extract to the apple mixture.
Calories & Nutritional Info
- Calories: Approximately 320 calories per serving (without ice cream)
- Carbohydrates: 58g
- Fat: 12g
- Protein: 2g
- Fiber: 3g
- Sugar: 40g
- Contains gluten from the flour in both filling and topping
- Dairy-free option: Substitute the butter with plant-based butter alternatives
Common Mistakes to Avoid
- Slicing apples too thin or too thick — Too thin and they’ll turn to mush; too thick and they won’t soften properly.
- Skipping the lemon juice — It brightens the flavor and prevents apples from browning.
- Overmixing the cobbler topping — This develops gluten and makes the crust tough instead of tender.
- Not allowing the cobbler to rest — Serving immediately from the oven means a runny filling that hasn’t had time to set.
- Using cold water instead of boiling water — The hot water partially cooks the flour, creating that distinctive cobbler crust texture.
Alternatives & Substitutions
- Fruit variations: Replace some or all apples with pears, peaches, or berries depending on the season.
- Gluten-free option: Substitute all-purpose flour with a 1:1 gluten-free flour blend in both filling and topping.
- Sugar alternatives: Replace white sugar with coconut sugar or reduce the amount for a less sweet dessert.
- Spice variations: Add ¼ teaspoon cardamom or ginger for an interesting flavor twist.
- Topping enhancements: Mix ⅓ cup of rolled oats or ¼ cup chopped nuts into the topping for added texture.
- Vegan version: Use plant-based butter and serve with non-dairy ice cream.
FAQs
What’s the difference between apple cobbler and apple crisp?
While both are baked fruit desserts, a cobbler has a biscuit-like topping dropped or spooned over the fruit, creating a “cobbled” appearance. A crisp typically has a streusel topping made with oats, butter, flour, and sugar that becomes crisp when baked.
Can I make apple cobbler ahead of time?
Absolutely! You can assemble the entire cobbler up to 24 hours in advance and refrigerate unbaked. Add about 10 minutes to the baking time if baking from cold. Alternatively, bake completely, cool, and reheat when ready to serve.
Why is my apple cobbler watery?
This usually happens when the apples release too much juice or the cobbler hasn’t cooled enough. Using firmer apples like Granny Smith helps, as does adding a bit more flour to the filling. Remember that cobbler continues to thicken as it cools.
Do I need to peel the apples?
While not absolutely necessary, peeling is recommended for the best texture. Apple peels can become tough and chewy in contrast to the soft filling. If you’re short on time, you can leave the peels on, especially if using thin-skinned varieties.
How do I know when my cobbler is done?
Look for three signs: the topping should be golden brown, the filling should be bubbling around the edges, and when you insert a knife into the apples, they should feel tender with just a slight resistance—not mushy or crunchy.
Final Thoughts
This Apple Cobbler isn’t just a dessert—it’s a celebration of simple ingredients coming together to create something truly special. Whether you’re serving it at a holiday gathering or enjoying it on a quiet evening at home, its warm, comforting flavors never disappoint. There’s something profoundly satisfying about creating a dessert that’s both homey and impressive. So grab those apples, preheat your oven, and prepare to fill your kitchen with the irresistible aroma of autumn’s finest comfort food.


