Ever had one of those moments when you need to bring a dessert that screams “I’m incredibly talented in the kitchen” but you’ve got the baking skills of a sleep-deprived college student? Welcome to your new secret weapon. This White Chocolate Raspberry Tart is about to become your go-to impressive dessert that’ll have everyone thinking you spent hours perfecting it. (Spoiler alert: you didn’t.)
Why You Need This Tart in Your Life Yesterday
Let’s be real – the combination of creamy white chocolate and tart raspberries is basically the culinary equivalent of finding the perfect outfit that makes you look like you lost 10 pounds overnight. The contrast between the silky-smooth white chocolate filling and the slightly tart raspberry topping creates this perfect balance that’ll make your taste buds do a happy dance. Plus, the buttery shortbread crust? Chef’s kiss.
The best part? This showstopper looks like it came from a fancy French patisserie but requires minimal effort. Isn’t that what we’re all looking for in life – maximum praise for minimum work?
White Chocolate Raspberry Tart
Equipment
- 9-inch tart pan with removable bottom
- Medium saucepan
- Mixing bowls
- Food processor (or ziplock bag and rolling pin)
- Spatula
- Measuring cups and spoons
Ingredients
For the Crust
- 1½ cups shortbread cookie crumbs about 24 cookies
- ⅓ cup unsalted butter melted
- 3 tablespoons granulated sugar
- Pinch of salt
For the White Chocolate Filling
- 12 oz high-quality white chocolate chopped
- 1¼ cups heavy cream
- 8 oz cream cheese softened
- 1 teaspoon vanilla extract
- ¼ teaspoon almond extract optional but game-changing
For the Raspberry Topping
- 2 cups fresh raspberries
- ⅓ cup raspberry preserves
- 2 tablespoons water
- 1 tablespoon lemon juice
- 2 tablespoons chopped pistachios optional for garnish
Instructions
The Crust (AKA The Foundation of Greatness)
- Crush those cookies like they insulted your favorite TV show. Use a food processor or the good old ziplock bag and rolling pin method.
- Mix the crumbs with melted butter, sugar, and salt until it resembles wet sand. Is there anything more satisfying than butter-soaked cookie crumbs? I think not.
- Press the mixture firmly into your tart pan, creating an even layer on the bottom and up the sides. Use the bottom of a measuring cup to really pack it in there – we’re going for structural integrity here, people.
- Chill the crust for 20 minutes while you contemplate how something so simple can be so delicious.
The White Chocolate Filling (The Star of the Show)
- Heat the heavy cream in a saucepan until it’s just about to simmer. Turn off the heat immediately – we’re not making caramel here.
- Add the chopped white chocolate to the hot cream and let it sit for 2 minutes. This is a great time to check Instagram or text back that friend you’ve been ignoring.
- Stir until smooth and the chocolate is completely melted. If you have stubborn chunks, microwave in 5-second bursts, stirring between each.
- In a separate bowl, beat the softened cream cheese until fluffy, then gradually add the white chocolate mixture and both extracts. Mix until smooth and lump-free. (Nobody wants to bite into a cream cheese boulder, trust me.)
- Pour this heavenly mixture into your chilled crust and smooth the top with a spatula. Tap the pan gently on the counter to remove any air bubbles – we’re professionals here.
- Refrigerate for at least 2 hours or overnight if you’re planning ahead like the organized adult you occasionally pretend to be.
The Raspberry Topping (The Crown Jewel)
- When the filling is set, warm the raspberry preserves and water in a small saucepan until fluid.
- Add the lemon juice and stir until everything’s incorporated.
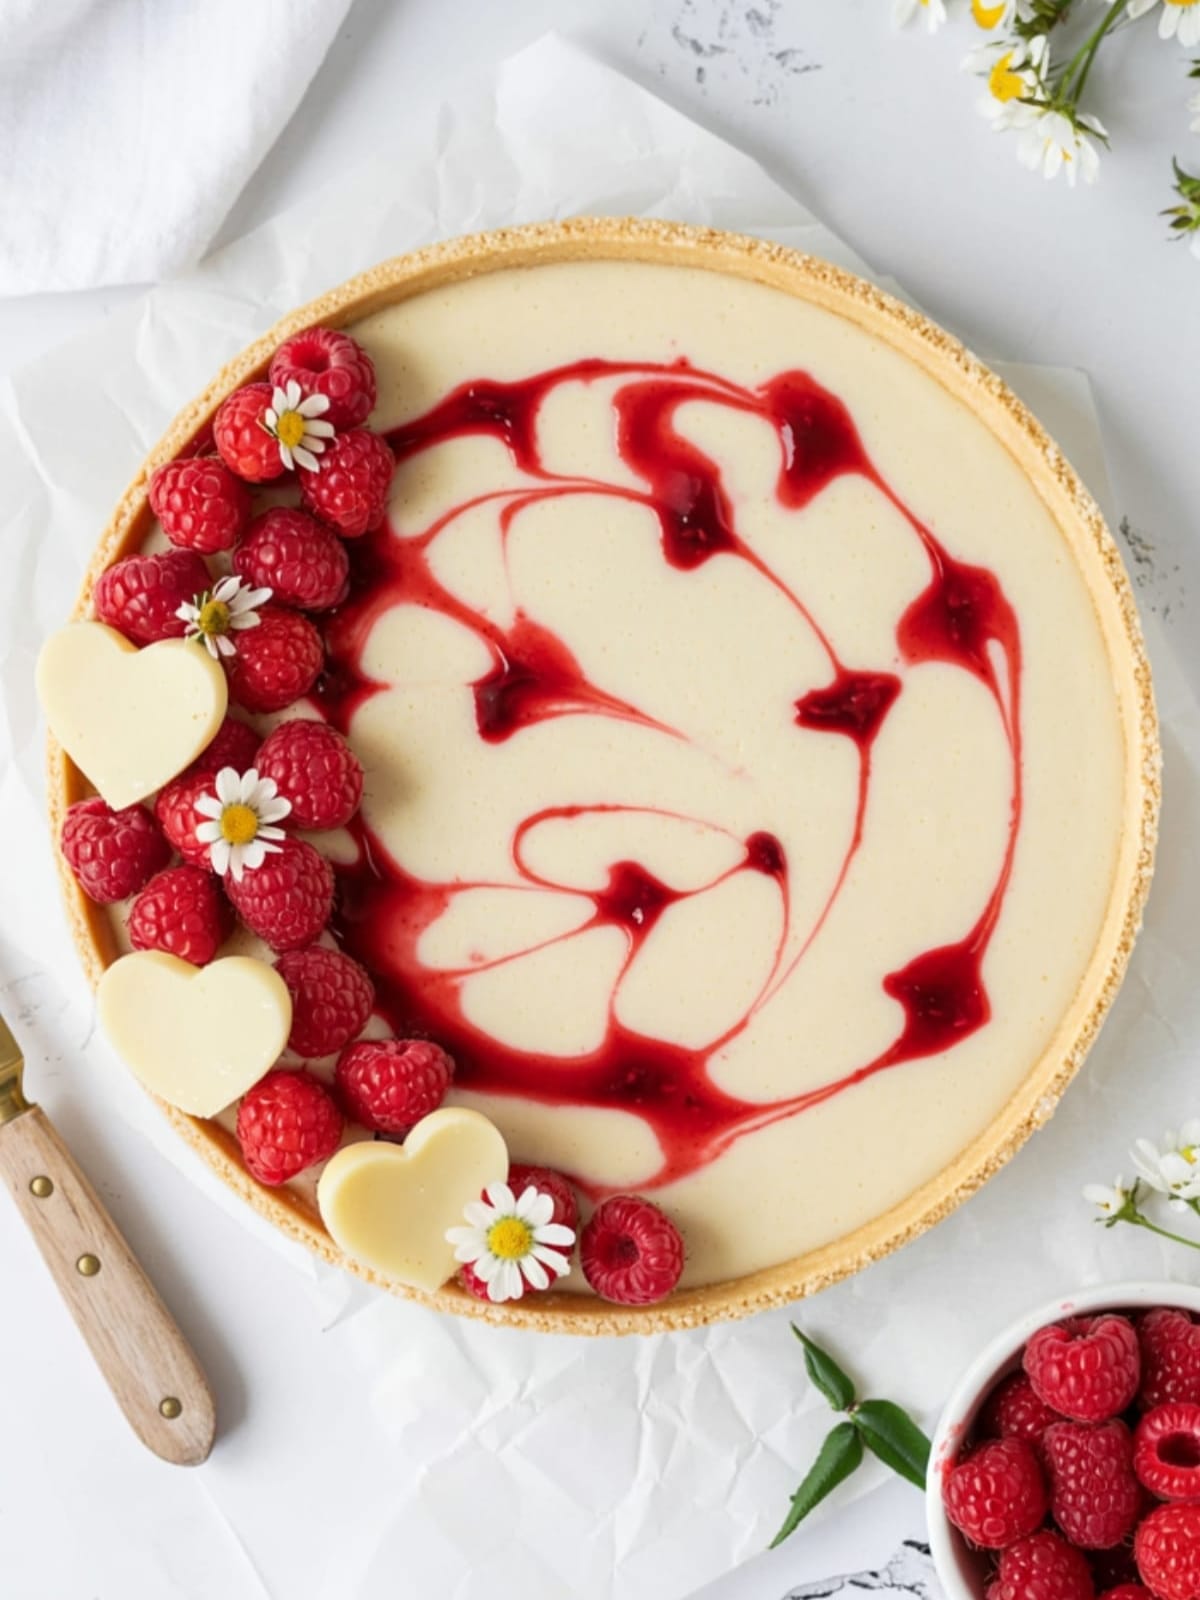
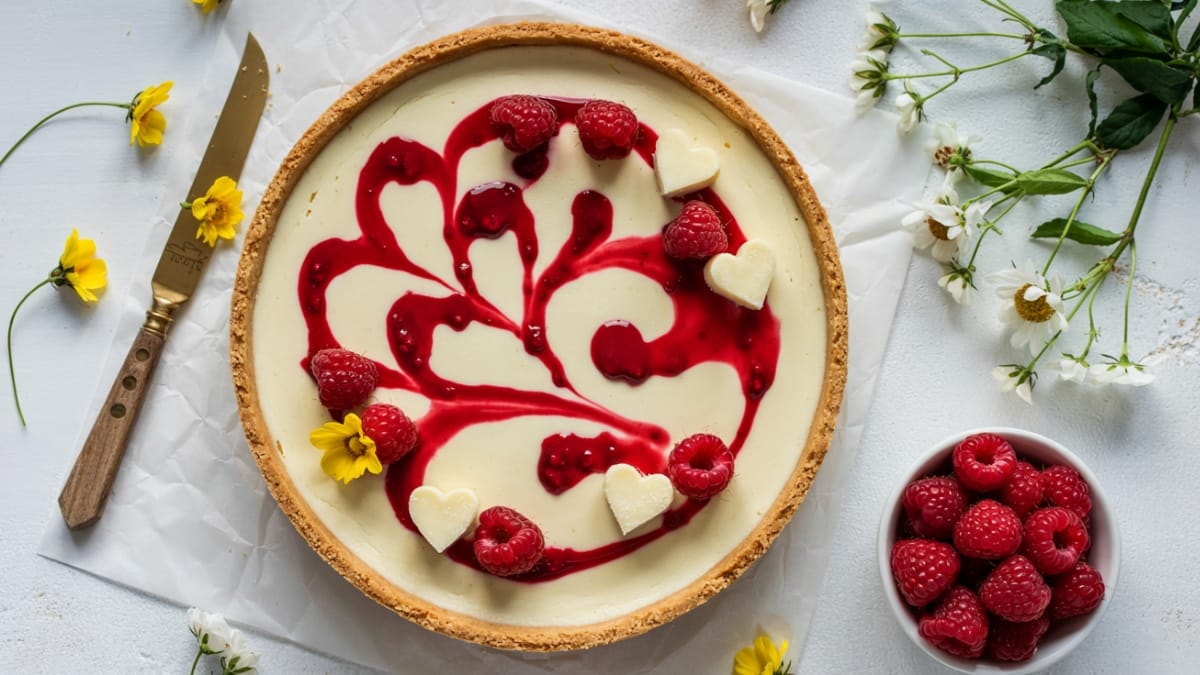
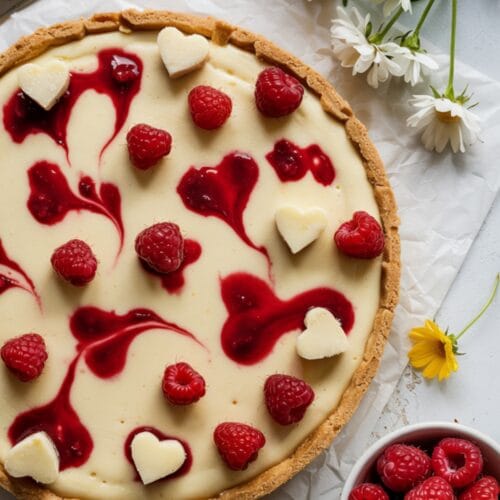
- Let the mixture cool slightly, then gently toss about ¾ of your fresh raspberries in it. This gives them that gorgeous glossy look that screams “I’m fancy!”
- Arrange the coated raspberries on top of your tart. You can go for a precise pattern or the “artfully scattered” look if precision isn’t your thing.
- Place the remaining fresh raspberries on top and sprinkle with chopped pistachios if using. The color contrast here is absolutely Instagram-worthy.
Notes
- White chocolate quality matters. Skip the cheap chips and go for the good stuff – your taste buds will thank you.
- Room temperature cream cheese is non-negotiable unless you enjoy arm-destroying mixing sessions.
- Make ahead friendly! This tart actually tastes better after sitting overnight, making it perfect for planning ahead.
- Tart pan troubles? If you don’t have a tart pan, a pie dish works in a pinch, but you’ll lose that fancy fluted edge.
- Dietary Notes: This recipe contains dairy and gluten. Not suitable for vegans or those with dairy allergies.
Common Mistakes That’ll Ruin Your Tart Game
- Overheating the cream. If it boils, you’re headed for disaster. Just heat until tiny bubbles form around the edges.
- Using cold cream cheese. Seriously, I mentioned this above but it bears repeating. Cold cream cheese = lumpy filling = sad tart.
- Rushing the chilling process. I know you want to eat it now, but patience yields that perfect sliceable consistency. Two hours minimum, folks!
- Handling raspberries roughly. These delicate divas bruise easily, so treat them gently when coating and arranging.
Make It Your Own: Delicious Variations
- The Chocolate Lover’s Version: Swap white chocolate for semi-sweet chocolate chips and use blackberries instead of raspberries. Same technique, totally different flavor profile.
- The Lemon-Berry Twist: Add 1 tablespoon of lemon zest to the filling and swap half the raspberries for blueberries for a citrusy summer vibe.
- The Gluten-Free Adaptation: Use gluten-free cookies for the crust (gluten-free graham crackers work great), and you’ve got a GF dessert that doesn’t taste like cardboard. Amazing!
FAQs
Can I use frozen raspberries?
For the topping, stick with fresh for the best presentation. However, if you want to make a raspberry swirl in the filling, thawed frozen berries work perfectly.
How long will this tart last?
Stored covered in the refrigerator, it’ll keep for up to 3 days. But who are we kidding? It’ll be devoured long before that.
Can I make this without a tart pan?
Absolutely! A pie plate works, or even a springform pan in a pinch. The removable bottom just makes serving easier, but it’s not essential for deliciousness.
Final Thoughts
This White Chocolate Raspberry Tart isn’t just a dessert—it’s your new secret weapon for potlucks, dinner parties, or those times when you need to convince someone you’ve got your life together. The beautiful thing is, while everyone’s ooh-ing and aah-ing, only you’ll know it took less effort than assembling IKEA furniture. Now go forth and bake your way into everyone’s hearts!


