
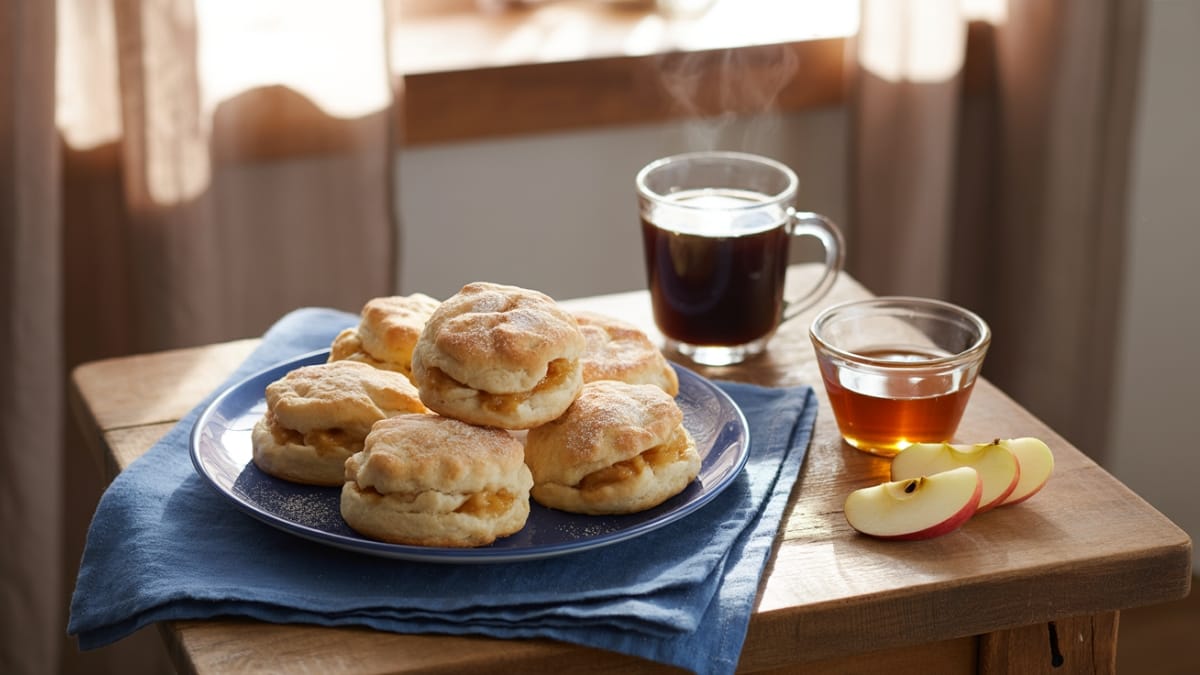
Imagine the coziness of apple pie in the convenience of a hand-held biscuit. That’s exactly what these Apple Pie Biscuits deliver—all the warm cinnamon-spiced apple goodness tucked inside flaky, buttery layers that you can enjoy without a fork in sight. Whether you’re looking for a special breakfast treat or a simple dessert that doesn’t sacrifice flavor, these biscuits hit all the right notes without the fuss of a traditional pie.
Why This Recipe is Awesome
What makes these Apple Pie Biscuits truly special is how they transform everyday ingredients into something extraordinary.
Unlike traditional apple pie that demands time and precision with crust-making, these biscuits come together in under 30 minutes.
The contrast between the tender, flaky biscuit exterior and the sweet, slightly tart apple filling creates a perfect balance of textures and flavors. Each bite offers that magical combination of buttery pastry and caramelized apples that usually takes hours to achieve.
As someone who’s tested countless apple desserts, I can confidently say these biscuits nail the comfort-food appeal while being remarkably approachable for bakers of any skill level. They’re rustic enough to be forgiving yet impressive enough for company—the sweet spot of home baking.
Equipment needed: Mixing bowl, pastry cutter or fork, baking sheet, parchment paper, pastry brush
Apple Pie Biscuits
Ingredients
- 2¼ cups all-purpose flour
- 1 tablespoon baking powder
- 1 teaspoon salt
- ¼ cup granulated sugar divided
- ½ cup 1 stick cold unsalted butter, cubed
- ¾ cup cold buttermilk regular milk with a splash of vinegar works as a substitute
- 2 medium apples Granny Smith or Honeycrisp work best, peeled and diced small
- 2 tablespoons brown sugar
- 1 teaspoon ground cinnamon
- ¼ teaspoon ground nutmeg
- 1 tablespoon lemon juice
- 2 tablespoons melted butter for brushing
- For the glaze: 1 cup powdered sugar mixed with 2-3 tablespoons milk or apple cider
Instructions
- Preheat your oven to 425°F (220°C) and line a baking sheet with parchment paper. This high temperature is crucial for creating those beautiful flaky layers.
- Prepare the apple filling by combining the diced apples, brown sugar, 2 tablespoons of granulated sugar, cinnamon, nutmeg, and lemon juice in a small bowl. Set aside to allow the flavors to meld while you work on the biscuit dough.
- In a large mixing bowl, whisk together the flour, baking powder, salt, and remaining 2 tablespoons of sugar until well combined.
- Add the cold cubed butter to the flour mixture and use a pastry cutter or your fingertips to work it in until the mixture resembles coarse crumbs with some pea-sized pieces of butter still visible. These butter pieces create steam when baking, resulting in flaky layers.
- Pour in the cold buttermilk and stir just until the dough comes together. Be careful not to overmix—a slightly shaggy dough is perfect.
- Turn the dough onto a lightly floured surface and gently pat it into a rectangle about ½-inch thick. The less you handle the dough, the more tender your biscuits will be.
- Spread the apple filling evenly over the dough rectangle, leaving about a ½-inch border around the edges.
- Carefully roll the dough into a log, starting from the long side, sealing the seam by pinching it gently.
- Cut the log into 8 equal pieces and place them on the prepared baking sheet, cut side up, about 2 inches apart.
- Brush the tops with melted butter and bake for 18-20 minutes until golden brown and the centers are cooked through.
- While the biscuits cool slightly, whisk together the powdered sugar and milk to create a glaze with a pourable consistency.
- Drizzle the glaze over the warm biscuits and serve immediately for the best experience.
Notes
- For extra-flaky biscuits, freeze your butter for 15 minutes before cutting it into the flour.
- If your kitchen is warm, chill the prepared dough for 15 minutes before rolling it with the filling.
- These biscuits are best enjoyed the day they’re made but can be stored in an airtight container for up to 2 days. Reheat in a 300°F oven for 5-7 minutes to restore some freshness.
- For a make-ahead option, prepare the dough and filling separately and store in the refrigerator overnight, then assemble and bake in the morning.
- The apple filling shouldn’t be too wet—if your apples are particularly juicy, toss them with 1 teaspoon of cornstarch before adding the other ingredients.
Calories & Nutritional Info
- Calories: Approximately 320 per biscuit
- Carbohydrates: 48g (primarily from flour and sugars)
- Fat: 14g (mainly from butter)
- Protein: 4g
- Fiber: 2g (from apples)
- Contains: Dairy, gluten (wheat)
- Can be adapted for vegan diets by using plant-based butter and milk alternatives
Common Mistakes to Avoid
- Using warm ingredients: Cold butter and buttermilk are essential for creating flaky layers. Warm ingredients will result in dense, flat biscuits.
- Overworking the dough: Handle the dough as little as possible to prevent developing gluten, which makes biscuits tough rather than tender.
- Cutting apples too large: Dice the apples into small, even pieces (about ¼-inch) so they cook through completely and don’t create bulky spots in your biscuits.
- Skipping the parchment paper: The sugar in these biscuits can caramelize and stick to the pan without proper lining.
- Adding too much filling: While it’s tempting to pile on the apples, too much filling will make rolling difficult and can cause the biscuits to fall apart during baking.
Alternatives & Substitutions
- Fruit variations: Replace apples with pears, peaches, or mixed berries for different seasonal versions.
- Gluten-free option: Substitute a 1:1 gluten-free flour blend, but note that the texture will be slightly different.
- No buttermilk? Use regular milk with 1 tablespoon of lemon juice or white vinegar, let stand for 5 minutes before using.
- Spice alternatives: Try cardamom or ginger instead of (or in addition to) nutmeg for different flavor profiles.
- Reduce sugar: Cut the sugar in the dough by half for a less sweet breakfast option.
- Add texture: Incorporate chopped nuts like pecans or walnuts into the filling for added crunch.
FAQs
Can I make these Apple Pie Biscuits ahead of time?
Yes! You can prepare the dough and filling separately up to a day in advance, keeping them refrigerated. Assemble and bake just before serving for the freshest results. Alternatively, you can fully bake them, store at room temperature for 1-2 days, and briefly reheat before serving.
Why did my biscuits turn out flat?
The most common culprits are warm ingredients or overworked dough. Make sure your butter and buttermilk are cold, and handle the dough minimally. If your kitchen is warm, chill the prepared dough for 15 minutes before rolling it with the filling.
What’s the best type of apple to use?
Firm, tart-sweet apples like Granny Smith, Honeycrisp, or Braeburn work best. They hold their shape during baking and provide a nice balance of flavor against the sweet biscuit dough. Avoid softer varieties like Red Delicious, which can become mushy.
Can I freeze these biscuits?
Yes! Freeze them either before or after baking. For unbaked biscuits, freeze solid on a baking sheet, then transfer to a freezer bag for up to 3 months. Bake directly from frozen, adding 3-5 minutes to the baking time. For baked biscuits, freeze without glaze and reheat from frozen in a 300°F oven for 10 minutes.
How do I know when the biscuits are done?
Look for a golden-brown color on top and a firm feel when gently pressed. If you’re uncertain, you can carefully lift one biscuit to check that the bottom isn’t doughy. The internal temperature should reach about 200°F if you have a thermometer.
Final Thoughts
These Apple Pie Biscuits beautifully bridge the gap between effortless and impressive—proving that you don’t need hours in the kitchen to create something truly special. Whether they become your new weekend breakfast tradition or your go-to last-minute dessert, they capture the essence of homemade comfort in just a few simple steps. Go ahead and give them a try—your kitchen will smell amazing, and everyone will think you spent all day baking!


