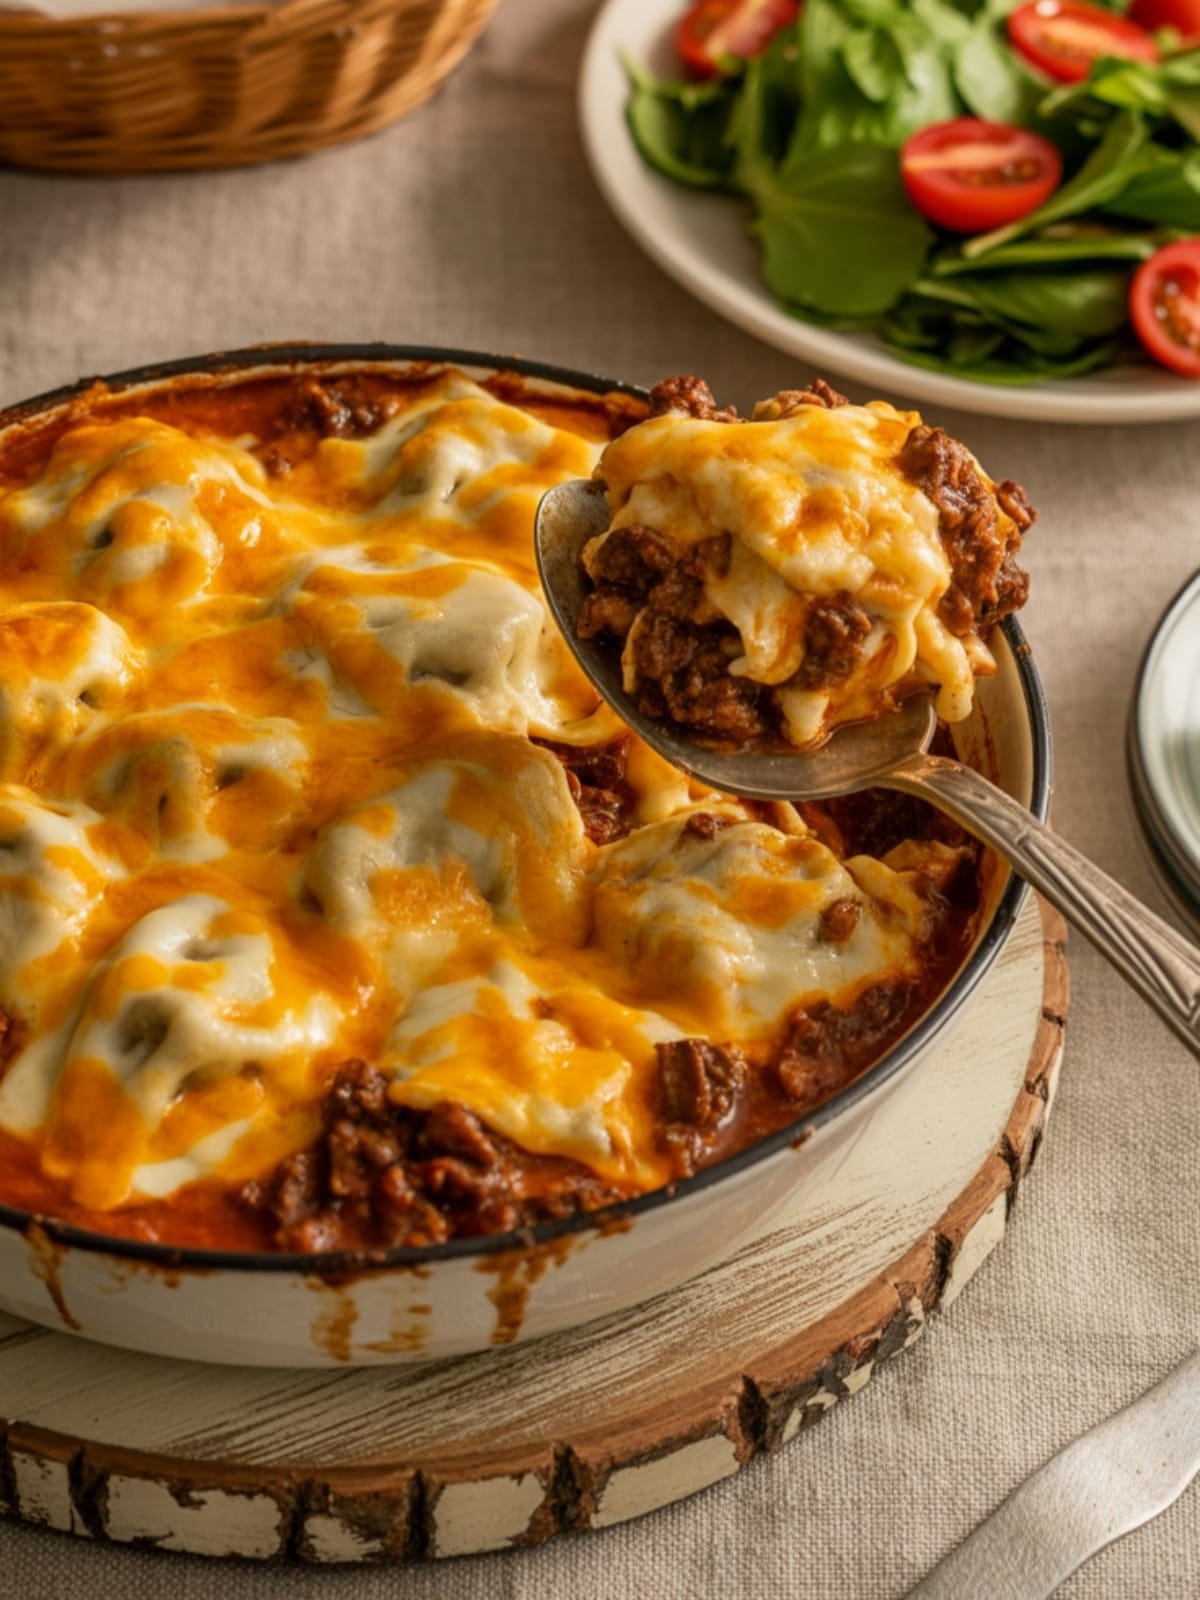
If there’s one dish that brings comfort and satisfaction to my dinner table without fail, it’s a hearty Cheesy Beef Ravioli Bake. This crowd-pleasing casserole combines the rich flavors of seasoned ground beef, tender ravioli pockets, and a blanket of melted cheese—creating that perfect balance of convenience and home-cooked goodness we all crave after a long day.
Why This Recipe is Awesome
This Cheesy Beef Ravioli Bake stands out because it transforms simple store-bought ravioli into something that tastes completely homemade. The magic happens when the ravioli absorbs the savory meat sauce while baking, creating layers of flavor you simply don’t get from boiling pasta. What I particularly love is how versatile this dish is—it’s elegant enough for weekend entertaining but easy enough for a Tuesday night dinner. Plus, it’s one of those rare recipes that both kids and adults genuinely enjoy, making it a true family-friendly win. The combination of beef and cheese creates a protein-packed meal that satisfies hunger while delivering that comforting, nostalgic Italian-American flavor we all crave.
Cheesy Beef Ravioli Bake
Ingredients
- 2 packages 20 oz each refrigerated beef ravioli
- 1 pound lean ground beef
- 1 medium onion finely diced
- 3 garlic cloves minced
- 1 tablespoon olive oil
- 1 jar 24 oz marinara sauce
- 1 teaspoon Italian seasoning
- ½ teaspoon red pepper flakes optional
- 2 cups shredded mozzarella cheese
- 1 cup shredded parmesan cheese divided
- Fresh basil for garnish optional
- Salt and pepper to taste
Instructions
- Preheat your oven to 375°F and lightly grease a 9×13-inch baking dish. This temperature ensures the ravioli cooks through without burning the cheese.
- Heat olive oil in a large skillet over medium heat. Add the diced onions and cook for 3-4 minutes until they begin to soften and become translucent.
- Add the garlic to the onions and cook for another 30 seconds until fragrant, being careful not to burn it as this can create bitterness.
- Brown the ground beef in the same skillet, breaking it up with a spoon as it cooks. Season with salt and pepper. Cook until no pink remains, about 5-7 minutes.
- Stir in the marinara sauce, Italian seasoning, and red pepper flakes (if using). Bring to a simmer and cook for 5 minutes to allow the flavors to blend.
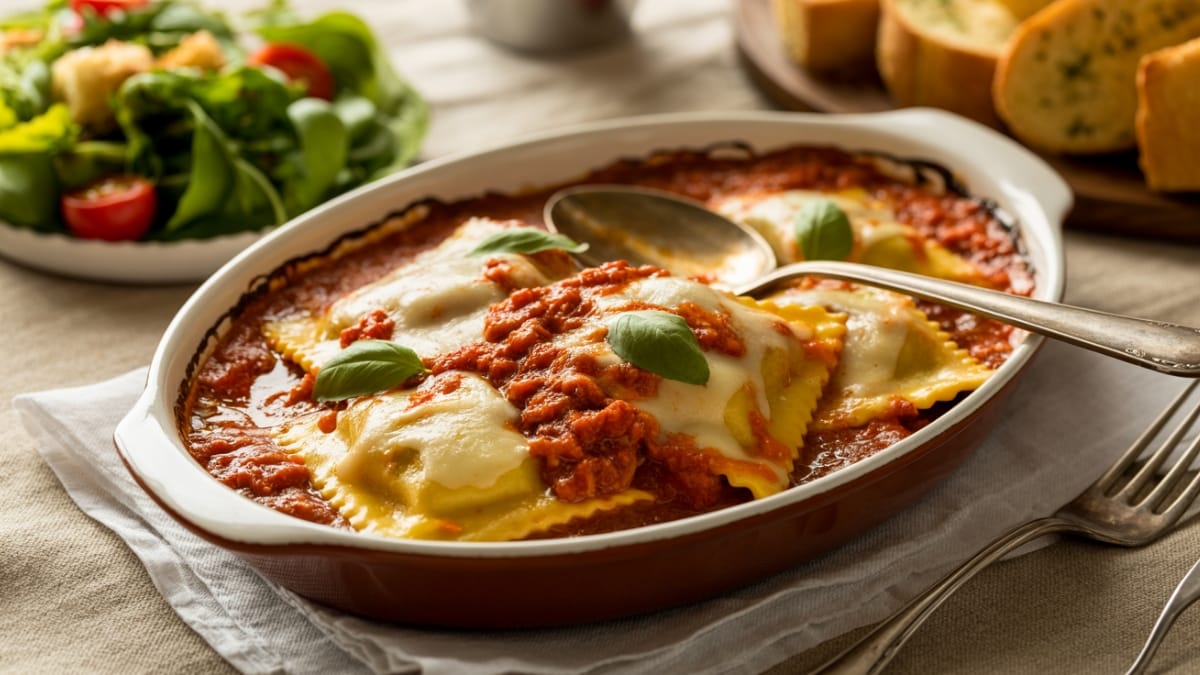
- Arrange half of the ravioli in a single layer on the bottom of the prepared baking dish. No need to cook the ravioli first—it will cook perfectly in the oven.
- Spoon half of the meat sauce over the ravioli layer, spreading it evenly to cover all the pasta.
- Sprinkle 1 cup of mozzarella and ½ cup of parmesan evenly over the sauce layer.
- Repeat the layers with remaining ravioli, sauce, and cheeses, finishing with a cheese layer on top.
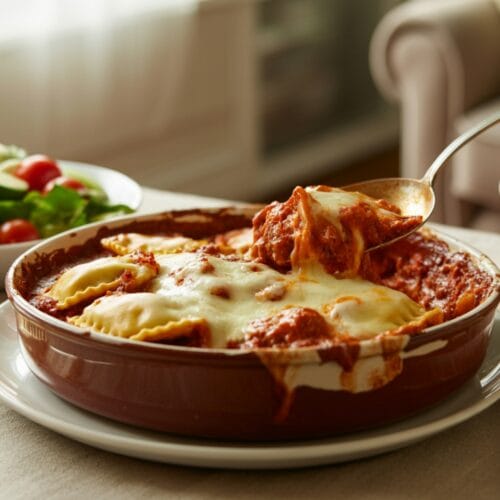
- Cover the baking dish with foil and bake for 25 minutes, then remove the foil and bake for an additional 5-10 minutes until the cheese is golden and bubbly.
- Let the dish rest for 5-10 minutes before serving. This allows the layers to set and makes serving much easier.
- Garnish with fresh basil if desired before serving.
Notes
- Want to make ahead? Assemble the entire dish, cover tightly with foil, and refrigerate for up to 24 hours before baking. Add 10-15 minutes to the baking time if cooking from cold.
- The dish freezes beautifully—prepare up to the baking step, cover tightly, and freeze for up to 3 months. Thaw overnight in refrigerator before baking.
- For a lighter version, use turkey or chicken ravioli instead of beef.
- Store leftover Cheesy Beef Ravioli Bake in an airtight container in the refrigerator for up to 3 days.
- This recipe works well with homemade marinara if you have the time and inclination.
Equipment needed: Large skillet, 9×13 baking dish, mixing spoon, cutting board, knife
Calories & Nutritional Info
- Calories per serving: Approximately 520 per serving (based on 8 servings)
- Protein: 30g
- Carbohydrates: 42g
- Fat: 25g (mostly from cheese and beef)
- Sodium: 890mg (varies based on marinara brand)
- Contains: Wheat, dairy, eggs
- Not suitable for: Vegetarians, vegans, those with gluten or dairy allergies
Common Mistakes to Avoid
- Overcooking the ravioli before baking. The store-bought ravioli should go into the dish uncooked—it will cook perfectly in the oven without becoming mushy.
- Skipping the foil cover during initial baking. This is crucial for properly cooking the ravioli without burning the cheese.
- Not letting the dish rest after baking. This step is essential for the layers to set; cutting in too soon results in a runny, messy serving.
- Using too much sauce. While it may be tempting to add extra, too much sauce will make the final dish watery.
- Forgetting to grease the baking dish. This simple step prevents sticking and makes cleanup much easier.
Alternatives & Substitutions
- Vegetarian option: Replace the beef ravioli with cheese or spinach ravioli and omit the ground beef, adding sautéed mushrooms for umami flavor.
- Spicier version: Add 1/2 teaspoon crushed red pepper to the sauce or incorporate spicy Italian sausage in place of some of the ground beef.
- Different cheeses: Try provolone or fontina for a more complex flavor profile.
- Gluten-free: Use gluten-free ravioli (now available in many supermarkets) with no other changes needed.
- Extra vegetables: Add a layer of fresh spinach, sautéed mushrooms, or roasted bell peppers for added nutrition and flavor.
FAQs
Can I use frozen ravioli instead of refrigerated?
Yes, frozen ravioli works perfectly in this recipe. No need to thaw first—simply add about 5-10 minutes to your baking time and make sure it’s fully covered with sauce to prevent drying out.
How do I know when the ravioli is fully cooked?
After baking, the ravioli should be tender when pierced with a fork. If you’re unsure, carefully remove one piece and cut it in half to check that the pasta is tender and the filling is hot all the way through.
Can I prepare this dish the night before?
Absolutely! This is a great make-ahead meal. Assemble everything, cover with foil, and refrigerate. When ready to bake, add about 10-15 minutes to the covered baking time since you’re starting with a cold dish.
What sides go well with Cheesy Beef Ravioli Bake?
A simple green salad with a light vinaigrette provides a perfect fresh contrast. Garlic bread or breadsticks are wonderful for soaking up extra sauce. For a more substantial meal, add steamed or roasted vegetables like broccoli or asparagus.
How can I make this dish healthier?
Use whole wheat ravioli, lean ground beef (90/10 or leaner), reduced-fat cheese, and add extra vegetables to the sauce like grated carrots, finely chopped bell peppers, or spinach. You can also reduce the cheese by about 25% without sacrificing too much flavor.
Final Thoughts
This Cheesy Beef Ravioli Bake has saved my dinner plans countless times, winning over everyone from picky eaters to discerning guests. There’s something undeniably comforting about cutting into those layers of pasta, meat sauce, and melted cheese. Whether you’re cooking for a family weeknight or hosting a casual gathering, this dish delivers maximum flavor with minimal effort—exactly what good home cooking should be.


