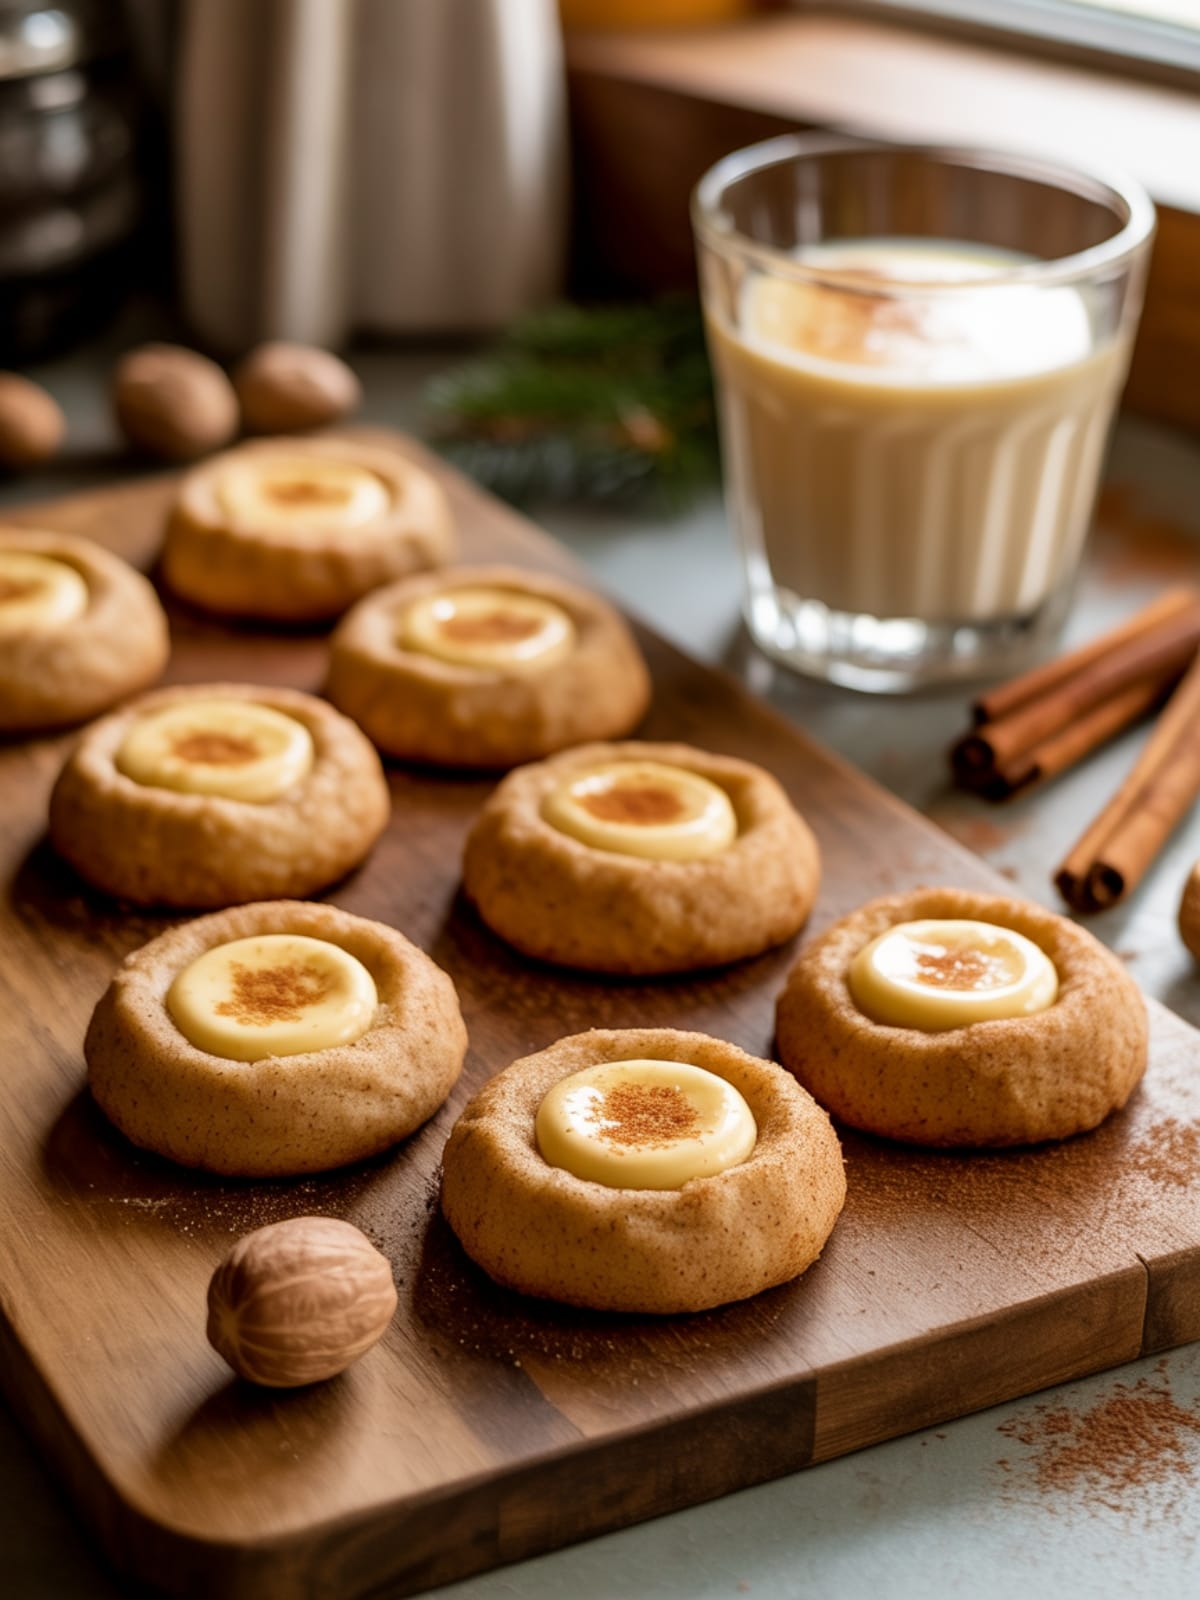
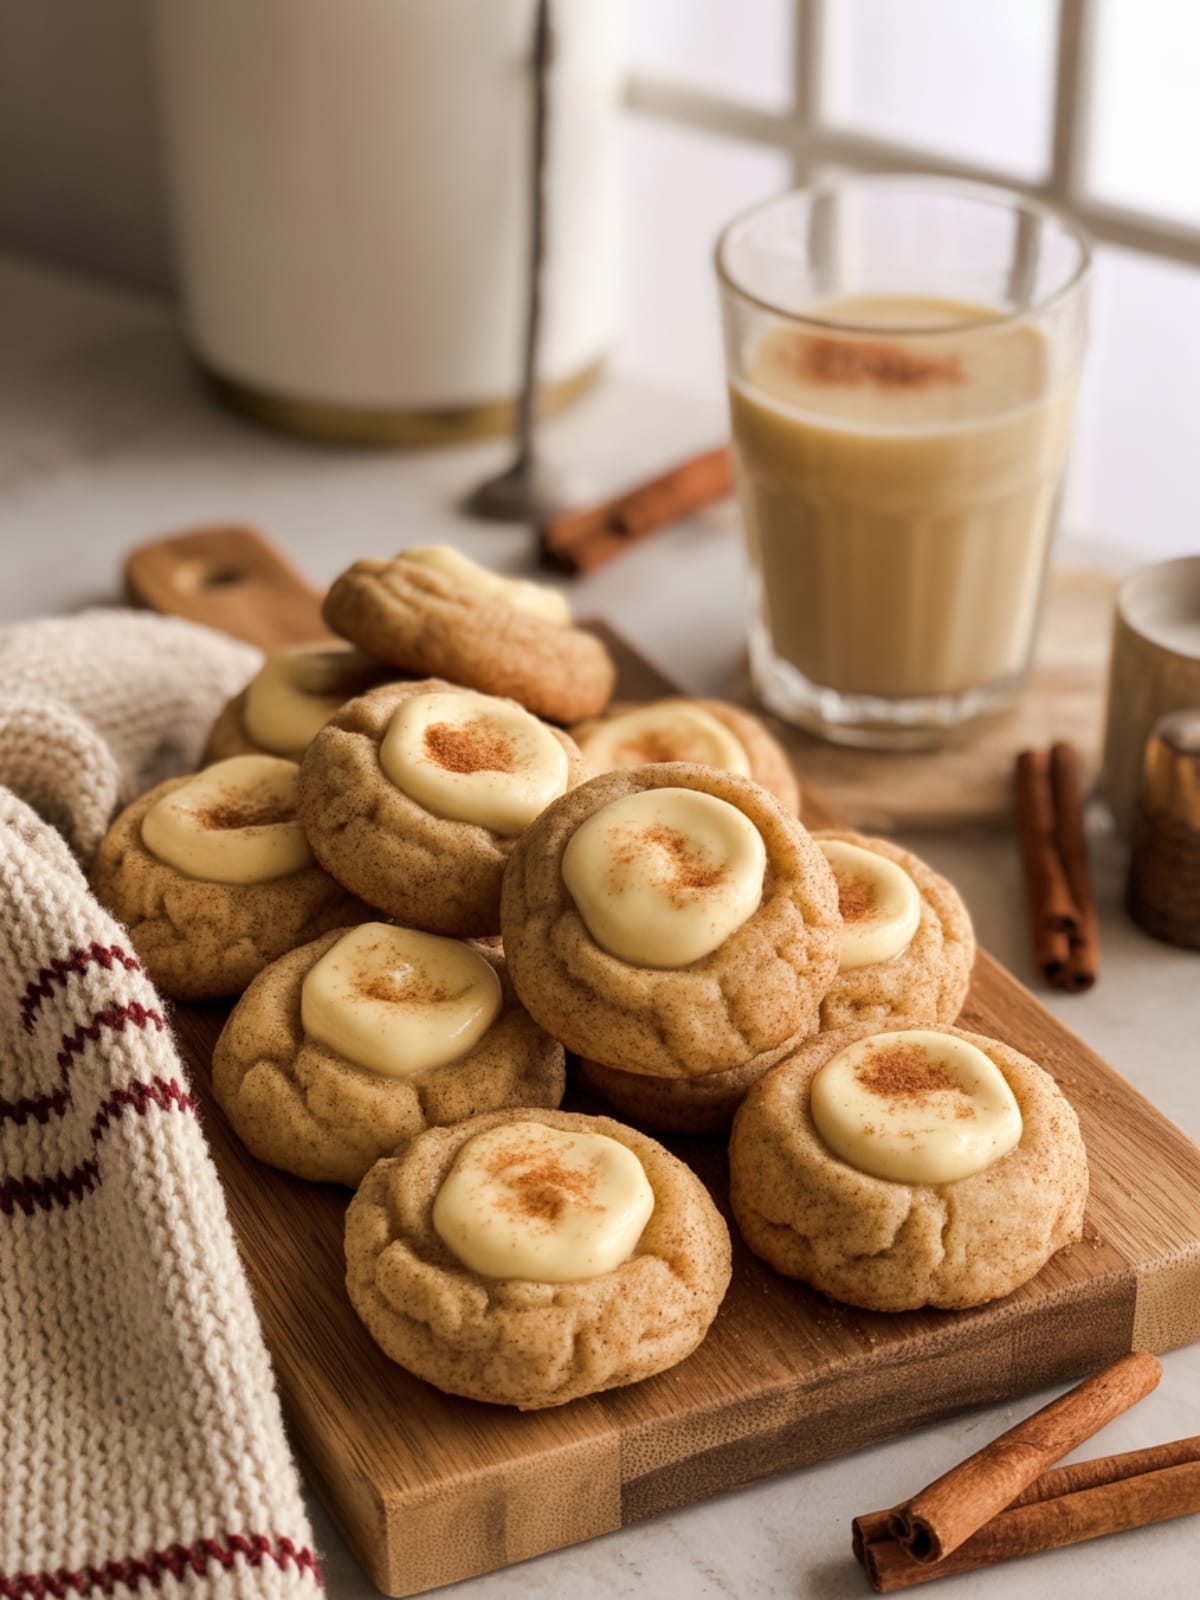
These Eggnog Snickerdoodle Thumbprint Cookies are about to become your secret weapon for holiday gatherings. Imagine the classic cinnamon-sugar coating of a snickerdoodle combined with the rich, creamy center of eggnog – it’s like two beloved holiday traditions joining forces to create something truly magical. The moment these cookies hit the cooling rack in my kitchen, they disappeared faster than I could say “Santa’s coming!”
Why This Recipe is Awesome
What makes these Eggnog Snickerdoodle Thumbprint Cookies stand out is their perfect balance of textures and flavors.
The cookie base has that signature snickerdoodle chewiness with crisp edges, while the eggnog filling brings a smooth, creamy center that’s infused with nutmeg and vanilla. These cookies offer incredible versatility too. You can make the dough ahead of time and freeze it, or bake them fresh when guests arrive for that irresistible aroma.
They’re also substantial enough to include in cookie exchanges or gift boxes without crumbling. The nostalgic combination of eggnog and snickerdoodle flavors creates a unique treat that bridges generations – adults recognize the classic holiday tastes while kids are drawn to the fun thumbprint design and sweet filling. It’s like capturing the entire holiday season in one perfect bite.
Equipment needed: Mixing bowls, electric mixer, baking sheets, parchment paper, measuring cups and spoons, cooling rack, small round measuring spoon or thumb.
Eggnog Snickerdoodle Thumbprint Cookies
Ingredients
For the Cookie Dough
- 2¾ cups all-purpose flour
- 2 teaspoons cream of tartar crucial for the snickerdoodle flavor
- 1 teaspoon baking soda
- ½ teaspoon salt
- 1 cup 2 sticks unsalted butter, softened
- 1½ cups granulated sugar
- 2 large eggs room temperature
- 1 teaspoon vanilla extract
- ¼ teaspoon ground nutmeg
For the Cinnamon-Sugar Coating
- ¼ cup granulated sugar
- 2 teaspoons ground cinnamon
For the Eggnog Filling
- 4 oz cream cheese softened
- 2 tablespoons unsalted butter softened
- 1½ cups powdered sugar
- 2 tablespoons store-bought eggnog or substitute with heavy cream + ⅛ tsp nutmeg
- ¼ teaspoon vanilla extract
- ⅛ teaspoon ground nutmeg plus more for garnish
- Pinch of salt
Instructions
- Prepare your oven and equipment. Preheat oven to 350°F (175°C) and line baking sheets with parchment paper. This prevents sticking and makes cleanup easier.
- Combine the dry ingredients. In a medium bowl, whisk together flour, cream of tartar, baking soda, salt, and nutmeg until well incorporated.
- Cream the butter and sugar. In a large bowl using an electric mixer, beat butter and 1½ cups sugar on medium-high speed until light and fluffy, about 2-3 minutes. Don’t rush this step – proper creaming creates the perfect cookie texture.
- Add wet ingredients to butter mixture. Beat in eggs one at a time, then add vanilla extract, mixing until fully incorporated.
- Combine wet and dry ingredients. Gradually add the flour mixture to the wet ingredients, mixing on low speed just until combined. Overmixing will result in tough cookies.
- Prepare the cinnamon-sugar coating. In a small bowl, mix together ¼ cup sugar and the ground cinnamon.
- Shape the cookies. Scoop dough into 1½-tablespoon sized balls, roll each ball in the cinnamon-sugar mixture, and place 2 inches apart on the prepared baking sheets.
- Create thumbprints. Using your thumb or the back of a rounded measuring teaspoon, make an indentation in the center of each cookie, being careful not to press all the way through.
- Bake the cookies. Bake for 10-12 minutes until edges are set but centers are still slightly soft. The cookies will continue to firm up as they cool.
- Refresh indentations. If the thumbprints have puffed up during baking, gently re-press them while the cookies are still warm.
- Cool completely. Allow cookies to cool on the baking sheet for 5 minutes, then transfer to a wire rack to cool completely before filling.
- Prepare the eggnog filling. Beat cream cheese and butter until smooth and fluffy. Gradually add powdered sugar, then mix in eggnog, vanilla, nutmeg, and salt until creamy.
- Fill the cookies. Transfer the filling to a piping bag (or a zip-top bag with the corner snipped) and pipe into the thumbprint indentations of each cooled cookie.
- Add the finishing touch. Lightly dust the filled cookies with additional nutmeg for a festive look and enhanced eggnog flavor.
Notes
- The cookie dough can be prepared up to 2 days in advance and refrigerated until ready to bake.
- For a stronger eggnog flavor, add 1/4 teaspoon rum extract to the filling mixture.
- Unfilled cookies can be stored in an airtight container at room temperature for up to 4 days.
- Once filled, cookies should be refrigerated and consumed within 3 days.
- For perfect thumbprints, dip your thumb in flour before making indentations to prevent sticking.
- If you’re making these for a cookie exchange, wait to fill them until just before serving or gifting.
Calories & Nutritional Info
- Calories: Approximately 230 per cookie
- Fat: 11g (6g saturated)
- Carbohydrates: 30g
- Protein: 2g
- Sugar: 20g
- Allergens: Contains dairy, eggs, and wheat
- Dietary notes: Not suitable for vegan or gluten-free diets without modifications
Common Mistakes to Avoid
- Skipping the cream of tartar. This ingredient is essential for the tangy flavor and chewy texture that defines a true snickerdoodle.
- Making thumbprints too shallow. Press deep enough to hold a generous amount of filling, but not so deep that you break through the bottom of the cookie.
- Overfilling the cookies. Too much filling can overflow and create a mess; about 1 teaspoon per cookie is perfect.
- Filling warm cookies. This will cause the eggnog filling to melt and run off. Ensure cookies are completely cooled before adding filling.
- Overbaking. These cookies should be soft with just slightly firm edges. They’ll continue to set as they cool.
Alternatives & Substitutions
- Dairy-free option: Use plant-based butter and cream cheese alternatives along with coconut milk-based “nog” for the filling.
- No eggnog available: Mix 2 tablespoons heavy cream with 1/8 teaspoon each of nutmeg and vanilla, plus a tiny pinch of cinnamon.
- Gluten-free adaptation: Substitute a 1:1 gluten-free flour blend, but note that the texture may be slightly different.
- Alternative fillings: Try white chocolate ganache, vanilla buttercream, or even dulce de leche instead of the eggnog filling.
- Adult version: Add 1 teaspoon of rum or bourbon to the filling for a more authentic eggnog experience.
- Less sweet option: Reduce the sugar in the cookie dough to 1¼ cups and use 1¼ cups powdered sugar in the filling.
FAQs
Can I make these cookies ahead of time?
Absolutely! The cookie dough can be made up to 3 days ahead and refrigerated, or frozen for up to 3 months. You can also bake the cookies and freeze them unfilled, then thaw and add the filling before serving.
Why did my cookies spread too much during baking?
This usually happens when the dough is too warm. If your kitchen is hot or the butter was too soft, chill the shaped cookie balls for 15-20 minutes before baking to prevent excessive spreading.
Can I use store-bought eggnog in the filling?
Yes, store-bought eggnog works perfectly! Choose a high-quality eggnog for the best flavor. You can even use flavored varieties like vanilla or cinnamon eggnog for a twist.
My filling seems too runny. How can I fix it?
If your filling is too soft, refrigerate it for 15-20 minutes to firm up. If it’s still too runny, gradually add more powdered sugar, 1 tablespoon at a time, until it reaches a pipe-able consistency.
Can these cookies be shipped as gifts?
I recommend shipping the cookies unfilled with the filling in a separate container. Include instructions for the recipient to fill the cookies upon arrival. If you must ship them filled, freeze the filled cookies first, then pack with ice packs.
How do I know when these cookies are perfectly baked?
The edges should be set and just starting to turn golden, while the centers remain soft. Don’t wait until they look completely done, as they’ll continue to firm up as they cool.
Final Thoughts
These Eggnog Snickerdoodle Thumbprint Cookies beautifully capture the essence of holiday baking – they’re familiar yet special, comforting yet exciting. As you share these with friends and family, you’re not just offering a cookie but a moment of seasonal joy. The best part? Each bite tells a story of tradition with a creative twist. Happy baking, and may your holiday season be as warm and inviting as these cookies!


