There’s something irresistibly charming about a hand pie. It’s like getting permission to eat dessert with your fingers while enjoying all the comforts of a traditional apple pie. These Apple Cinnamon Hand Pies capture autumn’s essence in a portable package—crisp, flaky pastry hugging warm spiced apples that release their sweet juices with each bite.
The beauty of these little pies isn’t just in their flavor, but in the way they connect us to simpler times when homemade treats were an expression of care.
Why This Recipe is Awesome

What makes these Apple Cinnamon Hand Pies truly special is their versatility and crowd-pleasing nature. They’re perfectly portable for picnics, lunchboxes, or on-the-go snacking without the mess of a full pie. The individual portions mean no slicing, no serving plates, and no forks required—just pure, uninterrupted enjoyment.
The balance of textures is what elevates these hand pies to greatness. The contrast between the shatteringly flaky crust and the tender, spiced apple filling creates a sensory experience that’s impossible to resist. Plus, unlike their full-sized counterparts, these hand pies have a higher crust-to-filling ratio, which is perfect for pastry lovers.
From a practical standpoint, they freeze beautifully, making them an ideal make-ahead dessert for unexpected guests or sweet cravings. And let’s be honest—there’s something undeniably fun about having your own personal pie!
Equipment needed: Rolling pin, baking sheet, parchment paper, pastry brush, small bowl, mixing bowl

Apple Cinnamon Hand Pies
Ingredients
- 2 refrigerated pie crusts or homemade equivalent
- 3 medium Granny Smith apples peeled and diced small (about 3 cups)
- 1/3 cup granulated sugar
- 2 tablespoons brown sugar
- 1 tablespoon all-purpose flour
- 1 1/2 teaspoons ground cinnamon
- 1/4 teaspoon ground nutmeg
- 1/8 teaspoon salt
- 1 tablespoon lemon juice
- 1 teaspoon vanilla extract
- 1 egg for egg wash
- 1 tablespoon water
- 2 tablespoons coarse sugar for sprinkling optional
Instructions
- Prepare your work area by preheating your oven to 375°F (190°C) and lining a baking sheet with parchment paper.
- Make the filling by combining the diced apples, granulated sugar, brown sugar, flour, cinnamon, nutmeg, salt, lemon juice, and vanilla in a mixing bowl. Stir well to ensure the apples are evenly coated, then set aside for 10 minutes to allow flavors to meld.
- Roll out the pie crusts on a lightly floured surface to about 1/8-inch thickness. Using a 5-inch round cutter or bowl as a guide, cut out as many circles as possible (you should get about 8 circles from the two crusts).
- Place about 2 tablespoons of apple filling slightly off-center on each dough circle, leaving at least a 1/2-inch border around the edges. Be careful not to overfill or the pies may leak during baking.
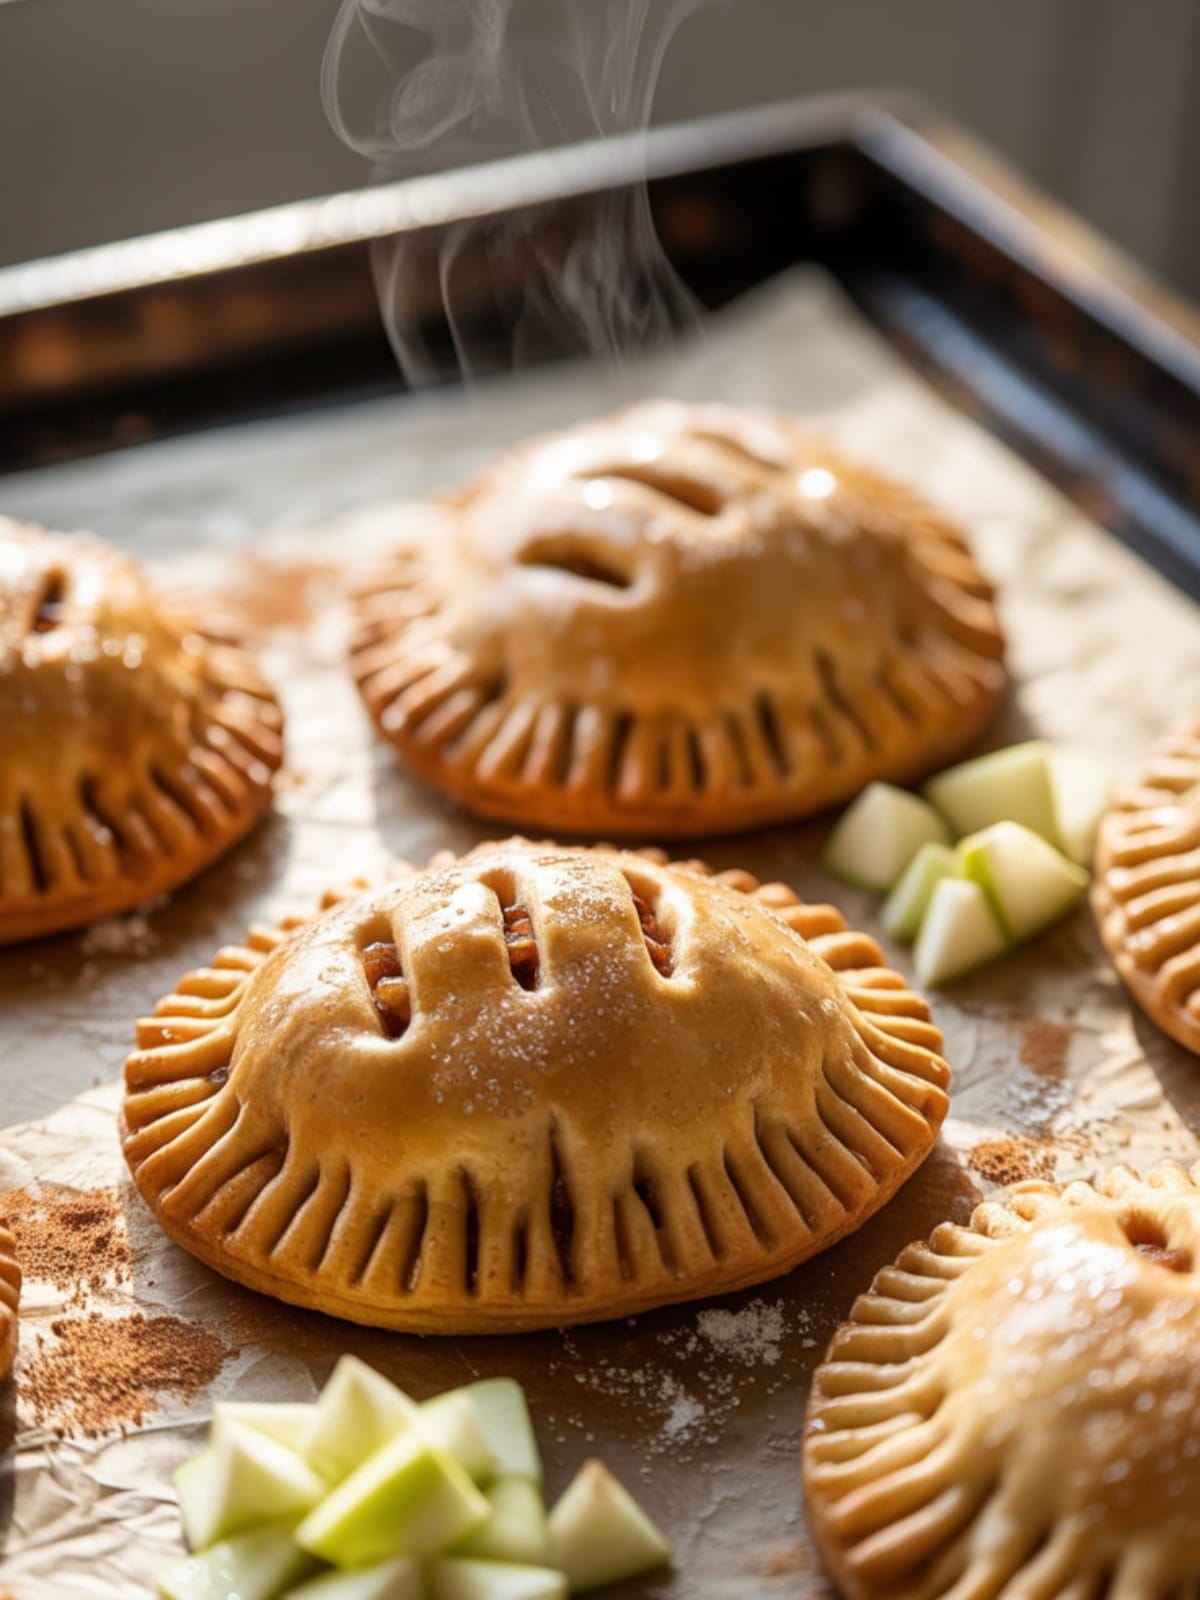
- Create the hand pies by folding each circle in half over the filling to create a half-moon shape. Press the edges firmly to seal, then crimp with a fork or fold over to create a decorative edge.
- Transfer the pies to the prepared baking sheet, spacing them about 2 inches apart. Cut a small vent in the top of each pie to allow steam to escape during baking.
- Make the egg wash by beating the egg with 1 tablespoon of water in a small bowl. Brush the tops of each pie with the egg wash, then sprinkle with coarse sugar if using.
- Bake for 20-25 minutes or until the pies are golden brown and the filling is bubbling through the vents. Rotate the baking sheet halfway through to ensure even browning.
- Allow the pies to cool on the baking sheet for 10 minutes before transferring to a wire rack to cool completely (or enjoy them warm for a gooey filling).
Notes
- For the flakiest crust, keep all ingredients and tools as cold as possible. Return the dough to the refrigerator for 15 minutes if it becomes too warm during handling.
- Cut apples into small, uniform pieces (about 1/4-inch cubes) to ensure they cook through completely and fit nicely in the hand pies.
- These pies can be assembled and frozen unbaked for up to 3 months. Bake straight from frozen, adding about 5-7 minutes to the baking time.
- A light dusting of flour on your work surface will prevent the dough from sticking while you roll and cut it.
- For a caramel-like twist, replace the granulated sugar with an equal amount of maple syrup or honey (reduce other liquid slightly if doing this).
Calories & Nutritional Info
- Calories: Approximately 290 calories per hand pie
- Carbohydrates: 42g (14% of daily value)
- Fat: 13g (17% of daily value)
- Protein: 3g (6% of daily value)
- Allergen information: Contains wheat, eggs, and may contain dairy depending on pie crust used
- Dietary considerations: Can be made vegan by using plant-based pie crust and substituting the egg wash with plant milk
Common Mistakes to Avoid
- Overfilling the pies: This leads to leakage during baking and potentially soggy crusts. Stick to the recommended 2 tablespoons of filling.
- Skipping the vents: Without proper venting, steam gets trapped inside, causing the pastry to become soggy or even burst open during baking.
- Not sealing edges properly: Ensure edges are firmly pressed together and crimped to prevent the filling from escaping during baking.
- Using apples that are too juicy: Some apple varieties release more liquid than others. Granny Smith, Honeycrisp, or Braeburn work best for hand pies as they hold their shape.
- Rushing the cooling process: Allow pies to set for at least 10 minutes after baking so the filling can thicken slightly and won’t burn your mouth.
Alternatives & Substitutions
- Fruit variations: Replace apples with equal amounts of pears, peaches, cherries, or berries for different seasonal options.
- Gluten-free option: Use your favorite gluten-free pie crust recipe or store-bought alternative.
- Spice adjustments: Add cardamom, ginger, or allspice for different flavor profiles. For a more subtle spice, reduce the cinnamon to 1 teaspoon.
- Sweetener options: Reduce sugar by 25% for a less sweet pie, or replace with coconut sugar for a deeper caramel note.
- Add-ins: For extra texture and flavor, add 2 tablespoons of chopped nuts, dried cranberries, or a tablespoon of caramel sauce to the filling.
FAQs
Can I make these hand pies ahead of time?
Absolutely! You can prepare the filling up to 2 days in advance and store it in the refrigerator. Alternatively, assemble the entire pies and freeze them unbaked for up to 3 months. Bake directly from frozen, adding 5-7 minutes to the baking time.
Why are my hand pies leaking?
Leakage typically happens when pies are overfilled or not sealed properly. Keep filling to about 2 tablespoons per pie, leave a generous border around the edges, and firmly press the edges together before crimping. A chilled dough also seals better than room-temperature dough.
Can I use store-bought apple pie filling?
Yes, you can use store-bought filling as a time-saver. Drain excess liquid first and roughly chop any large apple pieces to ensure they fit nicely in the hand pies. However, homemade filling typically has better flavor and lets you control the sweetness and spice levels.
What’s the best way to reheat leftover hand pies?
For the best texture, reheat hand pies in a 350°F oven for 5-7 minutes until warmed through. Microwaving works in a pinch (30-45 seconds), but the crust won’t stay as crisp.
Can I make mini versions of these for a party?
Definitely! Use a 3-inch cutter for bite-sized pies perfect for parties. Reduce the filling to 1 tablespoon per pie and decrease the baking time to 15-18 minutes, watching closely to prevent over-browning.
Final Thoughts
These Apple Cinnamon Hand Pies bring together the nostalgic comfort of homemade apple pie with modern convenience. Whether you’re packing them for a picnic, serving them at a holiday gathering, or simply enjoying one with your afternoon coffee, they deliver joy in every bite. Don’t worry about perfection—even slightly rustic-looking hand pies taste amazing and have that wonderful homemade charm that’s impossible to replicate with store-bought versions.


