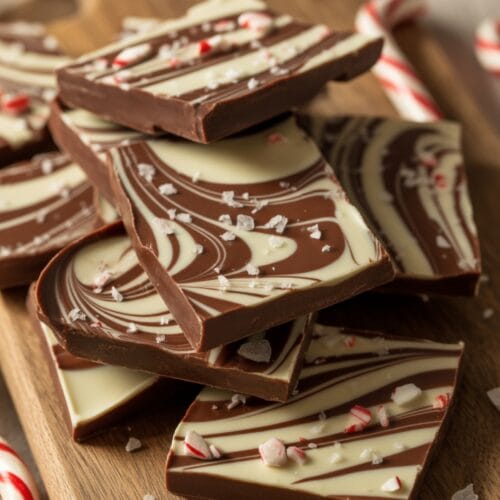
There’s something magical about the first bite of Salted Peppermint Chocolate Bark that instantly transports you to holiday bliss. That perfect crack as you break off a piece, the way the chocolate melts on your tongue, followed by refreshing peppermint and that surprising hint of salt that makes everything pop. This isn’t just another holiday treat—it’s the one everyone remembers and requests year after year.
I discovered this recipe during a particularly chaotic December when I needed something impressive but genuinely simple. Five years later, it’s still my go-to for homemade gifts, last-minute gatherings, and those evenings when only chocolate will do.
Why This Recipe is Awesome
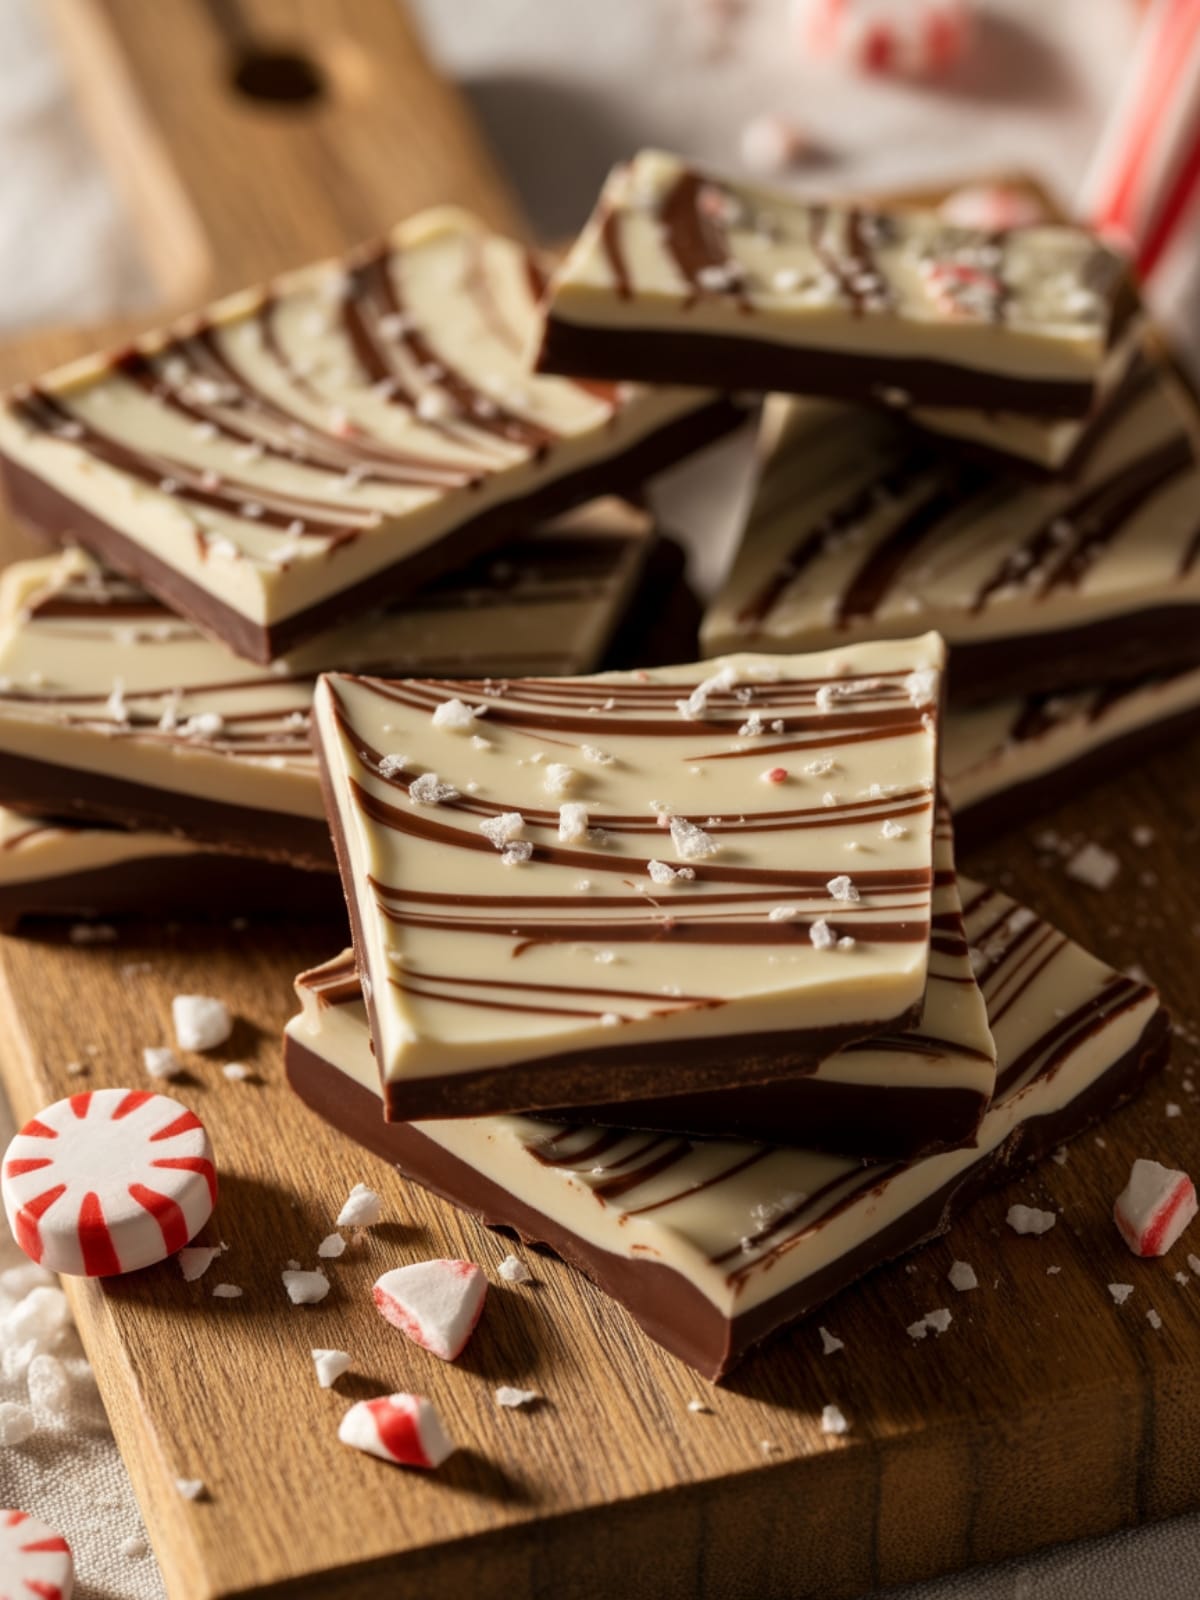
What makes this Salted Peppermint Chocolate Bark stand out in the sea of holiday sweets is its perfect balance of flavors and textures. The dark chocolate base provides richness without overwhelming sweetness, while the white chocolate layer adds creaminess.
The crushed candy canes deliver that nostalgic peppermint flavor and satisfying crunch, and the finishing touch of flaky sea salt elevates everything to gourmet status. Unlike many holiday treats, this requires zero baking skills—no mixers, no ovens, no precise measurements. It’s virtually impossible to mess up, yet it looks like something from a high-end chocolate shop.
Plus, it stores beautifully for weeks, making it perfect for advance preparation during the busy holiday season.
Equipment needed: Baking sheet, parchment paper, microwave-safe bowls, spatula, chef’s knife
Salted Peppermint Chocolate Bark
Ingredients
- 12 ounces high-quality dark or semi-sweet chocolate chopped (chips work too)
- 12 ounces high-quality white chocolate chopped
- 1/2 teaspoon peppermint extract optional but recommended
- 8 regular-sized candy canes crushed (about 1 cup)
- 1/2 teaspoon flaky sea salt like Maldon
Instructions
- Prepare your workspace by lining a baking sheet with parchment paper, making sure the paper extends slightly beyond the edges for easy removal later.
- Melt the dark chocolate in a microwave-safe bowl at 50% power, stirring every 30 seconds until smooth and completely melted. Be patient—chocolate burns easily!
- Add 1/4 teaspoon of peppermint extract to the dark chocolate if using, and stir well to incorporate the flavor throughout.
- Pour the melted dark chocolate onto the prepared baking sheet and use a spatula to spread it into an even layer about 1/4 inch thick. Don’t worry about making perfect edges.
- Let the dark chocolate layer set until the surface is matte but still slightly tacky, about 15-20 minutes at room temperature (5 minutes in the refrigerator).
- Melt the white chocolate using the same method as the dark chocolate, being even more careful as white chocolate scorches more easily.
- Add the remaining 1/4 teaspoon peppermint extract to the white chocolate if using, stirring well to combine.
- Pour the white chocolate over the partially set dark chocolate and gently spread it into an even layer, being careful not to mix the two chocolates together.
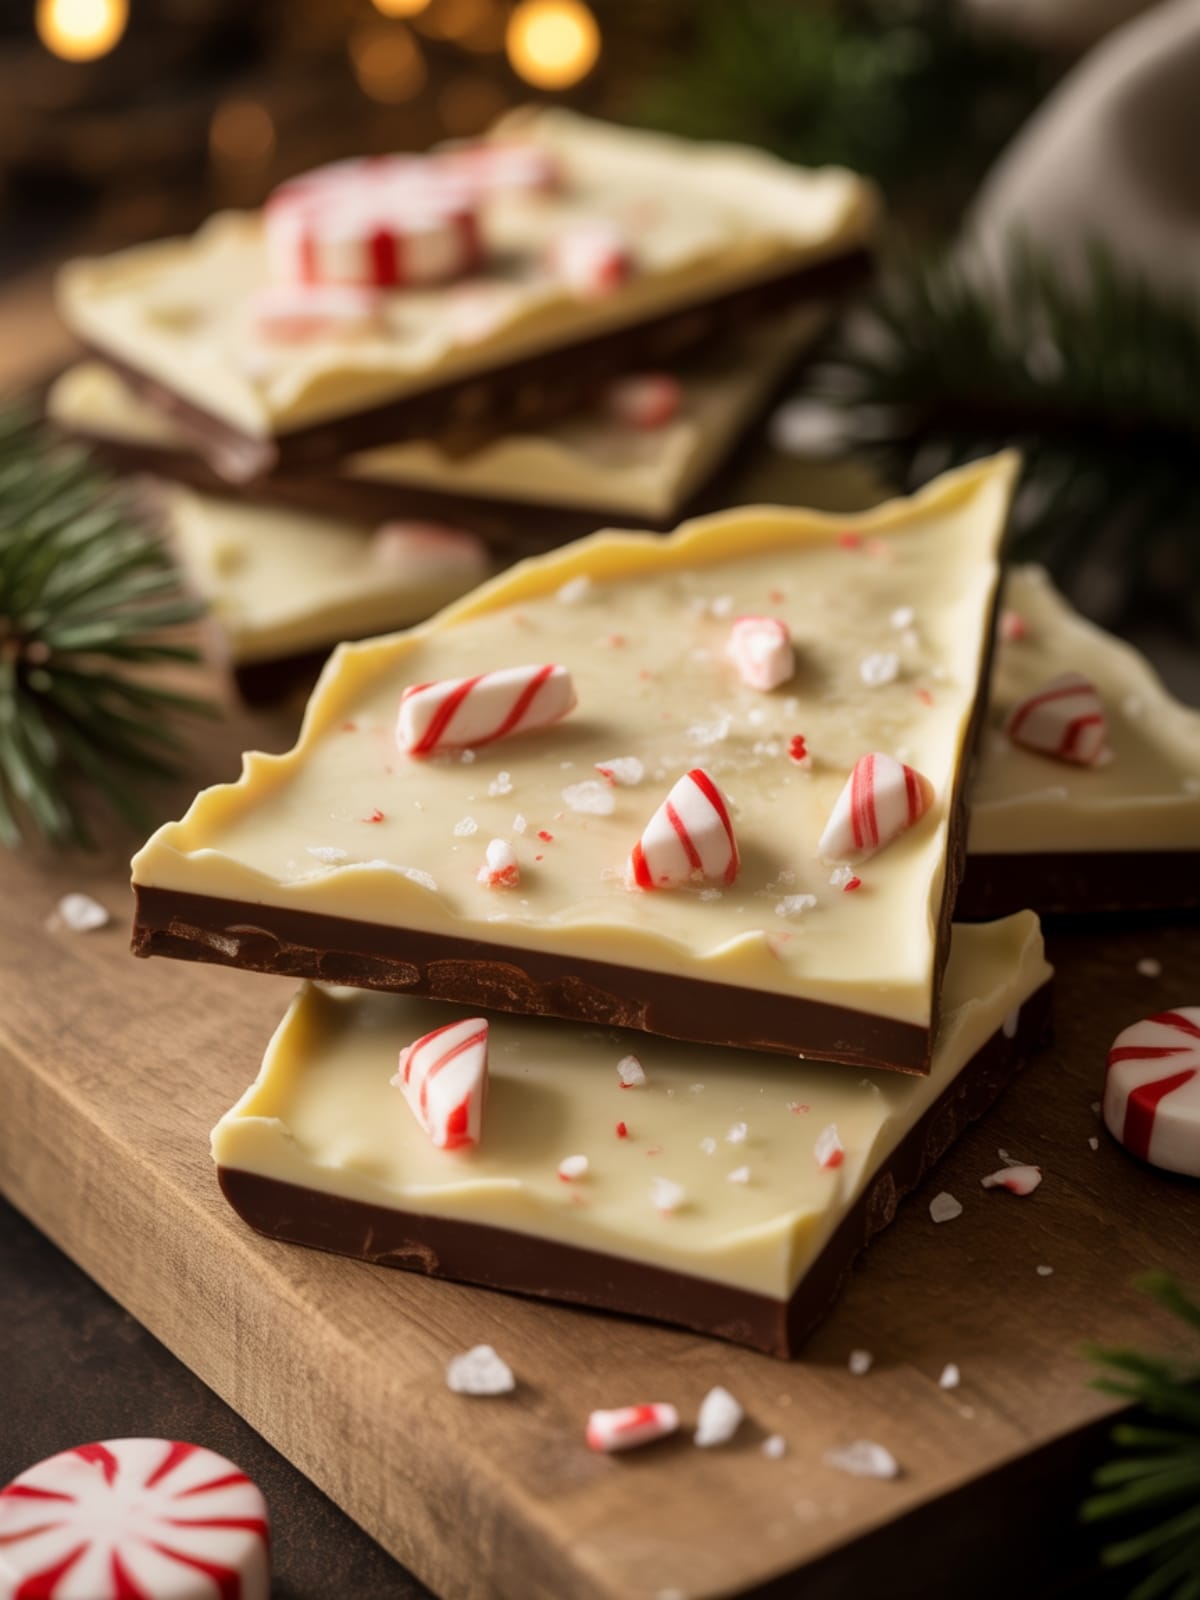
- Immediately sprinkle the crushed candy canes over the white chocolate layer while it’s still wet, pressing larger pieces gently to ensure they stick.
- Finish with a light sprinkle of flaky sea salt across the entire surface, using your fingers to control the distribution.
- Allow the bark to set completely, either at room temperature for about 2 hours or in the refrigerator for 30 minutes.
- Break or cut the bark into irregular pieces using your hands or a sharp knife. For cleaner cuts, use a chef’s knife warmed under hot water and dried.
Notes
- For the best texture and flavor, use good quality chocolate with at least 60% cocoa content for the dark layer.
- Crushing candy canes is easiest when you place them in a zip-top bag and gently hammer with a rolling pin or meat mallet.
- If making ahead, store between layers of parchment paper in an airtight container at cool room temperature for up to 2 weeks.
- For gifting, package pieces in cellophane bags tied with festive ribbon, or in decorative tins lined with parchment.
- The bark actually improves after 24 hours as the flavors meld and the peppermint slightly softens into the chocolate.
Calories & Nutritional Info
- Calories: Approximately 170 calories per piece (based on 20 pieces)
- Fat: 10g (6g saturated)
- Carbohydrates: 21g (18g sugar)
- Protein: 2g
- Allergens: Contains milk products. May contain soy depending on chocolate used.
- Dietary notes: Gluten-free, vegetarian, can be made vegan with appropriate chocolate selection
Common Mistakes to Avoid
- Overheating the chocolate: Always melt chocolate slowly at lower power, as burned chocolate cannot be salvaged and develops a gritty texture.
- Adding liquid to chocolate: Even a drop of water can make chocolate seize. Make sure all utensils are completely dry.
- Rushing the setting time: If you spread the white chocolate before the dark layer is partially set, they’ll mix together and lose the distinct layered look.
- Using too much peppermint extract: It’s incredibly potent—measure carefully or you’ll end up with bark that tastes like toothpaste.
- Adding candy canes too late: They need to be sprinkled while the white chocolate is still wet to properly adhere.
Alternatives & Substitutions
- Milk chocolate: Can replace dark chocolate for a sweeter, less intense base layer.
- Peppermint candies: Regular round peppermints work if candy canes aren’t available.
- Dairy-free option: Use high-quality vegan chocolate for both layers.
- Alternative toppings: Try crushed pretzel pieces for a salty-sweet variation, or chopped nuts for added texture.
- Flavor variations: Substitute orange extract for peppermint and top with candied orange peel for a chocolate-orange version.
- Colored version: Add a few drops of oil-based food coloring to the white chocolate for a festive green or pink bark.
FAQs
Why did my chocolate get grainy when I melted it?
Chocolate becomes grainy when it’s overheated or comes into contact with water. Always melt at 50% power in short intervals, stirring frequently. Keep all equipment absolutely dry, and avoid using a wooden spoon which might retain moisture.
Can I use chocolate chips instead of baking chocolate?
Yes, but choose high-quality chips. Standard chocolate chips contain stabilizers to help them keep their shape when baked, which can affect melting. They’ll work in a pinch, but premium chocolate will give you a smoother, richer result.
How do I get clean breaks when cutting the bark?
For precise pieces, chill the bark completely, then use a sharp chef’s knife warmed under hot water and dried. Cut straight down rather than dragging the knife. For a rustic look, simply break the chilled bark with your hands.
My white chocolate seized up—what happened?
White chocolate is particularly finicky. It likely overheated or came into contact with water. Unfortunately, once seized, it can’t be salvaged for this recipe. Next time, melt even more slowly and make sure all utensils are completely dry.
How far in advance can I make this for gifting?
This bark stays fresh for up to 2 weeks in an airtight container at cool room temperature. In fact, making it 1-2 days ahead allows the flavors to meld beautifully, making it perfect for advance holiday preparations.
Final Thoughts
Salted Peppermint Chocolate Bark is one of those rare recipes that combines absolute simplicity with truly impressive results. There’s something deeply satisfying about creating something so beautiful and delicious with such minimal effort. Whether you’re making it as a last-minute gift, a holiday party contribution, or simply a treat for yourself on a cozy winter evening, this bark brings joy with every snap and bite.


