Remember that first bite of something so delicious it stops conversation? That’s exactly what happens with Amish Peanut Butter Cream Pie. This isn’t just any dessert—it’s a slice of American heritage that combines creamy peanut butter filling with a perfectly flaky crust in a way that feels both nostalgic and exciting.
I discovered this gem years ago during a countryside drive through Pennsylvania, and it’s become my go-to when I need something foolproof yet impressive.
Why This Recipe is Awesome
What makes Amish Peanut Butter Cream Pie stand out is its beautiful simplicity. The Amish culinary tradition centers around uncomplicated, from-scratch cooking that maximizes flavor without unnecessary frills. Unlike commercial peanut butter desserts that can be overly sweet or artificial-tasting, this pie strikes a perfect balance—creamy, nutty, and just sweet enough to satisfy without overwhelming your palate.
The texture is where this pie truly shines. The filling has this incredible mousse-like consistency that’s substantial yet melts in your mouth. It’s also incredibly forgiving for novice bakers—no temperamental custards or precise temperature monitoring required.
And despite its impressive appearance, you can pull it together with pantry staples in less time than most “fancy” desserts.
Equipment needed: Pie plate, mixing bowl, hand mixer or stand mixer, rubber spatula, measuring cups, measuring spoons
Amish Peanut Butter Cream Pie
Ingredients
- 1 prepared 9-inch graham cracker crust store-bought or homemade
- 1 cup creamy peanut butter traditional, not natural-style
- 8 oz cream cheese softened
- 1 cup powdered sugar
- 1 teaspoon vanilla extract
- 1 cup heavy whipping cream
- ¼ cup granulated sugar
- ½ cup crushed peanuts or peanut butter cups for garnish optional
- 2 tablespoons honey or maple syrup optional, for drizzling
Instructions
- Prepare your workspace by setting out the cream cheese to soften at room temperature for about 30 minutes before beginning. This ensures a smooth, lump-free filling.
- Beat the cream cheese and peanut butter together in a large mixing bowl until completely smooth and well combined, about 2 minutes on medium speed. Scrape down the sides of the bowl halfway through.
- Add the powdered sugar and vanilla to the peanut butter mixture, beating on low speed until incorporated, then increase to medium-high for another minute until the mixture becomes light and fluffy.
- In a separate bowl, whip the heavy cream with the granulated sugar until stiff peaks form. Be careful not to overbeat, which can make the cream grainy or buttery.
- Gently fold half of the whipped cream into the peanut butter mixture using a rubber spatula, maintaining as much air as possible in the mixture. Once incorporated, fold in the remaining whipped cream until no streaks remain.
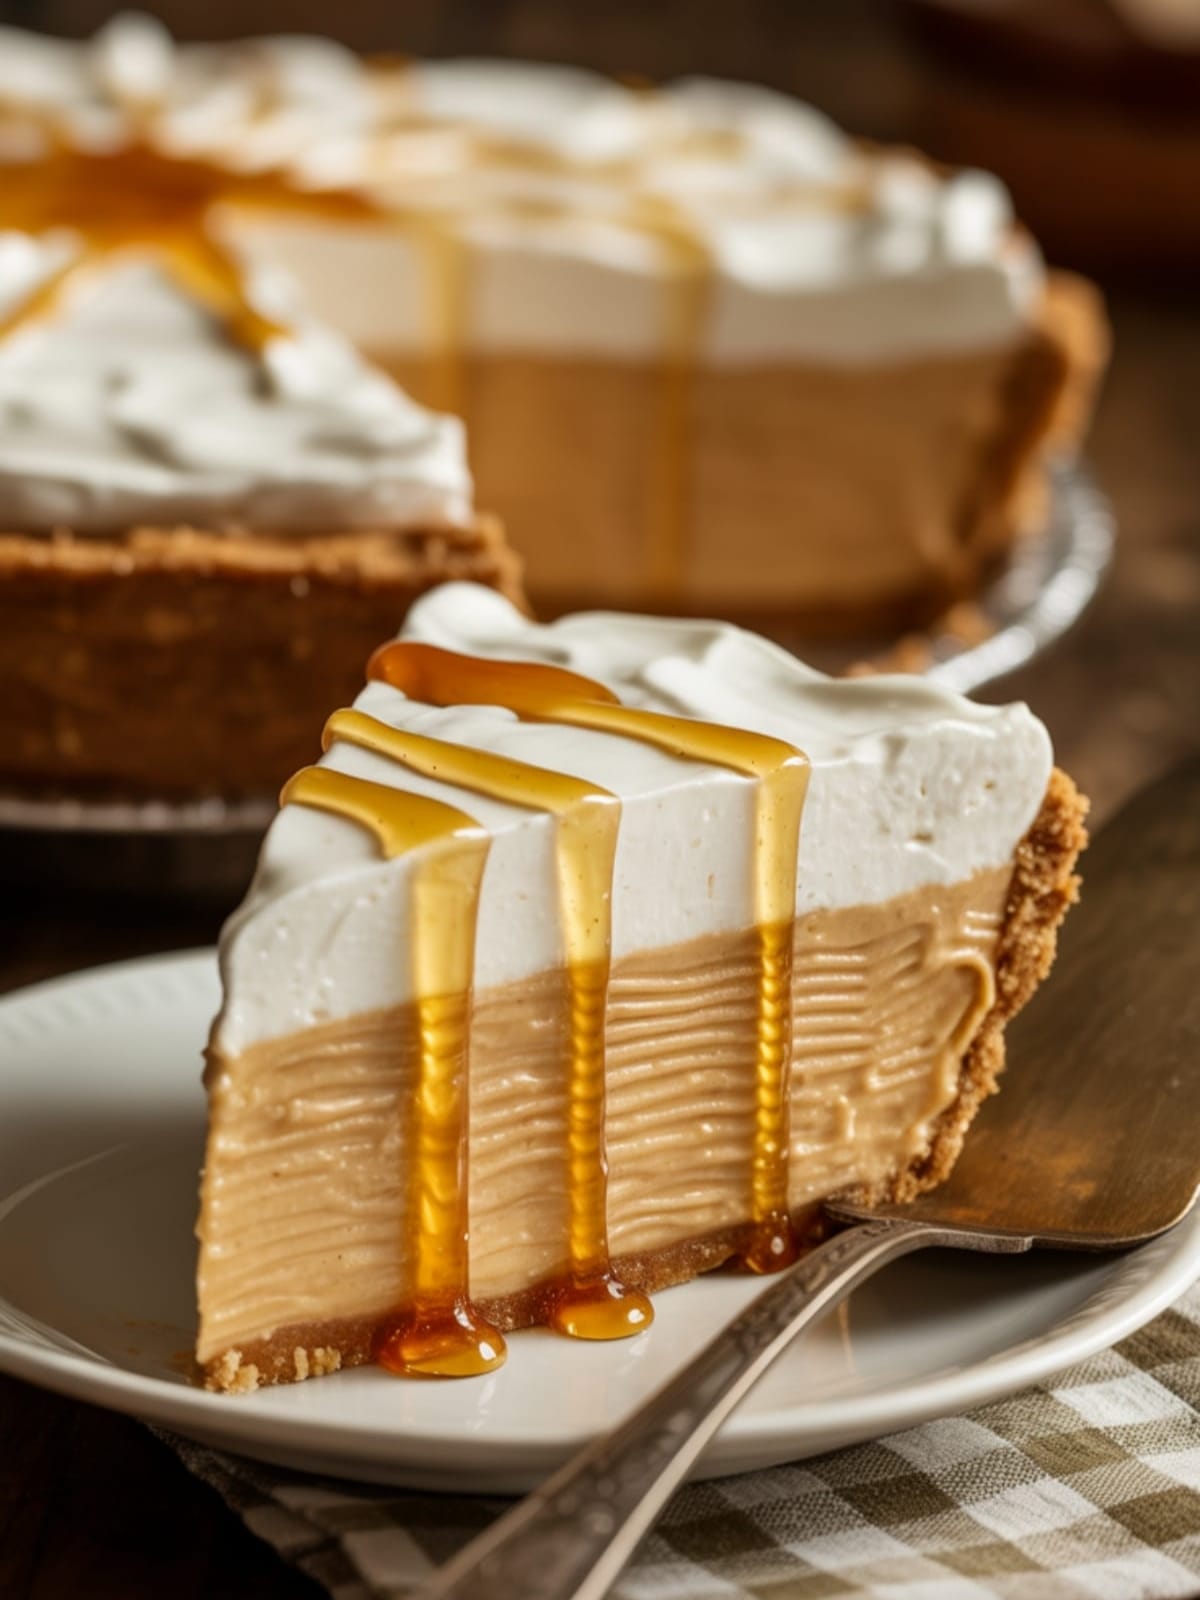
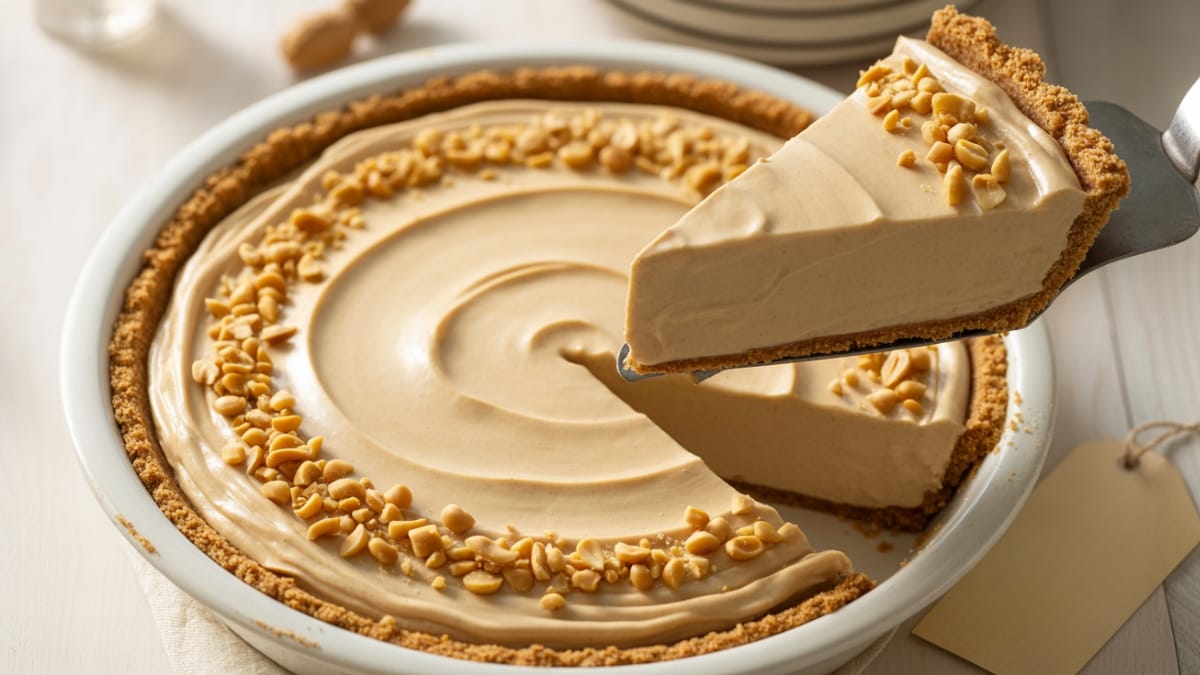
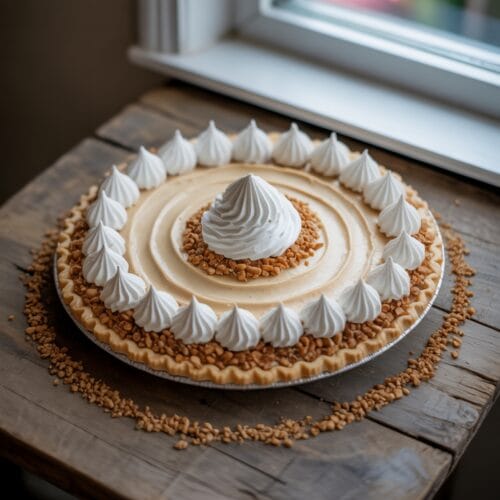
- Transfer the filling into the graham cracker crust, spreading it evenly with a spatula and creating decorative swirls on top if desired.
- Refrigerate the pie for at least 3 hours or overnight to allow it to set properly. The texture improves with longer chilling time.
- Just before serving, garnish the pie with crushed peanuts or peanut butter cup pieces, and if desired, drizzle with a little honey or maple syrup for extra shine and sweetness.
Notes
- For the most authentic flavor, use regular creamy peanut butter (like Jif or Skippy) rather than natural peanut butter, which can separate and create an uneven texture.
- This pie freezes beautifully for up to 2 months. Thaw overnight in the refrigerator before serving.
- For a homemade graham cracker crust, crush 1½ cups graham crackers with 6 tablespoons melted butter and 3 tablespoons sugar, then press into the pie plate and chill for 30 minutes before filling.
- The pie will keep in the refrigerator for up to 5 days, though the crust may soften slightly after day 3.
Calories & Nutritional Info
- Calories: Approximately 450-500 calories per slice
- Fat: 35g (primarily from peanut butter and cream)
- Protein: 10g
- Carbohydrates: 30g
- Contains: Dairy, peanuts, gluten (in standard graham crackers)
- Not suitable for: Vegan, dairy-free, or peanut-free diets
Common Mistakes to Avoid
- Using cold cream cheese – This creates lumps in your filling. Always bring cream cheese to room temperature before mixing.
- Rushing the chilling process – The pie needs adequate time to set. Serving too soon results in a runny filling that won’t hold its shape when sliced.
- Overbeating the whipped cream – Stop whipping once stiff peaks form. Overwhipped cream becomes grainy and won’t fold properly into the peanut butter mixture.
- Using natural peanut butter – The oils separate and can make the filling grainy or oily. Stick with conventional creamy varieties for consistent results.
Alternatives & Substitutions
- Gluten-free option: Use gluten-free graham crackers for the crust or substitute a crust made from crushed gluten-free cookies.
- Lower sugar version: Reduce powdered sugar to ¾ cup and use a sugar-free whipped topping instead of the heavy cream and granulated sugar.
- Chocolate lover’s variation: Add ¼ cup cocoa powder to the peanut butter mixture or use a chocolate cookie crust instead of graham cracker.
- Crunchy texture: Fold in ½ cup of chopped peanuts or mini chocolate chips into the filling before pouring into the crust.
- Cream cheese alternative: In a pinch, mascarpone cheese can be substituted, though it will create a slightly different flavor profile.
FAQs
Can I make this pie ahead of time for a special occasion?
Absolutely! This pie actually improves with time in the refrigerator. You can make it up to 2 days in advance, keeping it covered in the refrigerator. Add any garnishes just before serving for the freshest presentation.
Why is my filling not getting fluffy?
This usually happens if your cream cheese was too cold or if you didn’t whip the heavy cream to stiff peaks. Make sure your cream cheese is truly room temperature and that you’re whipping the cream until it stands up in firm peaks when you lift the beater.
Can I use crunchy peanut butter instead of creamy?
Yes, if you prefer more texture in your pie. Crunchy peanut butter will give you little bits of peanuts throughout the filling, creating a different but equally delicious experience. Just be aware the overall texture won’t be as silky smooth.
Is there a dairy-free version of this pie?
You can adapt this recipe using dairy-free cream cheese and coconut cream (the solid part from a chilled can of full-fat coconut milk) instead of heavy cream. The texture will be slightly different but still delicious.
How do I know when the pie is properly set?
The pie should be firm to the touch but still have a slight give when you press gently in the center. If it feels too soft or jiggly, it needs more time in the refrigerator. The minimum is 3 hours, but overnight is ideal.
Final Thoughts
There’s something special about bringing a slice of Amish Peanut Butter Cream Pie to the table—it carries the warmth of tradition while delivering pure delight in every bite. This pie reminds us that sometimes the most treasured recipes are the ones that focus on simple ingredients prepared with care. Whether you’re serving it for Sunday dinner or a special celebration, this humble pie has a way of making any occasion feel like coming home.


