There’s something undeniably magical about the first bite of a creamy, perfectly baked cheesecake. Now imagine that experience concentrated into adorable, individually portioned treats that are as impressive to serve as they are delightful to eat. Mini cheesecakes are the answer to so many dessert dilemmas—whether you’re hosting a gathering where sharing a single cake feels impractical, or you simply want better portion control without sacrificing the indulgence.
I fell in love with making these little gems years ago when I needed a foolproof dessert for a baby shower. They were such a hit that guests were slipping extras into their purses! What makes them truly special isn’t just their cute appearance—it’s how they solve the common cheesecake problems of cracking, long baking times, and serving challenges.
Why This Recipe is Awesome
Unlike their full-sized counterpart, mini cheesecakes are practically foolproof. That dreaded center crack that plagues so many cheesecake enthusiasts? Not an issue with these petite versions. They bake evenly and cool quickly, eliminating many of the structural problems that can happen with larger cheesecakes.
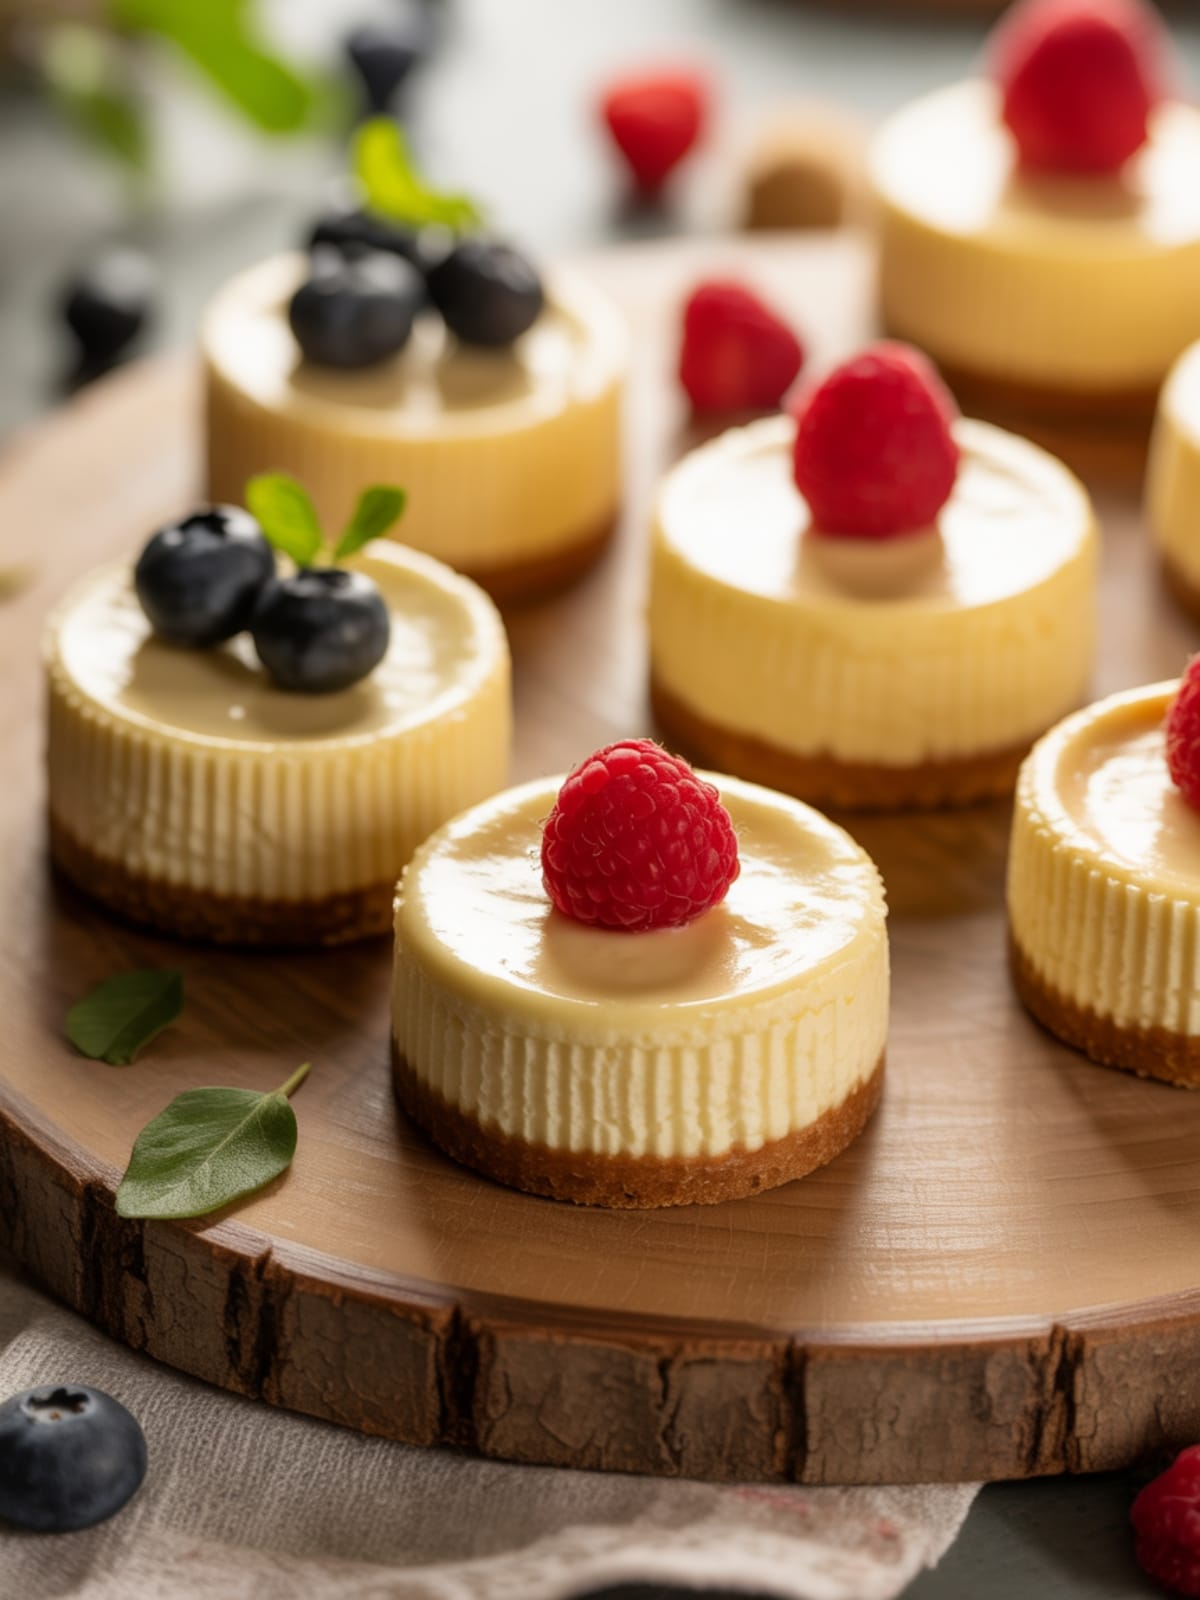
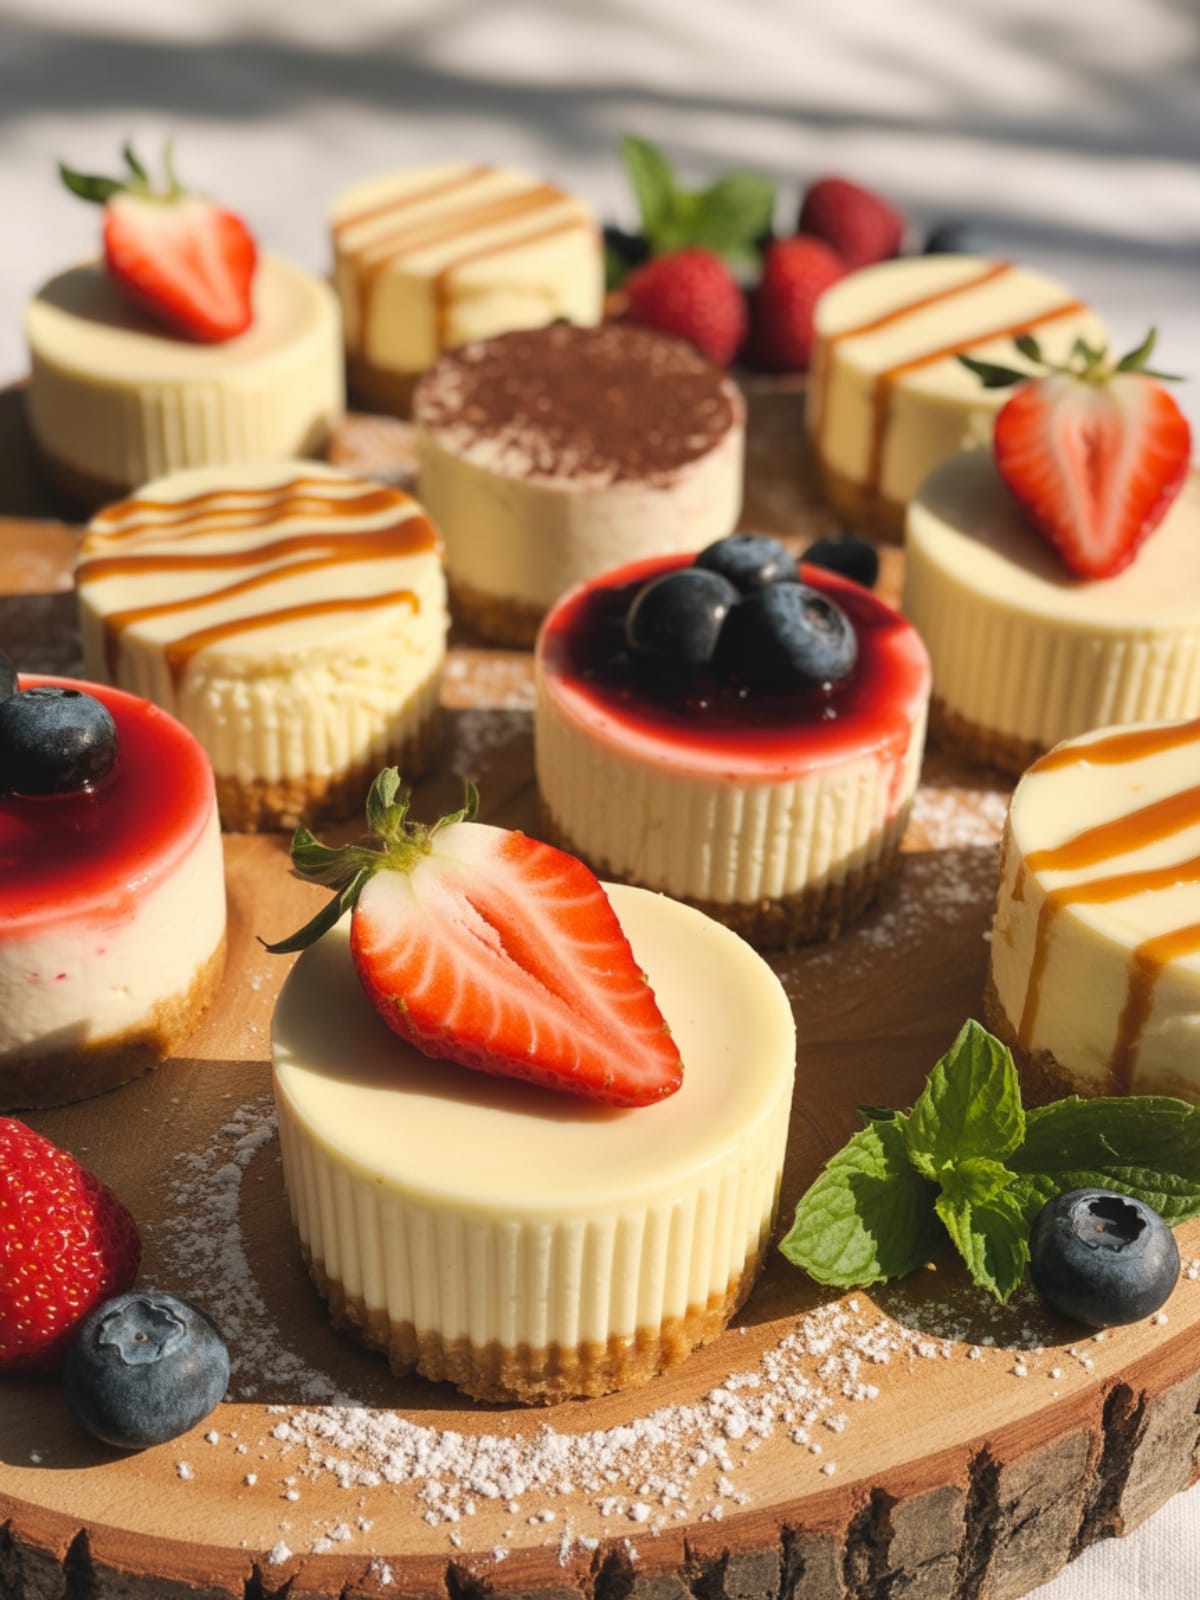
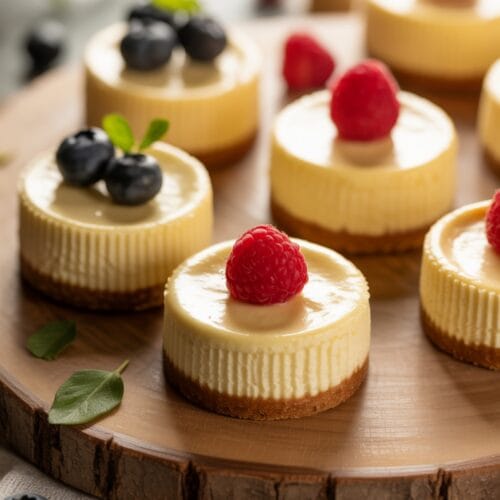
The versatility here is unmatched. You can customize each batch with different toppings—fresh berries for some, chocolate drizzle for others, caramel for the true sweet tooth in your life. Everyone gets exactly what they want!
Perhaps my favorite aspect is their make-ahead convenience. You can prepare these up to three days before your event, leaving you free to focus on other dishes or simply enjoy your company. Plus, the individual portions mean no messy cutting or serving issues that often come with traditional cheesecakes.
Equipment needed: Standard 12-cup muffin tin, paper liners, mixing bowls, hand mixer or stand mixer, measuring cups and spoons
Mini Cheesecakes
Ingredients
For the Crust
- 1 cup graham cracker crumbs about 8 full sheets, finely crushed
- 3 tablespoons unsalted butter melted
- 1 tablespoon granulated sugar
- Pinch of salt
For the Filling
- 16 ounces 2 blocks cream cheese, softened to room temperature
- ½ cup granulated sugar
- 2 large eggs at room temperature
- 1 teaspoon pure vanilla extract
- 2 tablespoons sour cream
- 1 tablespoon fresh lemon juice
Optional Toppings
- Fresh berries strawberries, blueberries, raspberries
- Fruit preserves or jam
- Chocolate ganache
- Caramel sauce
- Whipped cream
Instructions
- Prepare your workspace. Preheat your oven to 325°F (165°C) and line a standard 12-cup muffin tin with paper liners. This temperature ensures gentle, even baking that prevents the tops from cracking.
- Make the crust mixture. In a medium bowl, combine the graham cracker crumbs, melted butter, sugar, and salt. Mix until the texture resembles wet sand and the mixture holds together when pressed between your fingers.
- Form the crusts. Divide the crust mixture evenly among the lined muffin cups (about 1 tablespoon per cup). Using the bottom of a small glass or measuring cup, firmly press the crumbs into an even layer at the bottom of each liner.
- Pre-bake the crusts. Bake the crusts for 5 minutes, then remove from the oven and let cool while you prepare the filling. This short baking helps the crust set properly and prevents sogginess.
- Prepare the cheesecake filling. In a large bowl, beat the softened cream cheese with an electric mixer until completely smooth, about 2 minutes. Scrape down the sides of the bowl several times to ensure no lumps remain—this is crucial for a silky texture.
- Add the sugar and eggs. Beat in the sugar until well incorporated. Add eggs one at a time, mixing on low speed just until blended after each addition. Over-mixing with eggs can introduce too much air, which can cause cracks.
- Incorporate remaining ingredients. Add the vanilla extract, sour cream, and lemon juice, mixing on low speed just until combined. The sour cream adds richness while the lemon juice brightens the flavor without making it taste lemony.
- Fill the liners. Divide the filling evenly among the muffin cups, filling each about ¾ full. Tap the pan gently on the counter a few times to release any air bubbles that might have formed.
- Bake to perfection. Bake for 18-20 minutes, until the centers are just set but still slightly jiggly. They should look matte (not wet or shiny) and the edges might be just starting to turn golden.
- Cool properly. Turn off the oven, crack the door open, and let the cheesecakes cool in the oven for 10 minutes. This gradual cooling prevents dramatic temperature changes that can cause sinking or cracking. Then remove and cool completely at room temperature.
- Chill thoroughly. Refrigerate the mini cheesecakes for at least 2 hours or overnight. This final chilling step is essential for the perfect texture and flavor development.
- Add your toppings. Just before serving, add your choice of toppings. For fruit, you can arrange it decoratively on top; for sauces, a simple drizzle works beautifully.
Notes
- Room temperature ingredients are non-negotiable for a smooth filling. Cold cream cheese will leave lumps that won’t bake out.
- If you don’t have a food processor for making graham cracker crumbs, place the crackers in a zip-top bag and crush them with a rolling pin.
- These can be made up to 3 days ahead and stored covered in the refrigerator.
- Freeze unfrosted mini cheesecakes for up to 3 months. Thaw overnight in the refrigerator before topping and serving.
- For a water bath effect without the hassle, place a pan of hot water on the rack below the cheesecakes while baking—it creates humidity that helps prevent cracking.
Calories & Nutritional Info
- Calories: Approximately 240 calories per mini cheesecake (without toppings)
- Protein: 4g per serving
- Fat: 17g per serving
- Carbohydrates: 18g per serving
- Contains: Dairy, eggs, wheat (in graham crackers)
- Can be made gluten-free by using gluten-free graham crackers or cookie crumbs
Common Mistakes to Avoid
- Using cold ingredients – This causes lumpy batter that won’t smooth out during baking. Always let your cream cheese, eggs, and sour cream come to room temperature.
- Overmixing the batter – Once you add the eggs, mix just until combined. Excessive mixing incorporates air that can cause cracks and affect texture.
- Overbaking – The centers should still have a slight jiggle when you remove them from the oven. They’ll continue to set as they cool.
- Rapid temperature changes – Never take cheesecakes directly from a hot oven to the refrigerator. The gradual cooling process is essential for preventing cracks and sinking centers.
- Rushing the chilling step – The flavor and texture develop during refrigeration. A minimum of 2 hours chilling time is necessary for the best results.
Alternatives & Substitutions
- Graham Cracker Alternatives: Try Oreo cookie crumbs, gingersnaps, vanilla wafers, digestive biscuits, or shortbread cookies for different flavor profiles.
- Dairy-Free Options: Substitute dairy-free cream cheese and use coconut cream instead of sour cream. The texture will be slightly different but still delicious.
- Lower Fat Version: Use Neufchâtel cheese (⅓ less fat than cream cheese) and Greek yogurt instead of sour cream.
- Flavor Variations: Add 1-2 tablespoons of cocoa powder for chocolate cheesecakes, fold in ⅓ cup of mashed strawberries for strawberry cheesecakes, or add 1 teaspoon of espresso powder for coffee-flavored cheesecakes.
- Sugar Alternatives: Replace granulated sugar with an equal amount of coconut sugar or ⅓ cup of honey (reduce any liquid ingredients slightly if using honey).
FAQs
Can I make these without a muffin tin?
While a standard muffin tin is ideal, you can use individual ramekins or small mason jars. Just adjust the baking time accordingly—smaller containers may need less time, while larger ones will need more.
Why did my mini cheesecakes sink in the middle?
Sinking usually happens from drastic temperature changes or underbaking. Next time, let them cool gradually in the oven with the door cracked open, and make sure they’re just set (slightly jiggly in the center) before removing from the oven.
How do I know when my mini cheesecakes are done baking?
They should be set around the edges but still have a slight jiggle in the center—think Jell-O, not liquid. The tops should appear matte rather than shiny, and they’ll firm up completely during cooling.
Can I make these without paper liners?
Yes, but be sure to grease the muffin tin very well. I find that a light spray of cooking oil followed by a dusting of graham cracker crumbs helps them release cleanly. Let them cool completely before attempting to remove them.
How far in advance can I make these for a party?
These mini cheesecakes can be made up to 3 days ahead and stored covered in the refrigerator. Add any toppings just before serving for the freshest presentation.
Final Thoughts
These mini cheesecakes have become my secret weapon for impressive yet effortless entertaining. There’s something so satisfying about offering guests their own personal dessert—no sharing required! Whether you’re a seasoned baker or just starting out, this recipe offers that perfect balance of “looks fancy, actually easy” that we all appreciate. The next time you’re looking to bring a little joy to the table, I hope you’ll give these little treasures a try.


