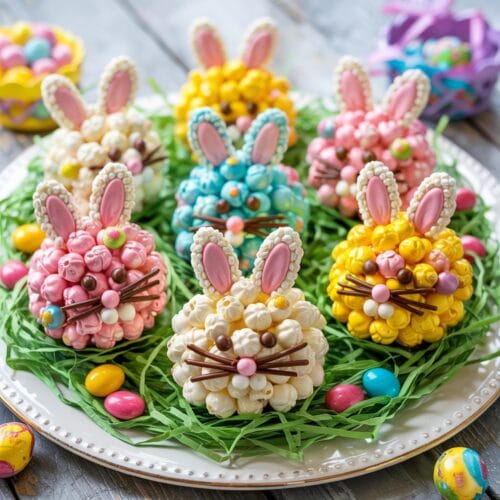
Easter Bunny Popcorn Balls
These Easter Bunny Popcorn Balls transform classic marshmallow popcorn treats into adorable holiday characters with simple decorations. The sticky marshmallow mixture binds popcorn into bunny-head shapes, while candy melts, cookies, and candies create ears, eyes, noses, and whiskers for a festive no-bake dessert that's perfect for Easter celebrations and spring parties.
Ingredients
For the Popcorn Balls
- 10 cups popped popcorn about 1/2 cup unpopped kernels
- 4 tablespoons butter
- 1 10 oz bag marshmallows (about 40 regular marshmallows)
- 1/4 teaspoon salt
- 1 teaspoon vanilla extract
- Optional: 1 cup white chocolate chips melted (for extra stickiness and flavor)
For Decorating
- 1 cup white candy melts for bunny coating
- Optional: pastel-colored candy melts pink, blue, yellow, or green for variety
- 24 white chocolate wafer cookies like Ghirardelli melting wafers for ears
- Pink candy melts or pink frosting for inner ears
- Mini chocolate chips or brown M&Ms for eyes
- Pink jelly beans or small pink candies for nose
- Black decorating gel or melted chocolate for whiskers
- Assorted Easter sprinkles optional
Instructions
- Prep your workspace. Line a baking sheet with wax paper or parchment paper. Have all your decorating ingredients measured and ready—this makes the process much smoother.
- Make perfect popcorn. Pop your popcorn using your preferred method. Remove any unpopped kernels (those are tooth-breakers!), and place the popped corn in a large bowl. If using microwave popcorn, choose a plain or lightly salted variety.
- Create the sticky mixture. In a large pot over low heat, melt the butter. Add marshmallows and stir constantly until completely melted and smooth. Remove from heat and stir in salt and vanilla extract.
- Optional flavor boost: If using white chocolate chips, melt them in the microwave in 30-second intervals, stirring between each, until smooth. Add to the marshmallow mixture.
- Combine everything. Pour the marshmallow mixture over the popcorn and gently fold together using a wooden spoon or spatula until all the popcorn is evenly coated. Work quickly as the mixture starts to set fast!
- Shape your bunnies. Once the mixture is cool enough to handle but still pliable (about 2-3 minutes), lightly coat your hands with cooking spray or wear disposable gloves. Shape the mixture into balls about the size of a tennis ball. This should make 10-12 bunny heads. Place them on the prepared baking sheet.
- Create a flat bottom. Gently press the bottom of each ball to flatten it slightly so your bunnies don't roll away.
- Prep the ears. Melt the white candy melts in a microwave-safe bowl according to package directions. Dip each white chocolate wafer cookie halfway into the melted candy, then set on wax paper to firm up slightly. These will be your bunny ears.
- Add ear details. Once the white coating on the cookies has set slightly, dip the tips in melted pink candy melts or use pink frosting to create the inner ear. Allow to harden completely.
- Coat the bunnies. If desired, dip the top half of each popcorn ball into melted white or pastel candy melts for a smoother surface to decorate. This step is optional but creates a more finished look.
- Attach the ears. Press two ear cookies into the top of each popcorn ball while the candy coating is still slightly soft. If you didn't dip the balls, use a small amount of melted candy to "glue" the ears in place.
- Add facial features. Press mini chocolate chips or brown M&Ms into place for eyes, add a pink jelly bean or candy for the nose, and use black decorating gel or melted chocolate to draw whiskers.
- Final touches. Add any additional sprinkles or decorations as desired. Let the bunnies set completely, about 15 minutes, before serving.
- Storage: These are best enjoyed within 1-2 days. Store in an airtight container or wrap individually in plastic wrap.
Notes
- Popcorn tip: Freshly popped popcorn works better than pre-packaged because it has less oil and butter already on it.
- For brightly colored bunnies, add a few drops of food coloring to the marshmallow mixture before adding it to the popcorn.
- Working with slightly damp hands makes shaping the popcorn balls easier and less sticky.
- If the popcorn mixture cools too much to shape, place it back over low heat briefly to soften.
- Make-ahead tip: You can make the basic popcorn balls a day ahead and add the decorative elements the next day.
- For a fun variation, use caramel popcorn instead of regular (though note that this makes the final treat much sweeter).
- Use kitchen scissors to snip any popcorn pieces that are sticking out too far and ruining your bunny shape.