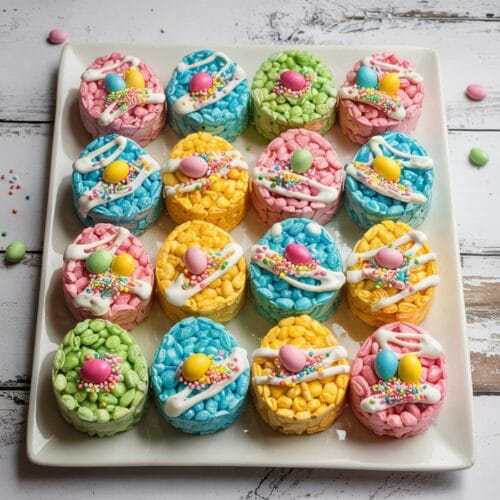
Easter Egg Rice Krispie Treats
These Easter Egg Rice Krispie Treats transform the classic gooey cereal treat into festive holiday shapes with pastel colors and optional decorations. Using just a few simple ingredients and an egg-shaped cookie cutter, this no-bake recipe creates adorable, customizable treats perfect for Easter celebrations, baskets, or spring gatherings.
Ingredients
For the Base
- 6 cups Rice Krispies cereal or any crispy rice cereal
- 4 tablespoons butter
- 1 10 oz package marshmallows (about 40 regular marshmallows)
- 1 teaspoon vanilla extract optional but adds nice flavor
- 1/4 teaspoon salt trust me on this one
- Food coloring pastel colors like pink, blue, yellow, green work well for Easter
For Decorating (Optional)
- 1 cup white chocolate chips or candy melts
- Assorted sprinkles in Easter colors
- Mini chocolate eggs or jelly beans
- 1/2 cup powdered sugar mixed with 1-2 tablespoons milk for simple icing
Instructions
- Prep your workspace. Line a 9x13 baking pan or rimmed baking sheet with wax paper or parchment paper, leaving some overhang on the sides for easy removal later. Spray lightly with cooking spray.
- Melt the butter. In a large pot over low heat, melt the butter, being careful not to let it brown. If using a microwave, place butter in a large microwave-safe bowl and heat for 30-45 seconds until melted.
- Add the marshmallows. Add marshmallows to the melted butter and stir continuously over low heat until completely melted and smooth. If using a microwave, heat in 30-second intervals, stirring between each, until smooth. This usually takes about 1.5-2 minutes total.
- Add flavor boosters. Remove from heat and stir in vanilla extract and salt.
- Decision time: Single color or rainbow?- For a single color batch: Add food coloring to the melted marshmallow mixture until you reach your desired shade. Remember that the color will lighten slightly when you add the cereal.- For multiple colors: Divide the marshmallow mixture equally into separate bowls (one for each color you want) and add different food coloring to each.
- Add the cereal. Fold in the Rice Krispies cereal, stirring gently until all the cereal is evenly coated. Try not to crush the cereal as you mix.
- Press into pan. Transfer the mixture to your prepared pan. Using a piece of wax paper or a spatula sprayed with cooking spray (to prevent sticking), press the mixture evenly into the pan, about 1/2 inch thick.
- Cool slightly. Let the treats cool for about 10 minutes until they're still pliable but not too sticky.
- Cut into egg shapes. Using your Easter egg cookie cutter, firmly press down to cut out egg shapes. To prevent sticking, you can dip the cookie cutter in a little water or spray it with cooking spray between cuts.
- Maximize your yield. Try to cut the eggs as close together as possible to minimize waste. (Though let's be honest, those scraps are the chef's treat!)
- Decorate if desired. If adding decorations:- For chocolate drizzle: Melt white chocolate chips or candy melts and drizzle over eggs using a fork or spoon.- For sprinkles: Add immediately after drizzling while chocolate is still wet.- For icing designs: Mix powdered sugar with milk until smooth, place in a small plastic bag, snip the corner, and pipe designs
- Set completely. Allow the treats to cool completely on wax paper, about 30 minutes, until firm and the decorations have set.
- Store properly. Place in an airtight container with wax paper between layers for up to 3 days, though they're best enjoyed within 2 days for maximum freshness.
Notes
- For softer treats, use 3 tablespoons of butter instead of 4.
- For extra-gooey treats, add an extra cup of mini marshmallows to the mixture after removing from heat, giving them just a quick stir so they don't melt completely.
- To make these treats look more egg-like, you can make the mixture a bit thicker (about 3/4 inch) when pressing into the pan.
- If you don't have an egg-shaped cookie cutter, you can form the treats into egg shapes by hand. Just let the mixture cool slightly first so it's easy to handle.
- These treats can be made a day ahead and stored in an airtight container.
- For a marbled effect, swirl different colored mixtures together lightly before pressing into the pan.
- Working with marshmallow tip: Spray your spatula with cooking spray to prevent the marshmallow mixture from sticking.