
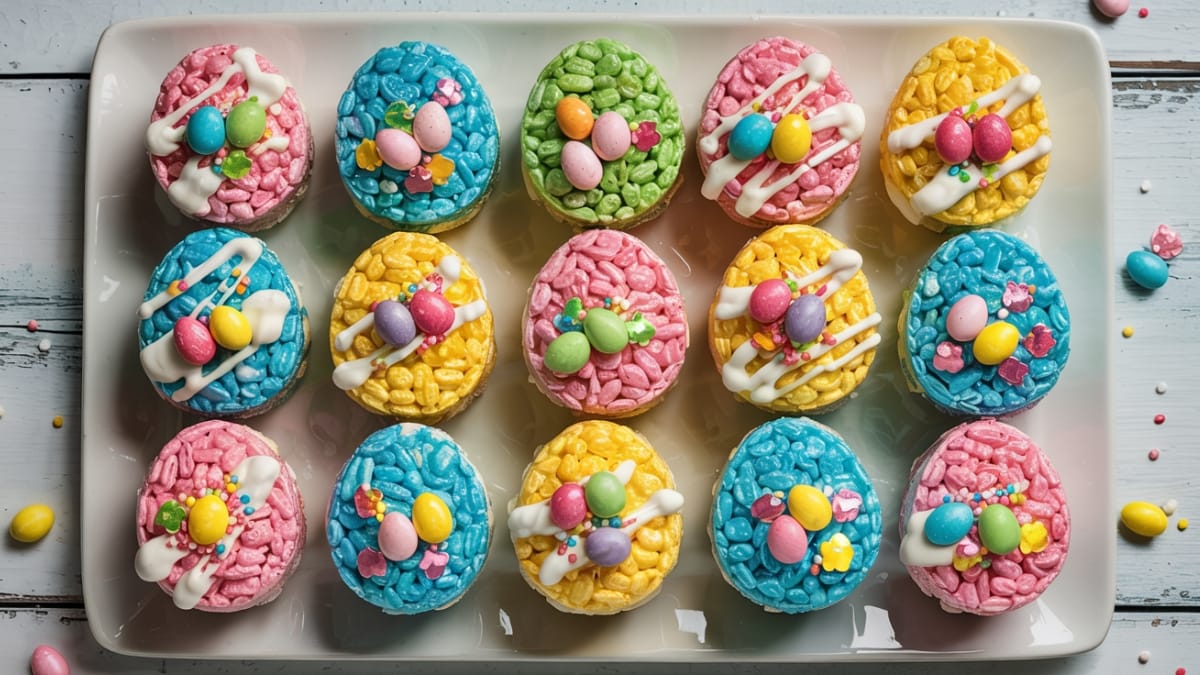
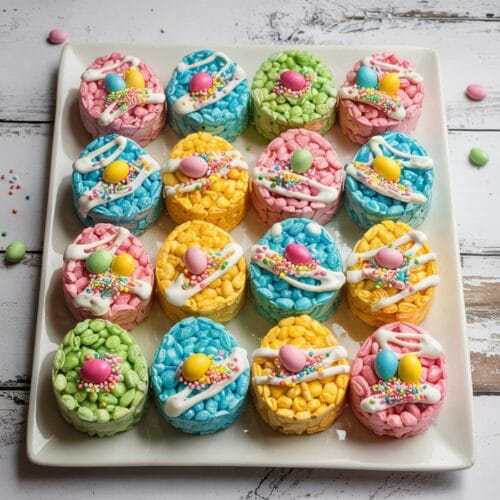
Ever wanted to be the hero who brings the treat that both kids and adults dive for? These Easter Egg Rice Krispie Treats are your ticket to dessert fame. They combine the nostalgic gooeyness of classic Rice Krispie treats with festive Easter shapes and colors—and the best part? They’re practically impossible to mess up. Even if your past baking attempts have ended with the smoke detector going off, this no-bake recipe has got your back.
Why This Recipe is Awesome
This isn’t just any Rice Krispie treat recipe—it’s the holiday upgrade that gives you maximum “wow factor” with minimal extra effort.
The shape makes all the difference. There’s something about turning a childhood favorite into Easter egg shapes that makes them instantly more festive and fun. It’s like magic, except the only magic required is a cookie cutter and maybe some sprinkles.
What I love most about this recipe is its versatility. You can go super simple with just the basic colored treats, or get fancy with decorations, depending on your ambition level and how many episodes of your favorite show you’re willing to miss. They’re perfect for Easter baskets, school parties, family gatherings, or just because it’s Tuesday and you deserve something delightful.
Plus, they’re a great kitchen project to do with kids. Little helpers can measure, pour, and definitely handle the all-important taste-testing phase.
Easter Egg Rice Krispie Treats
Ingredients
For the Base
- 6 cups Rice Krispies cereal or any crispy rice cereal
- 4 tablespoons butter
- 1 10 oz package marshmallows (about 40 regular marshmallows)
- 1 teaspoon vanilla extract optional but adds nice flavor
- 1/4 teaspoon salt trust me on this one
- Food coloring pastel colors like pink, blue, yellow, green work well for Easter
For Decorating (Optional)
- 1 cup white chocolate chips or candy melts
- Assorted sprinkles in Easter colors
- Mini chocolate eggs or jelly beans
- 1/2 cup powdered sugar mixed with 1-2 tablespoons milk for simple icing
Instructions
- Prep your workspace. Line a 9×13 baking pan or rimmed baking sheet with wax paper or parchment paper, leaving some overhang on the sides for easy removal later. Spray lightly with cooking spray.
- Melt the butter. In a large pot over low heat, melt the butter, being careful not to let it brown. If using a microwave, place butter in a large microwave-safe bowl and heat for 30-45 seconds until melted.
- Add the marshmallows. Add marshmallows to the melted butter and stir continuously over low heat until completely melted and smooth. If using a microwave, heat in 30-second intervals, stirring between each, until smooth. This usually takes about 1.5-2 minutes total.
- Add flavor boosters. Remove from heat and stir in vanilla extract and salt.
- Decision time: Single color or rainbow?– For a single color batch: Add food coloring to the melted marshmallow mixture until you reach your desired shade. Remember that the color will lighten slightly when you add the cereal.– For multiple colors: Divide the marshmallow mixture equally into separate bowls (one for each color you want) and add different food coloring to each.
- Add the cereal. Fold in the Rice Krispies cereal, stirring gently until all the cereal is evenly coated. Try not to crush the cereal as you mix.
- Press into pan. Transfer the mixture to your prepared pan. Using a piece of wax paper or a spatula sprayed with cooking spray (to prevent sticking), press the mixture evenly into the pan, about 1/2 inch thick.
- Cool slightly. Let the treats cool for about 10 minutes until they're still pliable but not too sticky.
- Cut into egg shapes. Using your Easter egg cookie cutter, firmly press down to cut out egg shapes. To prevent sticking, you can dip the cookie cutter in a little water or spray it with cooking spray between cuts.
- Maximize your yield. Try to cut the eggs as close together as possible to minimize waste. (Though let's be honest, those scraps are the chef's treat!)
- Decorate if desired. If adding decorations:– For chocolate drizzle: Melt white chocolate chips or candy melts and drizzle over eggs using a fork or spoon.– For sprinkles: Add immediately after drizzling while chocolate is still wet.– For icing designs: Mix powdered sugar with milk until smooth, place in a small plastic bag, snip the corner, and pipe designs
- Set completely. Allow the treats to cool completely on wax paper, about 30 minutes, until firm and the decorations have set.
- Store properly. Place in an airtight container with wax paper between layers for up to 3 days, though they're best enjoyed within 2 days for maximum freshness.
Notes
- For softer treats, use 3 tablespoons of butter instead of 4.
- For extra-gooey treats, add an extra cup of mini marshmallows to the mixture after removing from heat, giving them just a quick stir so they don’t melt completely.
- To make these treats look more egg-like, you can make the mixture a bit thicker (about 3/4 inch) when pressing into the pan.
- If you don’t have an egg-shaped cookie cutter, you can form the treats into egg shapes by hand. Just let the mixture cool slightly first so it’s easy to handle.
- These treats can be made a day ahead and stored in an airtight container.
- For a marbled effect, swirl different colored mixtures together lightly before pressing into the pan.
- Working with marshmallow tip: Spray your spatula with cooking spray to prevent the marshmallow mixture from sticking.
Calories & Nutritional Info
- Calories: Approximately 150-180 per egg-shaped treat (depending on size)
- Protein: 1g
- Fat: 4g
- Carbs: 30g
- Fiber: 0g
- Sugar: 17g
- Sodium: 150mg
- Allergen information: Contains dairy. May contain gluten depending on cereal used. Check ingredients for potential allergens like soy or gluten if making for someone with allergies.
Common Mistakes to Avoid
- Cranking up the heat. High heat can burn the marshmallows and butter. Patience is key—keep the heat low and stir constantly.
- Skipping the parchment/wax paper. Without it, your treats will stick to the pan like they’re afraid of being eaten.
- Pressing too hard when compacting the mixture. This crushes the cereal and makes for dense treats. Use gentle pressure for the perfect texture.
- Cutting when too warm. If you try to cut shapes when the mixture is still too warm, you’ll end up with a sticky mess on your cookie cutter.
- Waiting too long to cut. On the flip side, if you wait until they’re completely cool and hardened, they’ll be difficult to cut cleanly and might crack.
- Forgetting the salt. It seems minor, but that tiny bit of salt balances the sweetness and makes the flavor pop.
- Using old marshmallows. Fresh marshmallows melt better and create a better texture. If yours are a bit stale, add an extra tablespoon of butter to compensate.
Alternatives & Substitutions
- Different cereals: Try Cocoa Krispies, Fruity Pebbles, or a combination of cereals for different flavors and colors.
- Marshmallow variations: Use flavored marshmallows like strawberry or vanilla for a flavor twist.
- Butter alternatives: Coconut oil can be substituted for butter for a slight coconut flavor.
- Mix-ins: Add 1/2 cup of mini chocolate chips, chopped dried fruit, or sprinkles to the cereal mixture for extra texture and flavor.
- Allergy-friendly version: Use vegan marshmallows and plant-based butter substitute for a dairy-free option.
- Flavor boosters: Add 1/2 teaspoon of almond extract instead of vanilla, or try a bit of lemon or orange zest for a citrusy twist.
- Beyond eggs: Use any springtime cookie cutter shapes like flowers, butterflies, or bunnies.
- Chocolate base: Replace 1 cup of Rice Krispies with 1 cup of cocoa puffs or chocolate cereal for a chocolate twist.
FAQs
Can I make these ahead of time?
Yes! These treats can be made 1-2 days in advance. Store them in an airtight container with wax paper between layers to prevent sticking. They’re best within the first 48 hours for optimal freshness and texture.
My treats turned out too hard. What went wrong?
This usually happens when the cereal mixture is overcooked or packed too tightly into the pan. Use low heat for melting the marshmallows, and press the mixture into the pan gently to maintain some air between the cereal pieces.
How do I cut clean shapes without the cookie cutter sticking?
Lightly spray your cookie cutter with cooking spray or dip it in warm water between cuts. Also, make sure the treats are at the right temperature—cool enough to hold their shape but not fully hardened.
Can I freeze these treats?
Yes! Wrap them individually in plastic wrap and then place in a freezer-safe container or bag. They’ll keep for up to 6 weeks. Let thaw at room temperature before serving.
How can I make these more colorful?
For vibrant colors, use gel food coloring instead of liquid. You can also add colorful mix-ins like Fruity Pebbles cereal, rainbow sprinkles, or colored mini marshmallows. Another option is to dip half of each egg in colored white chocolate.
My marshmallows aren’t melting smoothly. What’s happening?
This could be due to old marshmallows or heat that’s too high. Try adding an extra tablespoon of butter to help them melt more smoothly, and make sure you’re using low heat and stirring constantly.
How can I involve kids in making these?
Kids can help measure the cereal, stir in the cereal once the marshmallow mixture has cooled slightly, press the mixture into the pan, and of course, handle all the decorating! Save the hot melting steps for adults.
Final Thoughts
Easter Egg Rice Krispie Treats combine the nostalgic joy of a childhood favorite with holiday fun, creating something that’s greater than the sum of its very simple parts. They’re the perfect dessert for those of us who want to bring something homemade and festive without risking a Pinterest fail of epic proportions. And let’s be honest—there’s something undeniably cheerful about a bright, colorful treat shaped like an Easter egg, especially one that delivers that perfect chewy-crispy texture we all love. Whether you’re a kitchen novice or a seasoned baker looking for a quick win, these treats deliver maximum smiles with minimal effort. Now that’s something worth celebrating!


