Let me tell you about the burritos that changed my reputation from “the friend who burns toast” to “the burrito whisperer.” I was hosting an impromptu game night and needed to feed a crowd with minimal effort and maximum impact. These ground beef burritos were thrown together with what I had on hand, but something magical happened when all those simple ingredients came together. People started taking pictures of their food (the ultimate compliment), and one friend actually texted me at midnight asking for the recipe because he “couldn’t stop thinking about them.” These aren’t just any burritos – they’re the perfect balance of seasoned beef, fluffy rice, creamy beans, and melty cheese wrapped in a toasty tortilla. Ready to elevate your burrito game from basic to legendary? Let’s roll!
Why These Ground Beef Burritos Will Rock Your World
These burritos hit that sweet spot between easy weeknight cooking and “oh wow, did I really make something this good?” deliciousness. The beef is perfectly seasoned with a homemade blend that beats any packet, and the technique for getting the right texture will change how you cook ground beef forever. These aren’t those sad, one-note burritos that leave you wondering what you just ate – each bite delivers a perfect harmony of flavors and textures. The best part? You can customize them endlessly, make them ahead for meal prep, and even freeze them for future burrito emergencies. Whether you’re feeding a hungry family, meal prepping for the week, or just craving serious comfort food, these burritos deliver restaurant-quality results with pantry-friendly ingredients.

Ground Beef Burritos
Equipment
- Large skillet
- Spatula
- Aluminum foil for wrapping
Ingredients
For the beef filling
- 1 pound ground beef (80/20 lean-to-fat ratio)
- 1 medium onion, finely diced
- 3 cloves garlic, minced
- 1 tablespoon olive oil
- 2 tablespoons tomato paste
- 1 tablespoon chili powder
- 1 teaspoon ground cumin
- 1 teaspoon dried oregano
- 1/2 teaspoon smoked paprika
- 1/4 teaspoon cayenne pepper (optional, adjust to taste)
- 1/2 cup beef broth or water
- Salt and pepper to taste
For the burritos
- 6 large flour tortillas (10-12 inch diameter)
- 2 cups cooked rice (white or brown)
- 1 can (15 oz) black beans or pinto beans, drained and rinsed
- 2 cups shredded Mexican-blend cheese
- 1 cup pico de gallo or prepared salsa
- 1 cup shredded lettuce
- 1/2 cup sour cream
- 1 large avocado, sliced or mashed
- 1/4 cup chopped cilantro
- 1 lime, cut into wedges
- Hot sauce to taste
Instructions
Step 1: Prepare the Beef Filling
- Heat olive oil in a large skillet over medium-high heat until shimmering.
- Add onion and cook for 3-4 minutes until softened and translucent.
- Add ground beef and break it apart with a wooden spoon. Season with a pinch of salt and pepper.
- Cook the beef until no pink remains, about 5-7 minutes, stirring occasionally.
- Add the garlic and cook for another 30 seconds until fragrant.
- Drain excess fat if necessary (but leave a little for flavor).
- Add tomato paste and spices (chili powder, cumin, oregano, paprika, and cayenne if using). Stir to coat the meat evenly and cook for 1 minute until fragrant.
- Pour in the beef broth or water, stirring to scrape up any browned bits from the bottom of the pan. This is flavor gold!
- Simmer for 5-7 minutes until most of the liquid has reduced but the mixture is still moist.
- Taste and adjust seasonings as needed. The filling should be bold and well-seasoned since it will be combined with milder ingredients.
Step 2: Warm the Tortillas
There are a few ways to make your tortillas pliable:
- Microwave method: Place tortillas between damp paper towels and microwave for 20-30 seconds.
- Stovetop method: Quickly heat each tortilla in a dry skillet for 10-15 seconds per side.
- Oven method: Wrap the stack in aluminum foil and heat in a 300°F oven for 10 minutes.
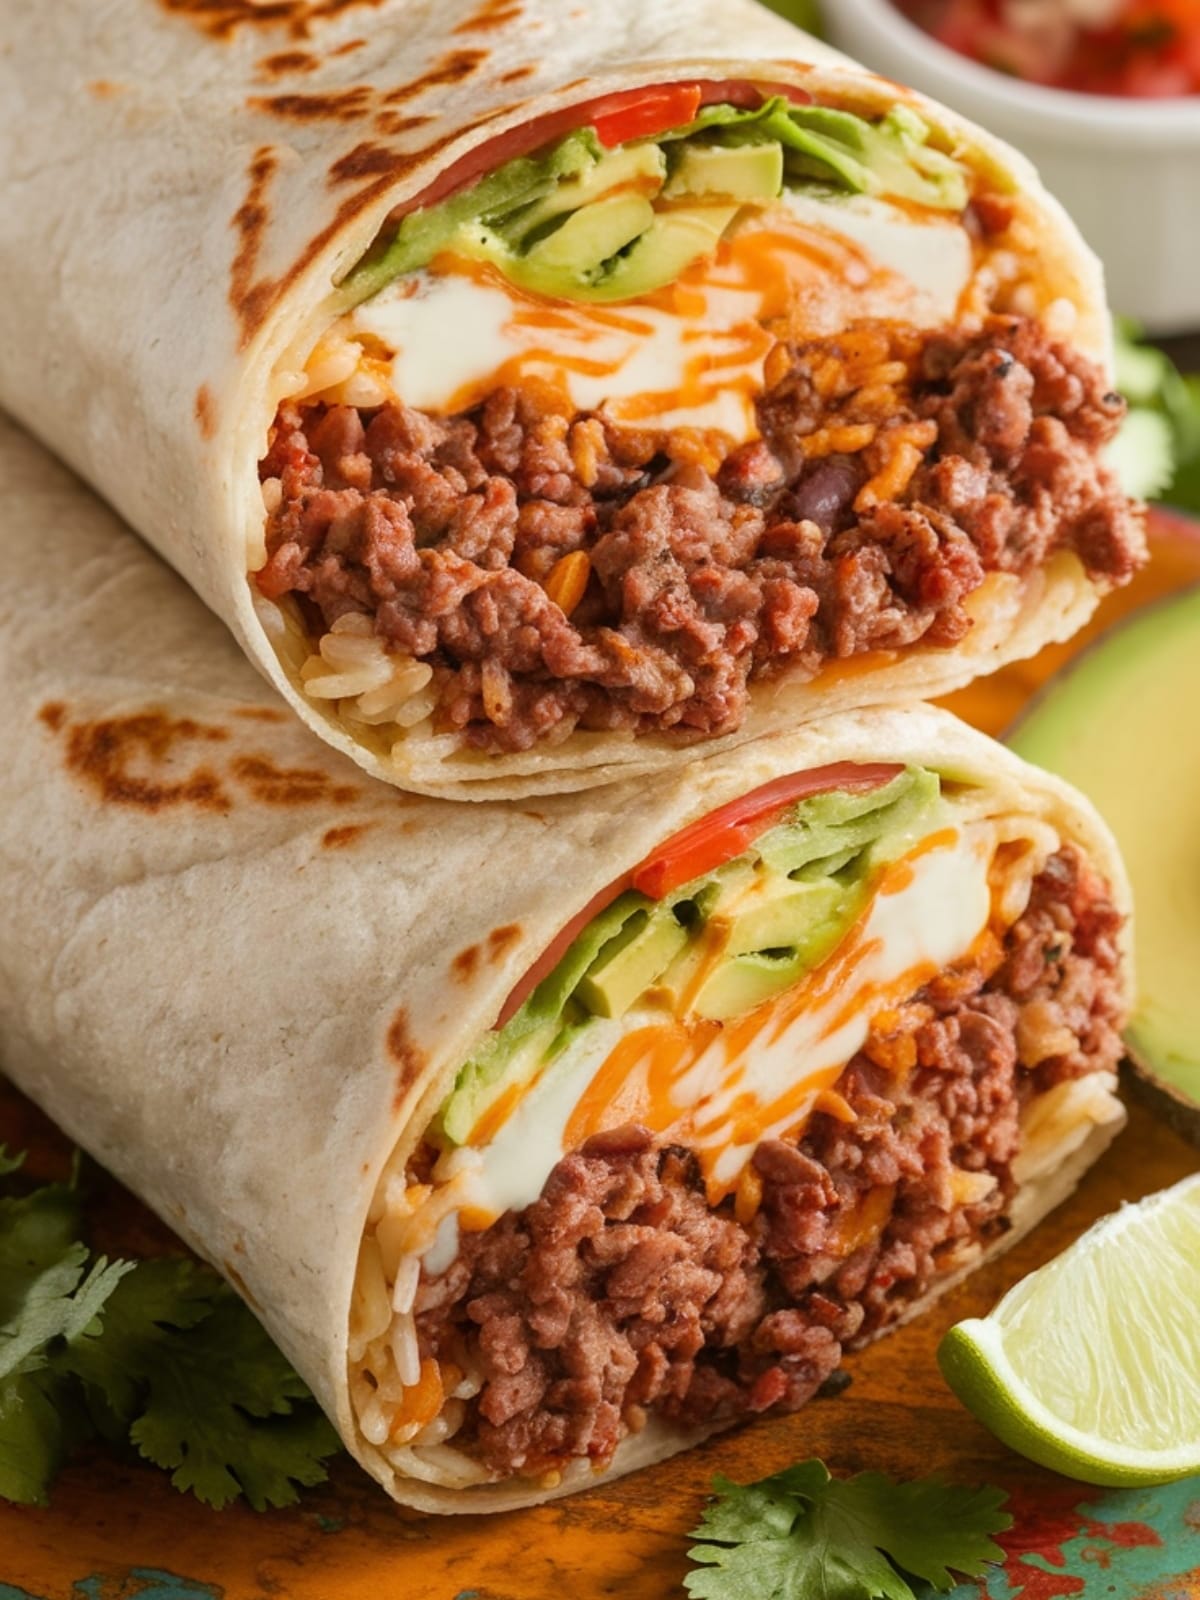
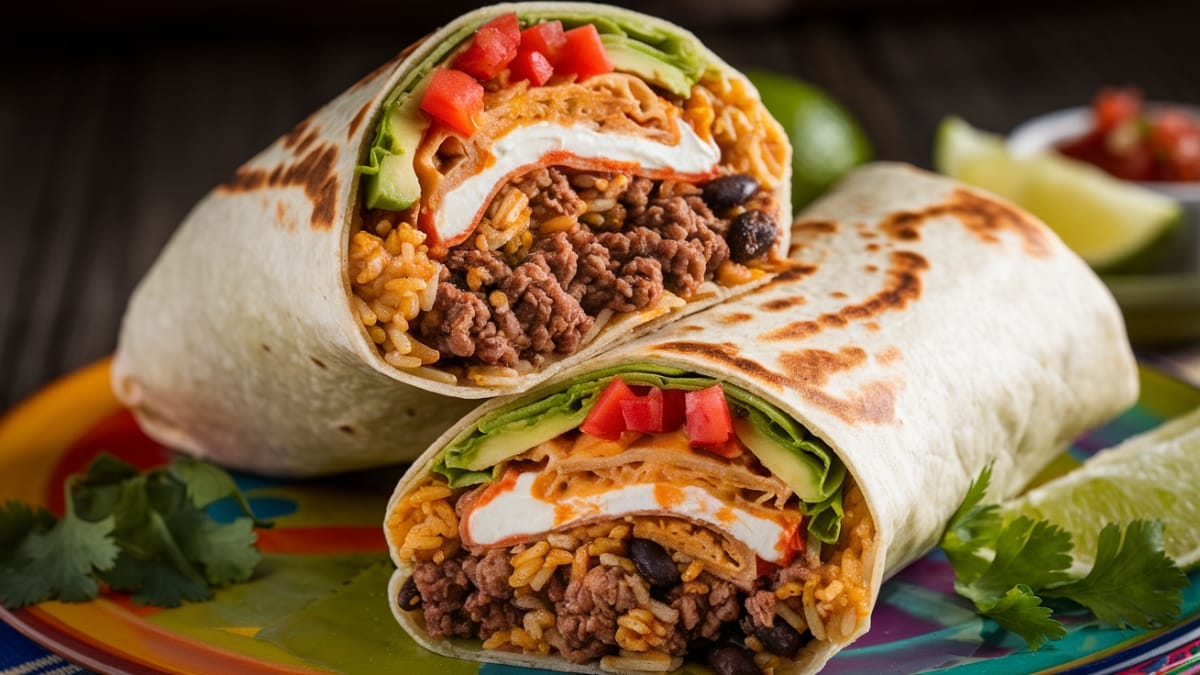
Step 3: Assemble Your Burritos
- Working with one tortilla at a time, lay it flat on your work surface.
- Spread about 1/3 cup of rice in a rectangular shape slightly off-center toward the bottom third of the tortilla.
- Top with about 1/3 cup of the beef mixture spread evenly over the rice.
- Add a few tablespoons of beans across the beef.
- Sprinkle with a generous handful of cheese (about 1/3 cup).
- Add your choice of cold toppings – some pico de gallo, lettuce, sour cream, avocado, and cilantro. Don't overdo it or your burrito will be hard to roll!
- Squeeze a little lime juice over the fillings for a brightness boost.
Step 4: Master the Burrito Fold
- Fold the bottom edge up and over the filling, pulling it back slightly to tighten the roll.
- Fold in both sides toward the center.
- Tightly roll up from the bottom, keeping the sides tucked in, until the burrito is completely rolled.
- For the perfect seal, you can place the burrito seam-side down in a hot, dry skillet for 1-2 minutes until it's sealed and lightly toasted.
- Optional: Wrap in foil if you're taking it to go or want to keep it warm.
Step 5: Serve and Enjoy
- Cut in half on a diagonal if desired (perfect for showcasing that beautiful cross-section).
- Serve immediately with extra salsa, sour cream, and hot sauce on the side.
- Watch them disappear and accept your burrito master status with humility.
Notes
- Tortilla selection: Large, fresh flour tortillas work best for burritos. Look for the “burrito size” ones that are 10-12 inches in diameter.
- Rice perfection: For Mexican-style rice, cook it with a bit of tomato paste, cumin, and garlic. Let it cool slightly before assembling to prevent a soggy burrito.
- Make ahead magic: Prepare the beef filling up to 3 days ahead and refrigerate. The assembled burritos (without cold toppings) keep well in the fridge for 24 hours.
- Freezer friendly: For make-ahead freezer burritos, omit the lettuce, sour cream, and avocado (add these fresh after reheating). Wrap tightly in foil, then place in a freezer bag for up to 3 months.
- Reheating tip: For the best texture, thaw frozen burritos in the refrigerator overnight, then reheat in a 350°F oven for 15-20 minutes or until heated through.
Common Mistakes to Avoid
- Overstuffing your burrito. I know it’s tempting to cram in as much goodness as possible, but an overstuffed burrito is doomed to rupture. Be reasonable with your filling amounts – you can always serve extra on the side!
- Not draining the beans. Skipping this step introduces unnecessary moisture that can lead to the dreaded soggy burrito syndrome. Always drain and rinse canned beans.
- Starting with cold tortillas. Cold tortillas crack when you try to roll them. Always warm your tortillas first for maximum pliability and that authentic texture.
Variations & Customizations
- Breakfast Burritos: Swap the rice for scrambled eggs and add some breakfast potatoes or hash browns. Keep the seasoned beef or substitute with bacon or breakfast sausage.
- Vegetarian Version: Replace the beef with sautéed mushrooms, bell peppers, and zucchini seasoned with the same spice blend. Add extra beans or crumbled tofu for protein.
- Bowl Style: Skip the tortilla altogether and serve all the components in a bowl over lettuce or cauliflower rice for a lower-carb option that’s just as satisfying.
FAQs
Can I use ground turkey or chicken instead of beef?
Absolutely! Both make excellent substitutes. Since they’re leaner, you might want to add a bit more oil when cooking and perhaps a touch more seasoning since beef naturally has a stronger flavor.
How do I keep my burrito from getting soggy?
Strategic layering is key! Place cheese directly on the tortilla to create a moisture barrier, make sure wet ingredients like salsa are well-drained, and don’t let assembled burritos sit too long before eating or toasting.
What’s the best way to serve these for a group?
Create a burrito bar! Prepare all the components and let everyone build their own. For maximum efficiency, pre-cook and season the beef, warm the tortillas, and set out all the toppings in separate bowls.
Final Thoughts
There’s something deeply satisfying about a really great burrito – that perfect handheld meal that manages to deliver complex flavors and multiple textures in every bite. While fancy restaurant versions might cost you $10-15 each, these homemade ground beef burritos deliver the same satisfaction at a fraction of the cost, with the added bonus of being customized exactly to your taste. Whether you’re feeding a hungry family, meal prepping for the week ahead, or just treating yourself to some serious comfort food, these burritos are guaranteed to elevate your Tex-Mex game from amateur to impressive. The only problem? Once people taste these, you might find yourself permanently assigned to “burrito duty” for every gathering going forward!


