Let me guess—you’re staring into your fridge right now, wondering how to transform those random ingredients into something that doesn’t scream “I’ve given up on cooking tonight.” Been there. Enter sausage and pepper quesadillas: the love child of Italian comfort food and Mexican convenience that’s about to rescue your weeknight dinner situation. They’re crispy, cheesy, packed with flavor, and require minimal brain power. Interested? I thought so.
Why This Recipe is Awesome
First off, these aren’t your basic cheese quesadillas that you make at 2 AM after a night out. These are grown-up quesadillas with ambition and complexity. The magic happens when spicy Italian sausage meets sweet bell peppers and everything gets cozy under a blanket of melted cheese.
What makes this recipe truly fantastic is its chameleon-like ability to work for literally any meal. Late breakfast? Sure. Quick lunch? Absolutely. Dinner with a side salad? Perfect. Midnight snack? Don’t mind if I do. Plus, they’re ready in 15 minutes – faster than delivery and approximately 100 times more satisfying than that sad freezer meal you were considering.
They’re also endlessly customizable. Vegetarian? Use plant-based sausage. Watching carbs? Try a low-carb wrap. Have random veggies about to go bad? Throw ’em in! This recipe doesn’t judge your food situation—it improves it.

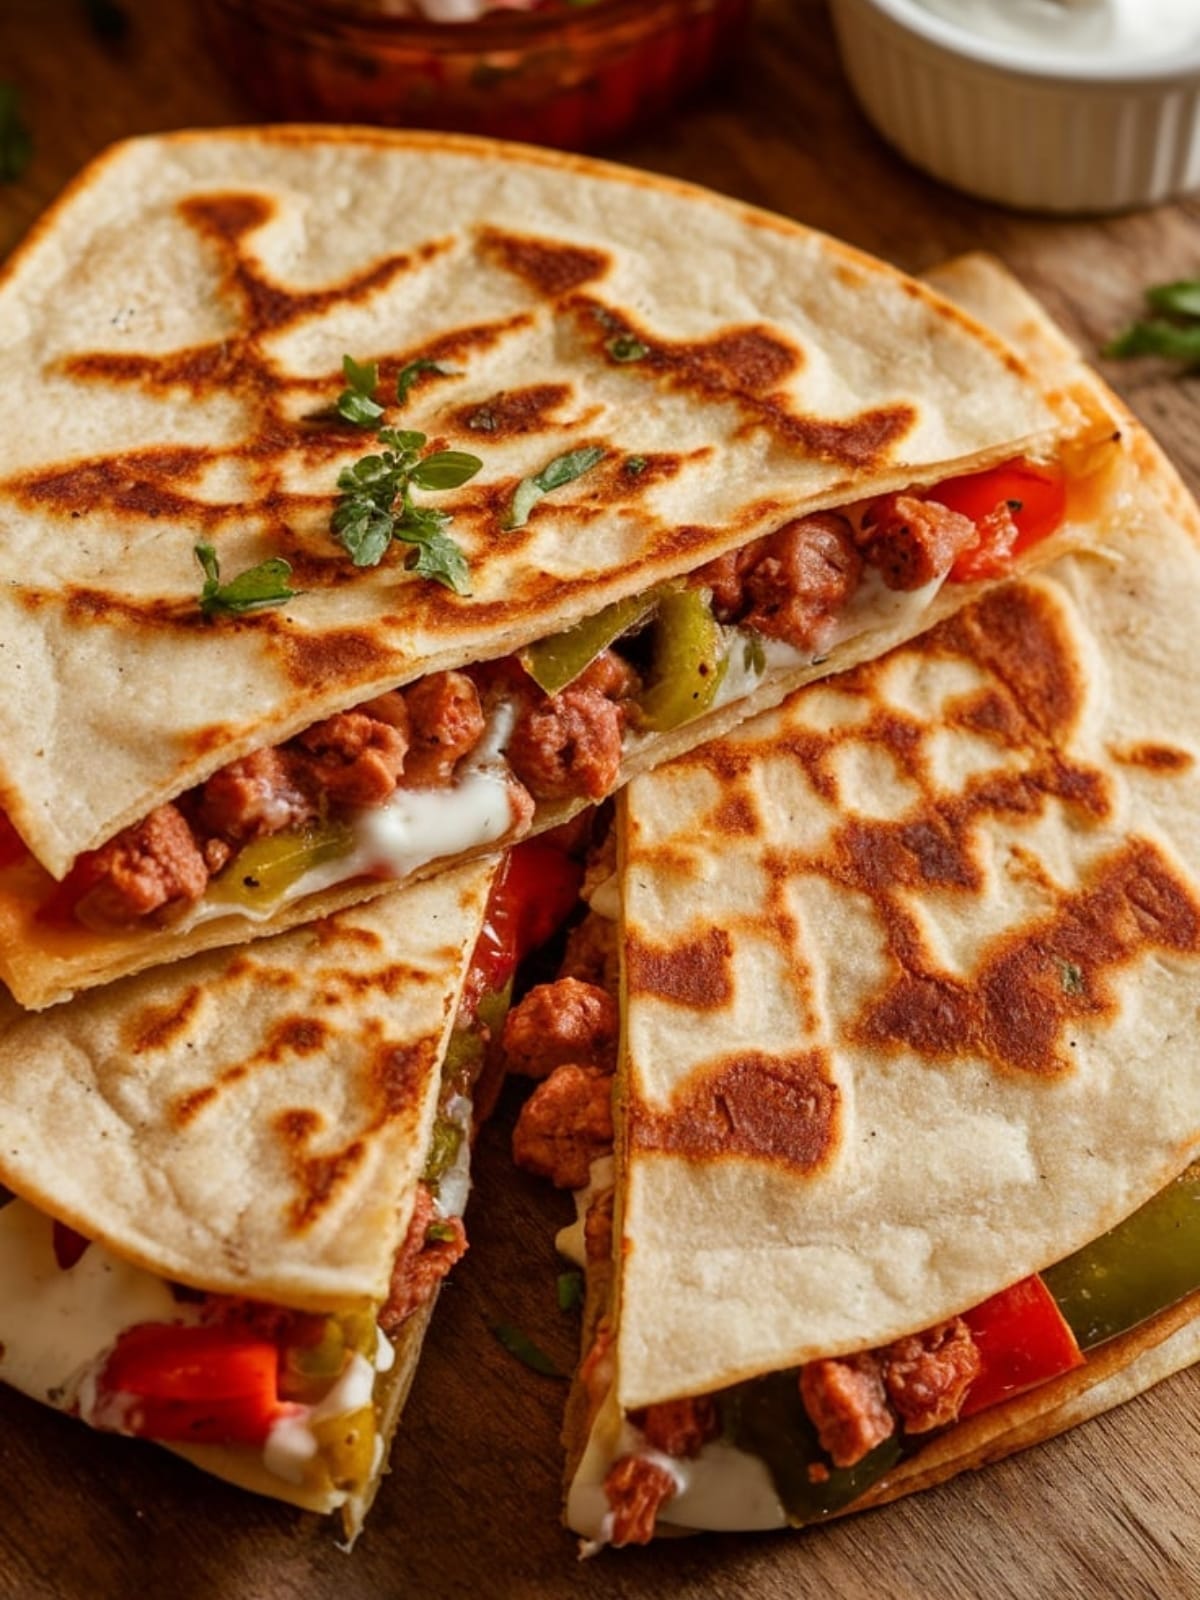
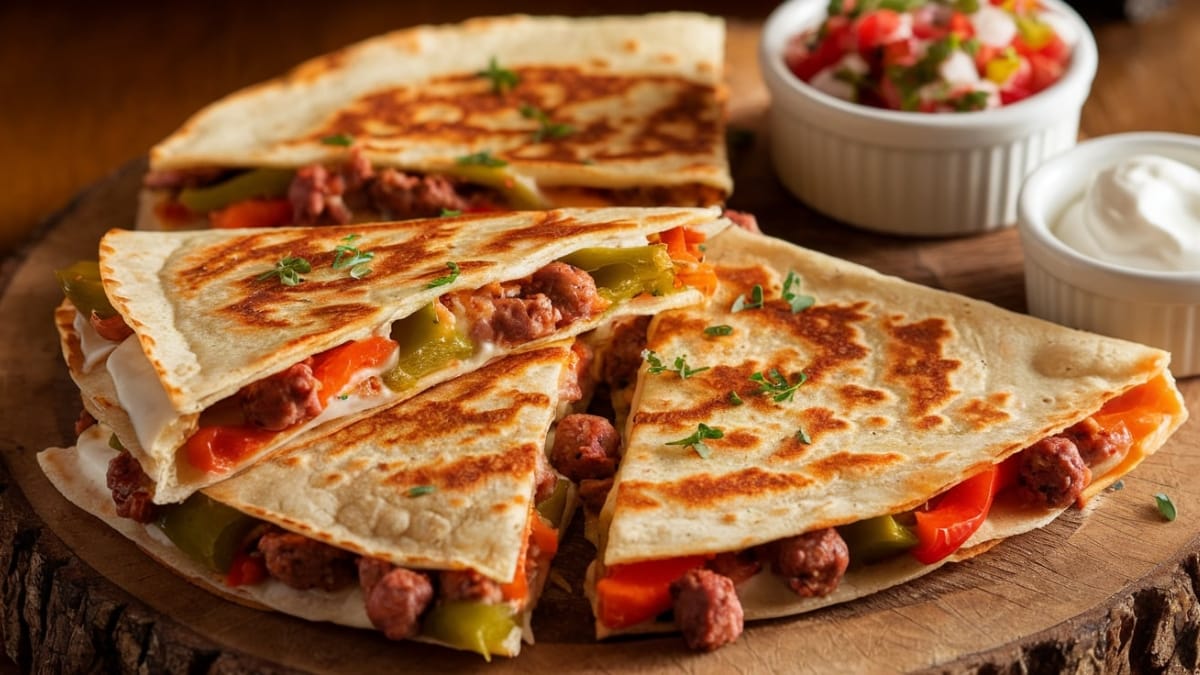
Sausage and Pepper Quesadillas
Ingredients
- 2 tablespoons olive oil divided
- 8 oz Italian sausage sweet or hot, casings removed
- 1 red bell pepper thinly sliced
- 1 green bell pepper thinly sliced
- 1 small onion thinly sliced
- 2 cloves garlic minced
- 1/2 teaspoon dried oregano
- 1/4 teaspoon red pepper flakes optional
- Salt and pepper to taste
- 4 large flour tortillas 8-10 inch
- 2 cups shredded cheese Mexican blend, mozzarella, or provolone
- 2 tablespoons butter softened (for crisping the tortillas)
- Optional: fresh chopped parsley or cilantro for garnish
- Optional: sour cream and salsa for serving
Instructions
- Prep your workspace by having all ingredients chopped and ready to go. This is a quick-cooking recipe, so being organized helps!
- Cook the sausage in a large skillet over medium-high heat with 1 tablespoon of olive oil. Break it into small crumbles with your spatula as it cooks (about 5 minutes).
- Add the vegetables – bell peppers, onions, and garlic to the same skillet. Cook for 3-4 minutes until they start to soften but still have some bite.
- Season with oregano, red pepper flakes (if using), salt, and pepper. Stir to combine everything and cook for 1 more minute.
- Transfer the sausage and pepper mixture to a bowl. Wipe the skillet clean with paper towels (carefully—it's hot!).
- Assemble each quesadilla by laying a tortilla flat, sprinkling 1/4 cup of cheese on half of it, adding about 1/3 cup of the sausage mixture, topping with another 1/4 cup of cheese, then folding the tortilla in half.
- Return the skillet to medium heat and add 1/2 tablespoon of olive oil.
- Cook quesadillas one or two at a time (depending on skillet size) for 2-3 minutes per side until golden brown and crispy. Pro tip: Spread a thin layer of butter on the outside of the tortilla before placing it in the pan for extra crispiness.
- Transfer to a cutting board, let rest for 1 minute (trust me on this—molten cheese is no joke), then cut into wedges.
- Repeat with remaining tortillas and filling.
- Serve immediately with optional garnishes and dipping options.
Notes
- For extra-crispy quesadillas, brush the outside of the tortillas with a little butter before cooking.
- The filling can be made up to 2 days ahead and refrigerated, making this an even quicker weeknight option.
- Don’t overstuff your quesadillas or they’ll leak and be difficult to flip.
- Let the quesadillas rest for a minute before cutting to allow the cheese to set slightly.
- If serving a crowd, keep finished quesadillas warm in a 200°F oven while you complete the batch.
- For a spicier version, add diced jalapeños or use hot Italian sausage.
Calories & Nutritional Info
- Calories per serving (1 quesadilla): Approximately 480
- Protein: 22g
- Carbohydrates: 30g
- Fat: 32g
- Fiber: 3g
- Sodium: 890mg (varies based on sausage type)
- Calcium: 35% DV from all that glorious cheese
Common Mistakes to Avoid
- Cranking the heat too high – Medium heat is your friend here; high heat will burn the tortilla before the cheese melts.
- Flipping too early – Wait until the bottom is golden brown before attempting the flip, or face the consequences of a sad, torn quesadilla.
- Skimping on the cheese – The cheese is both delicious AND functional—it’s the glue that holds everything together!
- Using wet ingredients – Pat your peppers dry after washing, or you’ll end up with soggy tortillas. Nobody wants a soggy quesadilla situation.
- Slicing immediately – Those 60 seconds of waiting after cooking allow the molten cheese to settle just enough to not burn your mouth and make a mess.
Alternatives & Substitutions
- Protein options: Chicken sausage, ground chicken, ground turkey, plant-based sausage, or chorizo for a more Mexican flavor profile.
- Vegetable variations: Add mushrooms, zucchini, spinach, or corn for different flavors and textures.
- Cheese choices: Pepper jack for heat, smoked gouda for depth, or dairy-free cheese for a vegan option.
- Tortilla alternatives: Corn tortillas (smaller so adjust filling amounts), low-carb wraps, or gluten-free tortillas.
- Add-ins: A spread of refried beans inside adds great texture, or try a layer of guacamole for creaminess.
- Cooking method: Use a panini press or waffle iron for hands-off cooking with great results.
- Make it breakfast: Add scrambled eggs to the filling for a morning version.
FAQs
Can I make these ahead of time?
You can prepare the sausage and pepper filling up to 2 days in advance and store it in the refrigerator. Assembly and final cooking are best done right before serving, though. Pre-made quesadillas tend to get soggy when stored—and soggy is the archenemy of quesadilla greatness.
How do I keep my quesadillas from getting soggy?
The key is managing moisture. Make sure your filling isn’t too wet (drain if necessary), and don’t stack hot quesadillas on top of each other—the steam will soften them. If you need to keep them warm, place them in a single layer on a baking sheet in a 200°F oven.
What’s the best way to reheat leftover quesadillas?
Skip the microwave unless you enjoy eating a sad, floppy tortilla with hot spots that can burn your mouth. Instead, place them in a dry skillet over medium-low heat or in a 350°F oven for about 5 minutes until crispy again and heated through.
Can I freeze these?
You can, but should you? The texture won’t be quite the same after freezing and reheating. If you must, wrap each cooled quesadilla individually in foil, place in a freezer bag, and freeze for up to 2 months. Reheat from frozen in a 375°F oven for 15-20 minutes.
What can I serve with these quesadillas?
These work great with a simple green salad, Mexican rice, black beans, guacamole, salsa, or sour cream. For a heartier meal, serve with tortilla soup or corn chowder. Or just eat them standing over the sink by themselves—no judgment here.
Can I use pre-cooked sausage to save time?
Absolutely! Slice pre-cooked sausage into thin pieces and add it when you’re sautéing the peppers and onions just to heat it through. Great way to use up those leftover grilled sausages from the weekend cookout.
How do I make this more kid-friendly?
If your little ones are spice-averse, use mild Italian sausage and skip the red pepper flakes. You can also finely dice the peppers and onions so they’re less detectable. In my experience, the cheese usually makes kids overlook any “suspicious” vegetables.
Final Thoughts
These sausage and pepper quesadillas are what happen when we let go of culinary boundaries and just focus on what tastes good. They’re the perfect solution for busy weeknights, unexpected guests, or those times when you want something satisfying without a ton of effort. Whether you stick to the recipe or use it as a template for cleaning out your fridge, these crispy, cheesy pockets of joy deserve a spot in your regular rotation. Now go forth and fold with confidence!


