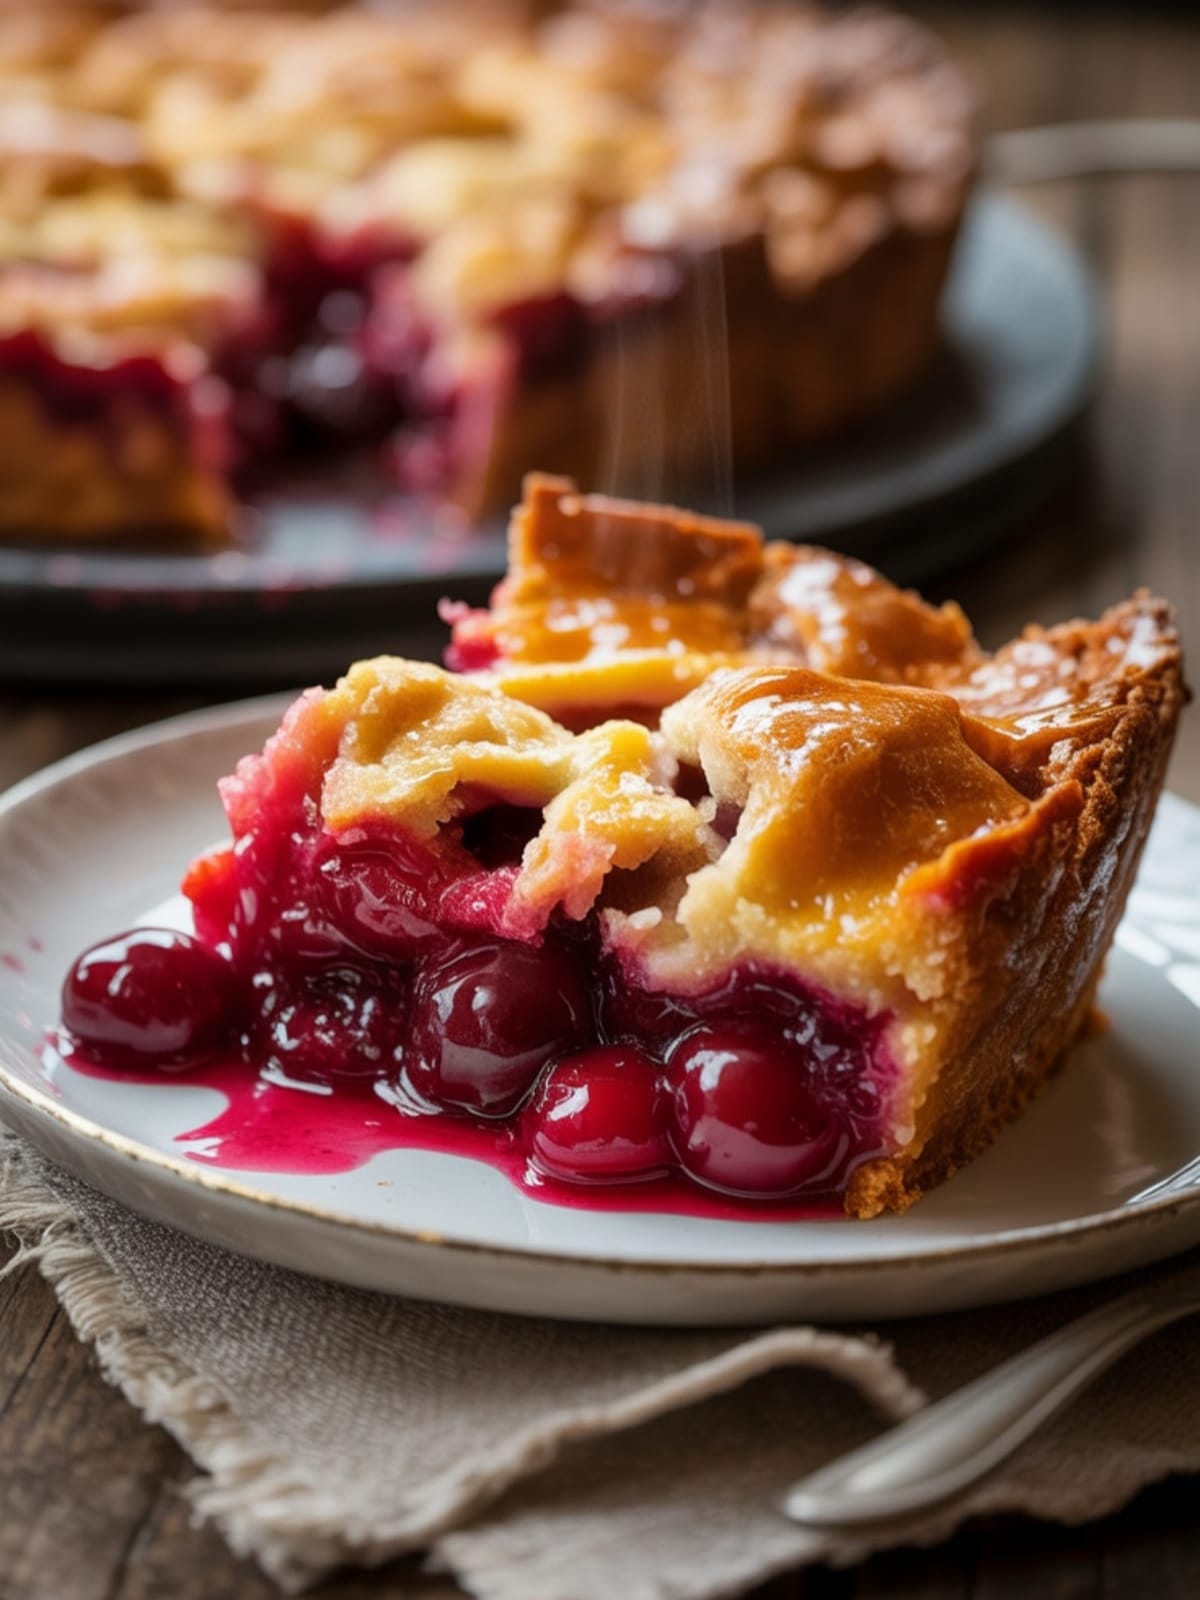
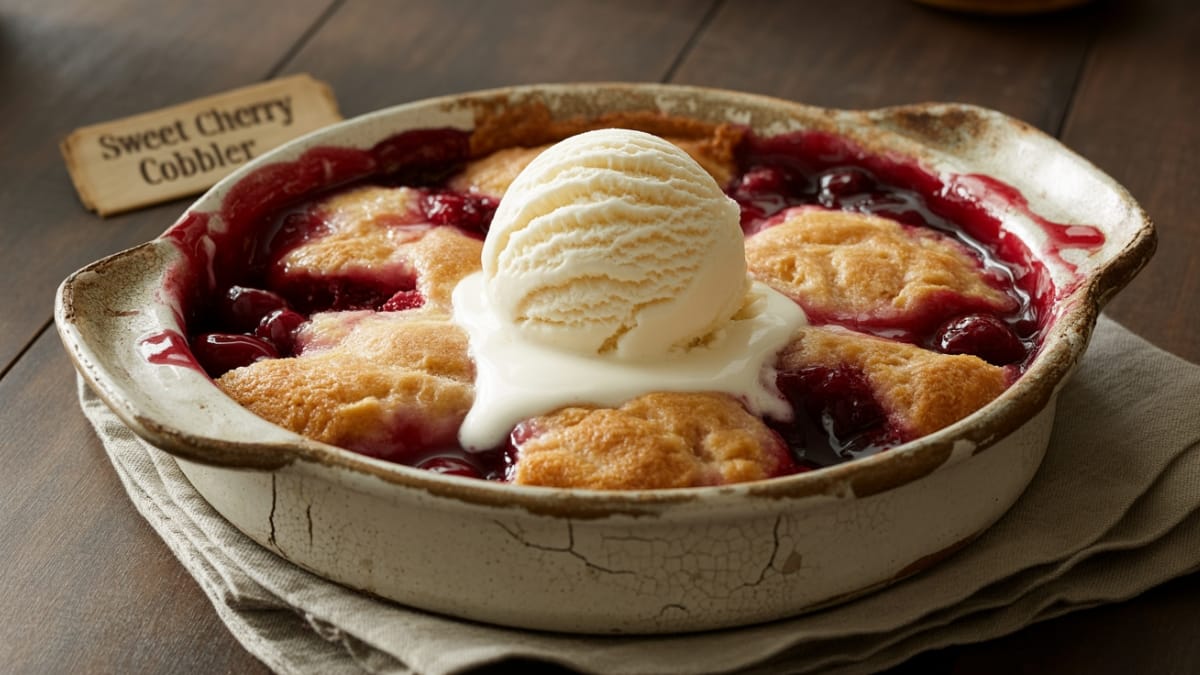
There’s nothing quite like the moment a bubbling, fragrant Sweet Cherry Cobbler emerges from the oven. That first spoonful—where the crisp, buttery topping meets warm, juicy cherries that burst with sweet-tart flavor—is pure kitchen magic. This isn’t just dessert; it’s a celebration of summer’s most treasured fruit transformed into something utterly comforting and irresistible.
Why This Recipe is Awesome
This Sweet Cherry Cobbler stands out because it strikes the perfect balance between rustic simplicity and show-stopping flavor.
Unlike fussy desserts that demand precision, this forgiving recipe welcomes both novice and experienced bakers.
The genius lies in how it showcases fresh cherries without overshadowing them. The fruit remains the star, while the cobbler topping—with its delicate crisp exterior and tender, almost cake-like interior—complements rather than competes with the cherry filling.
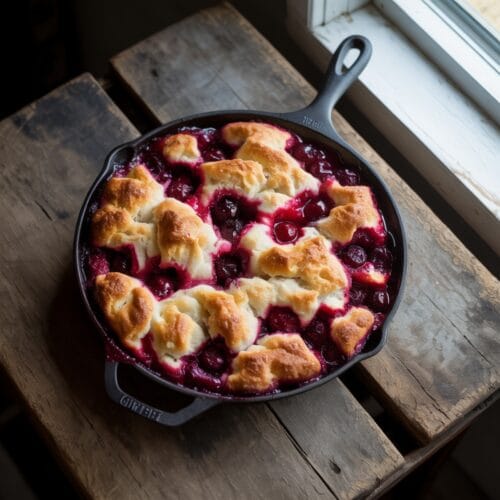
What I particularly love is how this dessert transforms dramatically in the oven. You’ll pour the batter in, arrange cherries on top, and through some culinary alchemy, the topping rises through the fruit to create perfect textural contrast in every bite.
Equipment needed: Cherry pitter, 9-inch baking dish, mixing bowls, whisk
Sweet Cherry Cobbler
Ingredients
- 4 cups fresh sweet cherries pitted (about 2 pounds whole cherries)
- ¾ cup granulated sugar divided
- 1 tablespoon cornstarch
- 1 tablespoon fresh lemon juice
- ¼ teaspoon almond extract optional but enhances cherry flavor beautifully
- 1 cup all-purpose flour
- 1 teaspoon baking powder
- ¼ teaspoon salt
- ½ cup unsalted butter melted
- 1 cup milk room temperature
- 1 teaspoon vanilla extract
- 2 tablespoons coarse sugar for topping optional
Instructions
- Preheat your oven to 350°F (175°C) and position a rack in the middle. Grease a 9-inch round or square baking dish.
- Prepare the cherry filling by combining pitted cherries, ¼ cup of granulated sugar, cornstarch, lemon juice, and almond extract in a bowl. Toss gently until cherries are evenly coated. Set aside for 10 minutes to allow juices to release.
- Make the cobbler batter by whisking together flour, remaining ½ cup sugar, baking powder, and salt in a medium bowl. In a separate bowl, combine melted butter, milk, and vanilla extract. Pour the wet ingredients into the dry ingredients and stir just until combined.
- Pour the batter into your prepared baking dish, spreading it evenly across the bottom. Do not stir after this point.
- Spoon the cherry mixture evenly over the batter, including all the accumulated juices. The fruit will appear to sink, but the batter will rise around and through the cherries during baking.
- Sprinkle the top with coarse sugar if using, for an extra crisp, sparkly crust.
- Bake for 40-45 minutes until the topping is golden brown and a toothpick inserted into the cake portion comes out clean. The filling should be bubbling around the edges.
- Allow the cobbler to cool for at least 15 minutes before serving to let the filling set slightly. Serve warm with vanilla ice cream or lightly whipped cream.
Notes
- If using frozen cherries, do not thaw them first. Add an extra tablespoon of cornstarch to account for additional moisture.
- The cobbler will keep at room temperature for 2 days or refrigerated for up to 5 days. Reheat individual portions in the microwave for 20-30 seconds.
- For a deeper flavor, try using brown sugar instead of granulated sugar in the cherry mixture.
- The almond extract is optional but pairs exceptionally well with cherries, even just a tiny amount elevates the natural cherry flavor.
- This recipe works beautifully with other summer fruits like peaches, blackberries, or a mixed berry blend.
Calories & Nutritional Info
- Calories: Approximately 320 per serving
- Carbohydrates: 48g
- Fat: 14g (9g saturated)
- Protein: 4g
- Contains: Dairy and gluten
- Suitable for: Vegetarians
Common Mistakes to Avoid
- Overmixing the batter – This creates a tough cobbler topping instead of the tender cake-like texture we want. Mix just until ingredients are incorporated.
- Skipping the cornstarch – Without it, your filling will be too runny. The cornstarch thickens the cherry juices into a luscious sauce.
- Stirring after adding the cherries – The magic of this cobbler is how the batter rises through the fruit during baking. Stirring disrupts this process.
- Serving immediately from the oven – Give your cobbler at least 15 minutes to set up. The resting time allows the filling to thicken properly.
- Using overly ripe cherries – While sweet, extremely soft cherries can make your cobbler soggy. Choose firm, ripe cherries for best results.
Alternatives & Substitutions
- Gluten-free version: Substitute the all-purpose flour with a 1:1 gluten-free baking blend.
- Dairy-free option: Replace butter with coconut oil and use almond milk or oat milk instead of regular milk.
- Sugar alternatives: Coconut sugar works well as a 1:1 replacement. For a less sweet cobbler, reduce sugar by up to ¼ cup.
- Fruit variations: Substitute cherries with blackberries, blueberries, peaches, or plums (adjust sugar based on fruit sweetness).
- Add-ins: Try mixing in ½ teaspoon of cinnamon or cardamom to the batter, or adding a handful of chocolate chips to the cherry mixture for a black forest twist.
FAQs
Can I use canned cherry pie filling instead of fresh cherries?
You can, but the result will be much sweeter and less vibrant. If using pie filling, skip the sugar, cornstarch, and lemon juice in the cherry mixture. I strongly recommend fresh cherries for the best flavor and texture.
Do I really need to pit all those cherries?
Yes, pitting is essential—nobody wants to bite into a hard cherry pit! Invest in an inexpensive cherry pitter to make the job quick and much less messy. If you don’t have one, a paper clip opened up can work in a pinch.
Why did my batter not rise through the cherries?
This typically happens if your baking powder is expired or if you stirred the mixture after adding the cherries. Check your baking powder’s freshness and remember the cardinal rule: no stirring after the cherries go on top!
Can I make this cobbler ahead of time?
Absolutely! You can prepare the cherry mixture and batter separately up to a day ahead, but don’t combine them until right before baking. The baked cobbler reheats beautifully at 300°F for about 15 minutes.
Why is my cobbler too runny?
This usually happens when the cherries release too much juice or the cobbler hasn’t cooled enough. Make sure to include the cornstarch and allow the cobbler to rest for at least 15-20 minutes after baking for the filling to set properly.
Final Thoughts
This Sweet Cherry Cobbler isn’t just a dessert—it’s a celebration of summer’s fleeting gifts. There’s something profoundly satisfying about transforming simple ingredients into something so comforting and delicious. Whether you’re making it for a special occasion or just because cherries are in season, I hope this recipe brings as much joy to your table as it has to mine.


