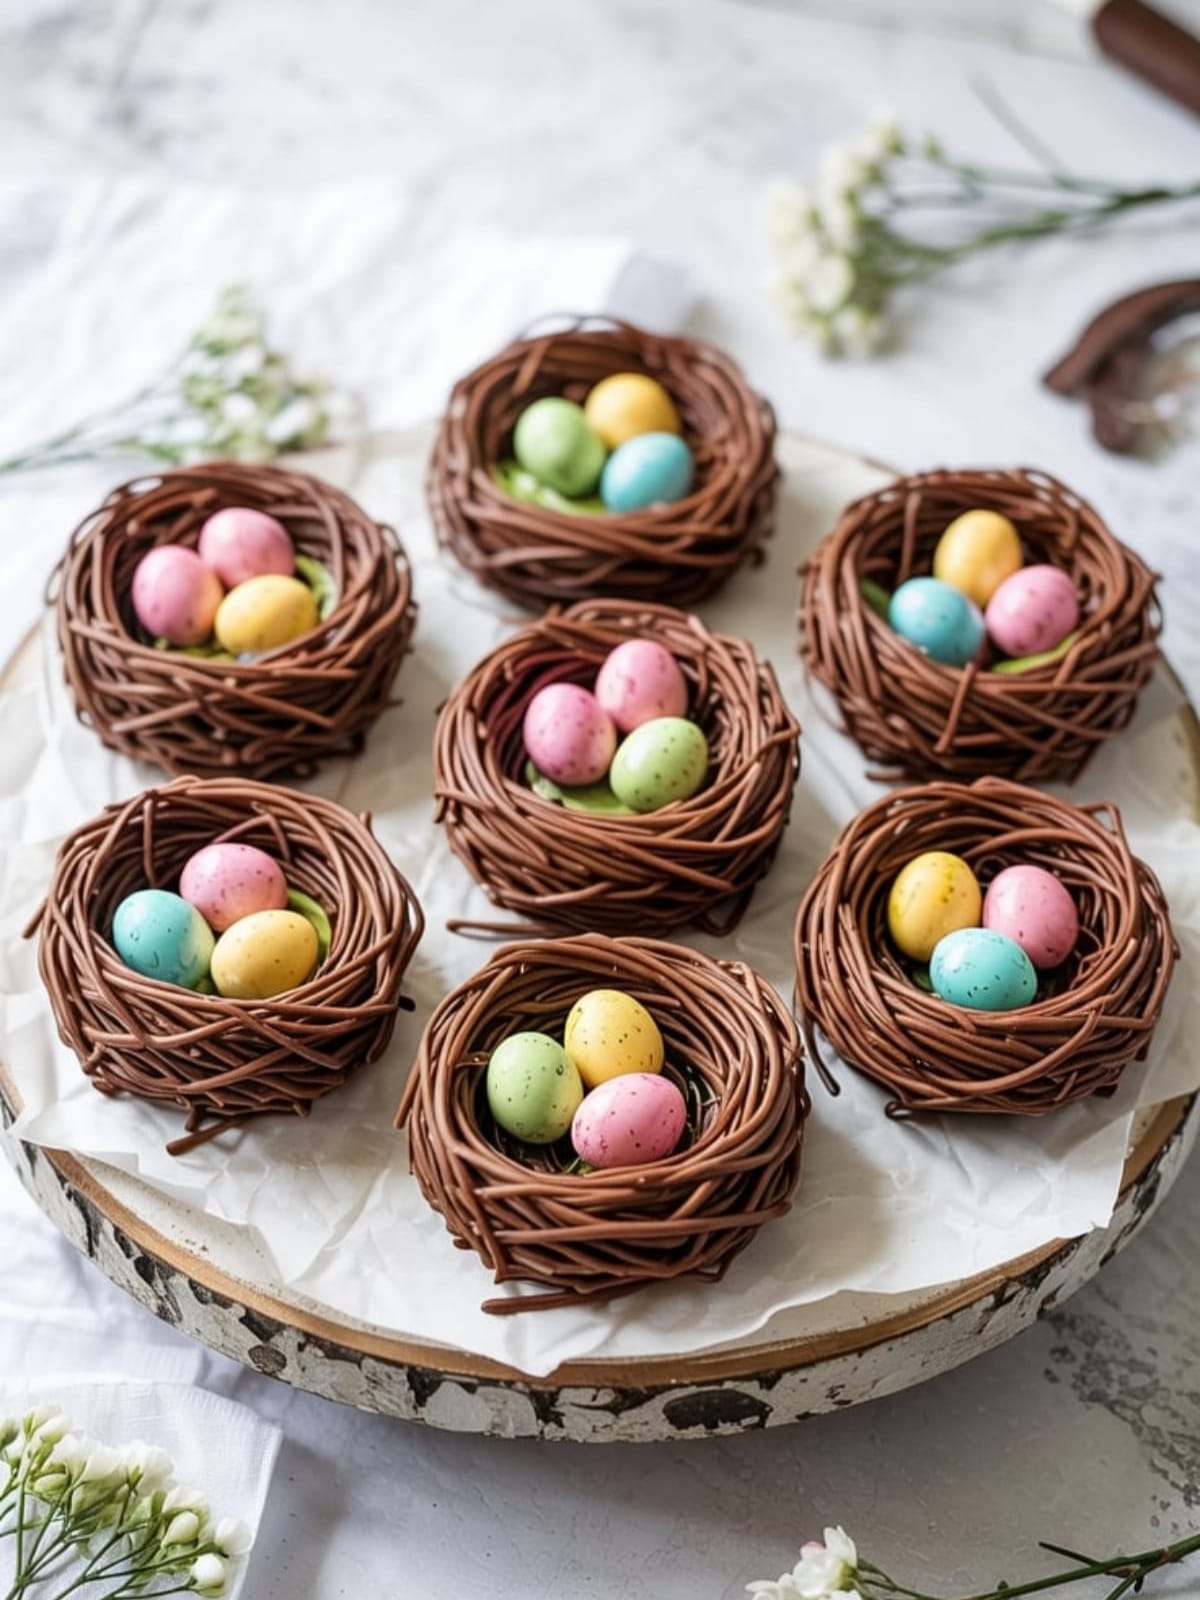
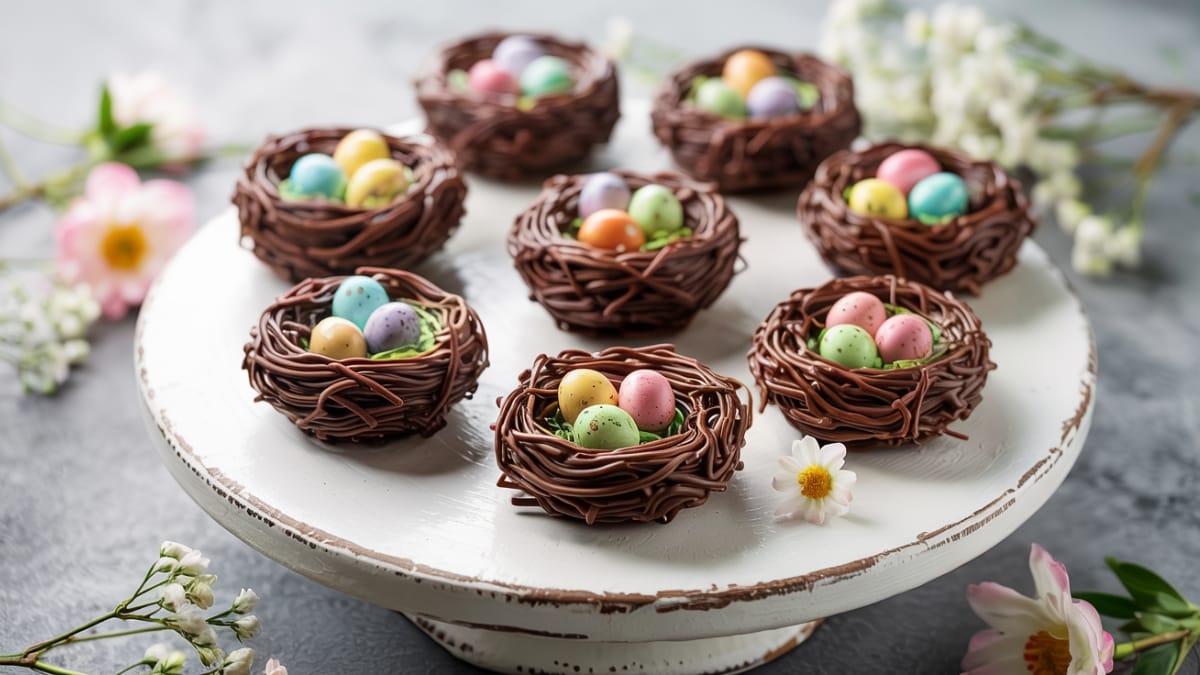
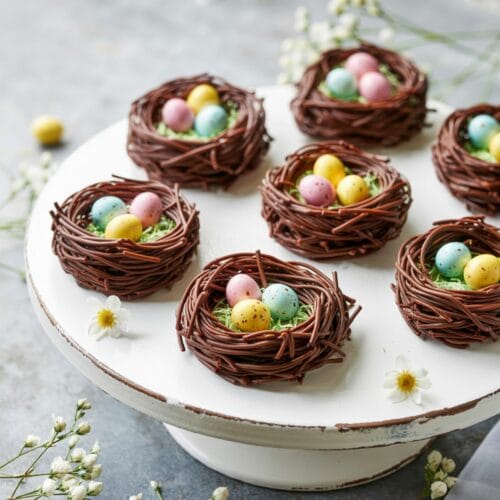
Ever wanted to make an Easter dessert that looks like you spent hours on it when really you just threw some ingredients together while binge-watching your favorite show? These Chocolate Nests are exactly that kind of magical recipe. They’re adorable, customizable, and—most importantly—they require zero actual baking skills. Just some melting, mixing, and arranging. Even that friend who burns water can make these successfully.
Why This Recipe is Awesome
This isn’t just any Easter treat—it’s the one you’ll turn to every spring when you need something festive but don’t have the patience for complicated recipes or fancy techniques.
The visual impact is immediate. Little chocolate nests filled with colorful candy eggs just scream “Easter!” without requiring you to pipe intricate flowers or construct elaborate layered desserts. They hit that perfect sweet spot between impressive and actually doable.
What I love most about this recipe is its versatility. You can dress these up for an elegant spring brunch or keep them casual for a kids’ Easter party. And since they’re made with just a handful of ingredients that you probably already have in your pantry, they’re perfect for last-minute entertaining or when you suddenly remember you promised to bring something to that Easter potluck.
Plus, they’re a hit with both kids and adults. Because let’s be honest—who doesn’t love the combination of chocolate and candy?
Chocolate Nests
Ingredients
For the Nests
- 2 cups chow mein noodles the crispy kind
- 1 cup chocolate chips semi-sweet, milk, or dark—your choice
- 1/2 cup butterscotch chips optional, but adds great flavor
- 2 tablespoons smooth peanut butter or substitute cookie butter or Nutella
- 1 tablespoon butter
For Decorating
- 36 small candy eggs like mini chocolate eggs, jelly beans, or Cadbury mini eggs
- Optional: 2-3 tablespoons shredded coconut tinted green with food coloring for “grass”
- Optional: 1/4 cup white chocolate chips melted, for drizzling
Instructions
- Prep your workspace. Line a 12-cup muffin tin with paper or silicone liners. If you don't have a muffin tin, line a baking sheet with parchment paper.
- Melt the chocolate mixture. In a microwave-safe bowl, combine the chocolate chips, butterscotch chips (if using), peanut butter, and butter. Microwave in 30-second intervals, stirring between each, until completely melted and smooth. Be careful not to overheat—chocolate can seize and become grainy if it gets too hot.
- Add the crunch. Pour the chow mein noodles into the melted chocolate mixture and gently fold them in with a wooden spoon until they're completely coated. The mixture should hold together when pressed but still have visible noodles for that "twiggy" nest look.
- Shape into nests. Divide the mixture evenly among the cupcake liners. Using your fingers or the back of a small spoon (dipped in a little cold water to prevent sticking), create an indentation in the center of each to form a nest shape. Don't worry about making them perfect—nests in nature aren't perfectly symmetrical either!
- Add the eggs. While the chocolate is still soft, place 2-3 candy eggs in the center of each nest. If you're using the green-tinted coconut "grass," sprinkle a small amount in each nest before adding the eggs.
- Chill to set. Refrigerate the nests for about 30 minutes, or until firm.
- Optional finishing touch. If desired, drizzle a little melted white chocolate over the nests in a zigzag pattern for added visual interest.
- Serve and amaze. Remove the nests from the refrigerator about 10 minutes before serving to take the chill off. Store any leftovers in an airtight container in the refrigerator for up to a week.
Notes
- Chow mein noodle tip: If the noodles in your area are very large, you can break them into smaller pieces before mixing for easier nest shaping.
- For a more “rustic” look, leave some noodle pieces sticking out at various angles.
- These can be made up to 3 days ahead and stored in the refrigerator in an airtight container.
- If your kitchen is warm, keep the nests refrigerated until shortly before serving to prevent the chocolate from getting too soft.
- Color coordination: Consider matching your candy eggs to your party décor for an extra festive touch.
- For a more elegant presentation, place each nest on a small square of parchment paper on a serving platter.
Calories & Nutritional Info
- Calories: Approximately 220 per nest
- Protein: 3g
- Fat: 13g
- Carbs: 25g
- Fiber: 1g
- Sugar: 18g (varies depending on candy used)
- Sodium: 150mg (primarily from the chow mein noodles)
- Allergen information: Contains wheat (from noodles), may contain peanuts, dairy, and soy depending on specific ingredients used
Common Mistakes to Avoid
- Overheating the chocolate. This can cause it to seize and become grainy. Microwave in short bursts and stir frequently.
- Making the nests too large. A little goes a long way with these rich treats. Keep them moderate-sized for the best eating experience.
- Not creating a deep enough indentation. If the center isn’t defined enough, your eggs will roll right off!
- Adding the eggs too late. Place them while the chocolate is still soft so they adhere properly.
- Using a substitute that’s too brittle. Some cereals might not hold up as well as chow mein noodles. If substituting, make sure your base has enough structural integrity.
- Rushing the chilling process. The nests need time to set properly or they’ll fall apart when handled.
- Making them in high humidity. Chocolate can absorb moisture and lose its snap in very humid conditions. If your kitchen is steamy, allow extra chilling time.
Alternatives & Substitutions
- No chow mein noodles? Try pretzel sticks broken into pieces, shredded wheat cereal, or corn flakes.
- Nut-free version: Use sunflower seed butter or cookie butter instead of peanut butter.
- Dairy-free option: Use dairy-free chocolate chips and coconut oil instead of butter.
- Different “eggs”: Try M&Ms, Skittles, jelly beans, yogurt-covered raisins, or malted milk balls.
- Flavor variations: Add 1/2 teaspoon of vanilla extract, almond extract, or orange zest to the chocolate mixture.
- Healthier twists: Use dark chocolate chips and reduce the amount of candy eggs, or substitute with dried fruit pieces.
- Adding texture: Mix in 1/4 cup of chopped nuts or toasted coconut with the chow mein noodles.
- Appearance options: Use white chocolate instead of regular chocolate for a different look, or add a few drops of food coloring to white chocolate for pastel-colored nests.
FAQs
Can I make these without peanut butter?
Absolutely! You can substitute any nut butter, cookie butter, Nutella, or even omit it entirely (though you might need a touch more regular butter to maintain the right consistency).
How far in advance can I make these?
These nests can be made up to 3 days ahead and stored in an airtight container in the refrigerator. They’ll stay fresh for about a week total.
My chocolate mixture is too thick to coat the noodles properly. What should I do?
Add 1-2 teaspoons of neutral oil (like vegetable or coconut) and stir well. This should loosen the mixture without affecting the flavor.
What’s the best way to transport these to a gathering?
Keep them in the cupcake liners and place them in a container with a tight-fitting lid. If it’s a warm day, transport them in a cooler with an ice pack to prevent melting.
How can I involve kids in making these?
Kids can help mix the noodles into the chocolate (once it’s cooled enough to be safe) and place the candy eggs in the nests. For younger children, you can pre-shape the nests and let them add the decorations.
Can I make one large nest instead of individual ones?
Yes! Spread the mixture into an 8-inch circle on a parchment-lined baking sheet, creating a depression in the center. Add more candy eggs to fill the larger space. Chill until firm, then slice into wedges to serve.
My nests are sticking to the paper liners. How can I prevent this?
Try using silicone liners instead, or lightly spray the paper liners with cooking spray before adding the chocolate mixture. You can also freeze the nests for 10 minutes before removing them from the liners.
Final Thoughts
Chocolate Nests are one of those magical recipes that deliver big on presentation while requiring minimal effort. They strike the perfect balance between looking adorably festive and actually being doable, even if you’re not particularly crafty in the kitchen. Whether you’re hosting an elaborate Easter brunch, need a last-minute contribution to a spring potluck, or just want to make something fun with kids, these no-bake treats fit the bill perfectly. Plus, the combination of crispy, chocolatey, and sweet candy is irresistible to pretty much everyone. So embrace the season, get a little messy with some melted chocolate, and watch as your simple creation becomes the cutest thing on the dessert table.


