There’s something magical about the aroma of cinnamon and apples baking together. It transforms your kitchen into a cozy sanctuary, wrapping everyone in warmth and nostalgia. This Cinnamon Apple Bread isn’t just a recipe—it’s an experience that brings the essence of fall harvest right to your breakfast table or afternoon tea.
Whether you’re a seasoned baker or just starting your culinary adventures, this bread strikes that perfect balance between impressive and approachable.
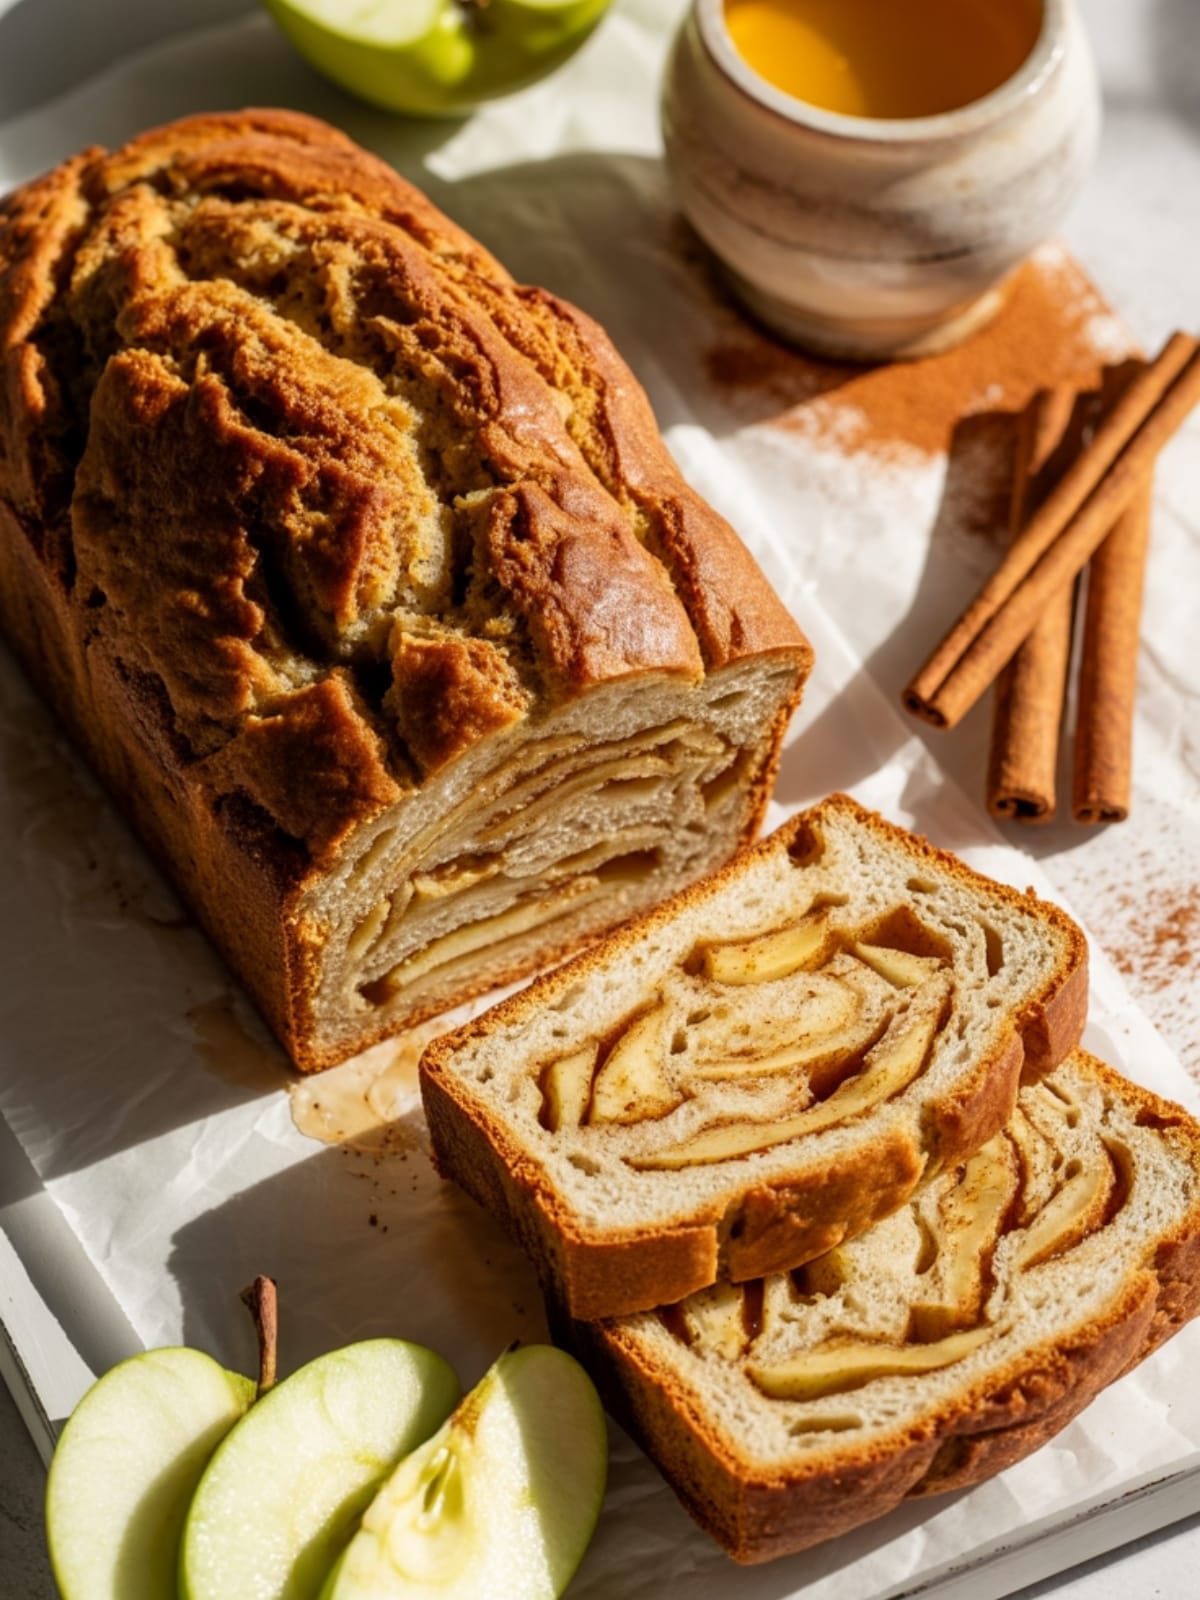
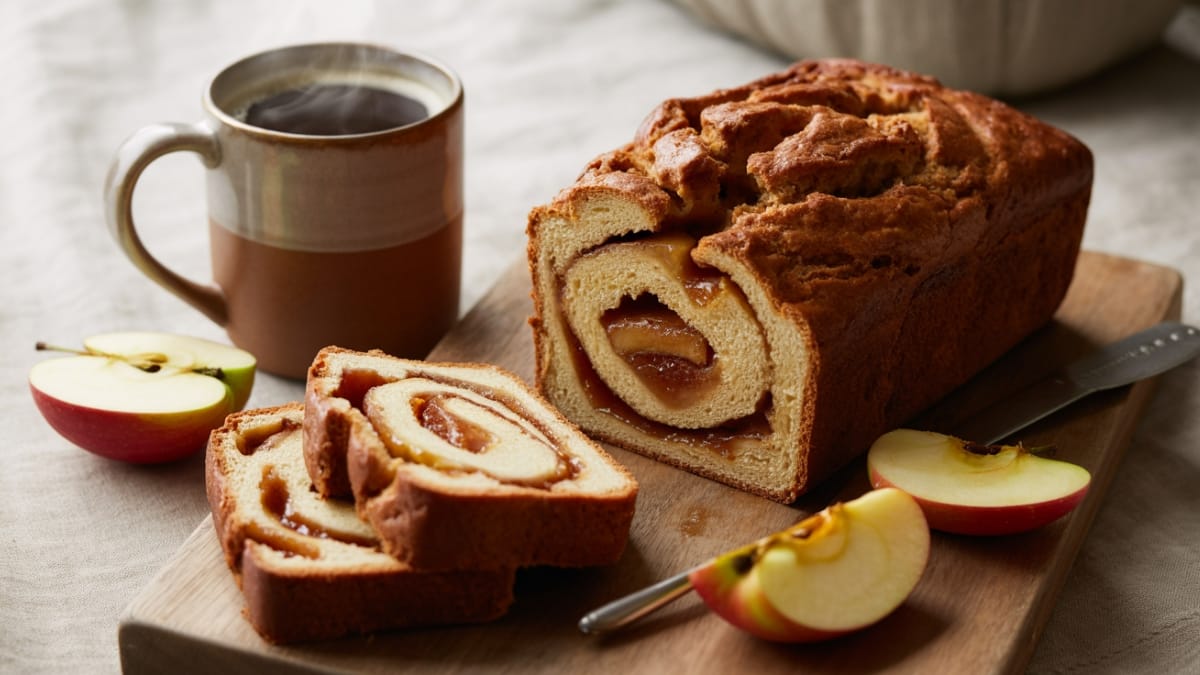
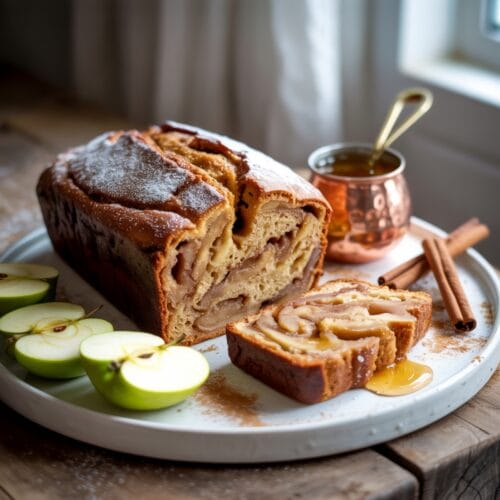
The tender crumb studded with juicy apple chunks and that irresistible cinnamon swirl running through the center? Pure genius in simplicity.
Why This Recipe is Awesome
This Cinnamon Apple Bread stands out because it delivers bakery-quality results without complicated techniques. The magic lies in its perfect balance—moist and tender without being heavy, sweet but not cloying, and complex in flavor despite its straightforward ingredient list.
Unlike many quick breads that can turn out dense, this recipe creates a delightfully light texture that still holds up to toasting.
The cinnamon-sugar layer doesn’t just add sweetness; it creates these gorgeous caramelized pockets throughout the loaf that make each bite slightly different from the last.
What truly elevates this bread is its versatility. It works beautifully as a breakfast treat, afternoon snack, or even as a light dessert when warmed and topped with a scoop of vanilla ice cream. Plus, it freezes beautifully, making it perfect for meal prep or unexpected guests.
Equipment needed: 9×5 inch loaf pan, mixing bowls, whisk, wooden spoon, measuring cups and spoons
Cinnamon Apple Bread
Ingredients
- 2 cups all-purpose flour
- 1 teaspoon baking powder
- 1/2 teaspoon baking soda
- 1/2 teaspoon salt
- 1 tablespoon ground cinnamon divided
- 2 large eggs room temperature
- 1/2 cup granulated sugar
- 1/2 cup brown sugar packed
- 1/2 cup vegetable oil or melted butter for richer flavor
- 1/4 cup buttermilk regular milk with 1 tsp lemon juice works in a pinch
- 2 teaspoons vanilla extract
- 2 cups apples peeled and diced (about 2 medium apples, Honeycrisp or Granny Smith recommended)
- 1/3 cup granulated sugar mixed with 1 teaspoon cinnamon for the swirl
- Optional: 1/2 cup chopped walnuts or pecans
Instructions
- Prepare your oven and pan. Preheat your oven to 350°F (175°C) and line a 9×5 inch loaf pan with parchment paper, leaving some overhang for easy removal. Alternatively, grease and flour the pan thoroughly.
- Mix the dry ingredients. In a medium bowl, whisk together the flour, baking powder, baking soda, salt, and 1 teaspoon of the cinnamon until well combined.
- Combine the wet ingredients. In a large bowl, beat the eggs, granulated sugar, and brown sugar until the mixture is light and slightly fluffy, about 2 minutes. Add the oil (or melted butter), buttermilk, and vanilla extract, whisking until smooth and fully incorporated.
- Create the batter. Gradually add the dry ingredients to the wet mixture, stirring just until combined—overmixing will make your bread tough. Gently fold in the diced apples (and nuts if using) with a rubber spatula or wooden spoon.
- Prepare the cinnamon swirl mixture. In a small bowl, mix the 1/3 cup of sugar with the remaining 2 teaspoons of cinnamon until evenly combined.
- Layer the batter with cinnamon swirl. Pour half of the batter into the prepared loaf pan. Sprinkle about 3/4 of the cinnamon-sugar mixture evenly over the batter. Add the remaining batter on top, then sprinkle with the remaining cinnamon-sugar mixture.
- Create the swirl effect. Using a butter knife or skewer, gently swirl through the batter in a figure-eight pattern, being careful not to overmix—you want distinct layers of cinnamon throughout the bread.
- Bake until golden and set. Place the loaf in the preheated oven and bake for 50-60 minutes, or until a toothpick inserted into the center comes out with just a few moist crumbs (not wet batter). If the top begins to brown too quickly, loosely cover with aluminum foil after about 35-40 minutes.
- Cool properly before slicing. Allow the bread to cool in the pan for 15 minutes, then use the parchment overhang to lift it out onto a wire rack to cool completely, at least 1 hour, before slicing. This resting period allows the texture to set properly.
Notes
- For maximum flavor, choose firm, tart-sweet apples like Honeycrisp, Braeburn, or Granny Smith that hold their shape during baking.
- The bread will stay moist longer if you store it wrapped tightly in plastic wrap or in an airtight container at room temperature for up to 3 days.
- For longer storage, freeze individual slices wrapped in plastic and aluminum foil for up to 3 months. Thaw at room temperature or reheat in the microwave.
- Don’t skip the parchment paper if possible—it makes removal from the pan much easier and prevents sticking.
- The bread actually tastes better on day 2 as the flavors have time to meld, making it perfect for make-ahead preparations.
Calories & Nutritional Info
- Calories: Approximately 290 calories per slice (based on 10 slices per loaf)
- Protein: 3g per slice
- Carbohydrates: 45g per slice
- Fat: 11g per slice
- Allergens: Contains wheat, dairy, and eggs
- Dietary notes: Can be adapted for dairy-free diets by using plant-based milk with lemon juice instead of buttermilk
Common Mistakes to Avoid
- Overmixing the batter – Stir just until ingredients are combined; overmixing develops gluten and creates a tough, dense bread.
- Using cold ingredients – Room temperature eggs and buttermilk blend more evenly with other ingredients, creating a better texture.
- Cutting into the bread too soon – The cooling process is crucial for texture development; cutting too early can make the bread gummy and collapse.
- Inaccurate measurements – Quick breads rely on precise ratios; use proper measuring cups for dry ingredients and liquid measuring cups for wet ones.
- Skipping the toothpick test – Visual cues can be misleading; always check for doneness with a toothpick in the center of the loaf.
Alternatives & Substitutions
- Flour alternatives: Replace up to half the all-purpose flour with whole wheat flour for a nuttier flavor and more fiber. For gluten-free, use a 1:1 gluten-free baking blend.
- Sugar options: Reduce sugar by up to 25% for a less sweet bread, or substitute coconut sugar for a lower glycemic index option (note: this will darken the bread slightly).
- Oil variations: Substitute applesauce for half the oil to reduce fat, or use coconut oil for a subtle tropical note.
- Dairy-free adjustment: Use almond milk or oat milk with 1 teaspoon of lemon juice instead of buttermilk.
- Fruit variations: Try pears instead of apples, or use a combination of apples and cranberries for a tart twist.
- Spice customization: Add 1/4 teaspoon nutmeg and 1/8 teaspoon cloves for a more complex spice profile, or include 1 teaspoon of orange zest for brightness.
FAQs
Why did my apple bread turn out dense?
Dense bread usually comes from overmixing the batter (developing too much gluten) or using too much fruit that releases excess moisture. Mix just until ingredients are combined, and be sure to measure your apples as directed. Also check that your leavening agents (baking powder/soda) are fresh.
Can I make this bread ahead of time for a special occasion?
Absolutely! This bread actually develops deeper flavor after a day. Bake it up to 2 days ahead, cool completely, wrap tightly in plastic wrap, and store at room temperature. For longer storage, freeze for up to 3 months and thaw overnight in the refrigerator.
My bread is browning too quickly in the oven.
What should I do? This is common with cinnamon-sugar toppings. Simply tent the bread loosely with aluminum foil after about 30-35 minutes of baking to prevent over-browning while allowing the center to finish cooking.
Can I turn this recipe into muffins instead?
Yes! Fill lined muffin cups about 2/3 full, add a small spoonful of cinnamon-sugar in the middle, top with remaining batter, and sprinkle with cinnamon-sugar. Bake at 350°F for 18-22 minutes or until a toothpick comes out clean. Yields approximately 12-14 muffins.
Why do I need to peel the apples?
Peeling is recommended because apple skins can create an unpleasant texture in the soft bread. However, if you prefer the added nutrition and don’t mind the texture, you can leave peels on—just be sure to wash them thoroughly and use organic apples if possible.
Final Thoughts
This Cinnamon Apple Bread is more than just a recipe—it’s an invitation to slow down and savor something truly special. Whether you’re enjoying a slice with your morning coffee or serving it to delighted friends, you’re creating moments of warmth and connection. The beautiful thing about home baking is that each loaf tells a story—your story. So go ahead, make this recipe your own, and let the comforting aroma fill your home.


