Have you ever been caught with a spoon in the cookie dough bowl? Don’t worry, you’re not alone. That irresistible combination of butter, sugar, and chocolate chips speaks to something primal in all of us.
Now imagine capturing that forbidden pleasure in a safe-to-eat, sliceable treat that you can share (or not—I won’t judge). Cookie Dough Fudge takes everything we love about sneaking raw cookie dough and transforms it into a legitimate dessert that you can proudly display on your counter.
Why This Recipe is Awesome
This Cookie Dough Fudge isn’t just another sweet treat—it’s a genius solution to that eternal dilemma: wanting to eat cookie dough without worrying about raw eggs. The brilliance lies in how it perfectly balances the nostalgic flavor of chocolate chip cookie dough with the dense, satisfying texture of traditional fudge. What makes this recipe truly special is its versatility.
It’s sophisticated enough for a dinner party dessert board but casual enough for a movie night snack. The heat-treated flour ensures it’s completely safe to eat, while the fudge element gives it structure and that melt-in-your-mouth quality that makes you close your eyes with each bite. Plus, there’s no baking required!
In a world of complicated desserts that demand precision timing and temperature control, this fudge is refreshingly straightforward. It’s the perfect project for kids, novice bakers, or anyone who wants impressive results without turning on the oven.
Equipment needed: 8×8 baking pan, parchment paper, microwave-safe bowl, mixing bowl, rubber spatula, measuring cups and spoons
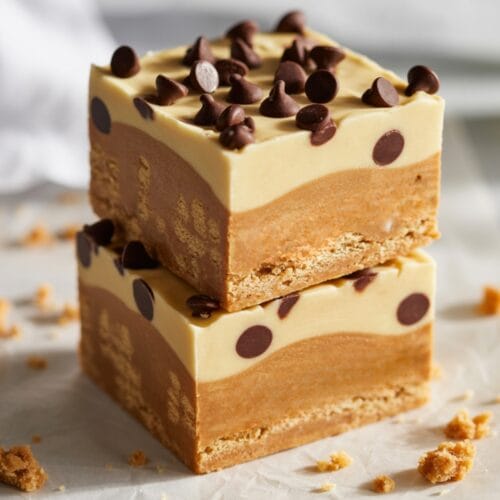
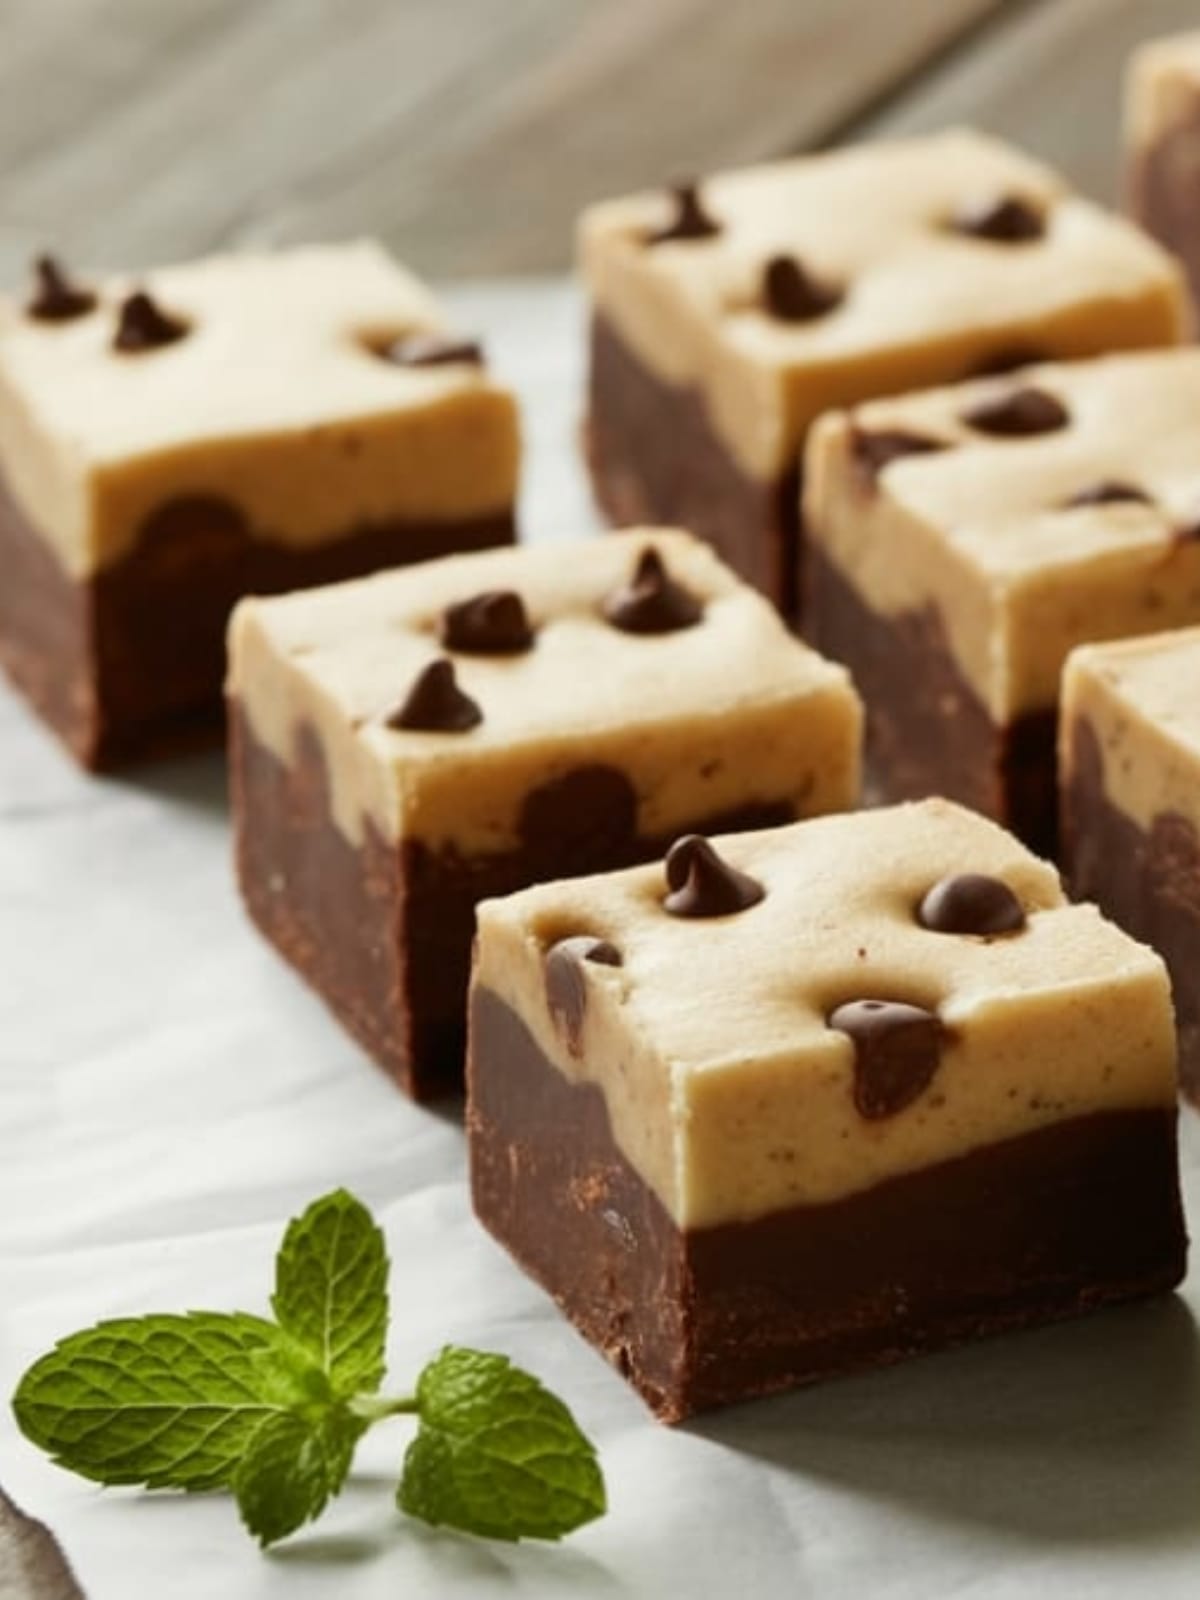
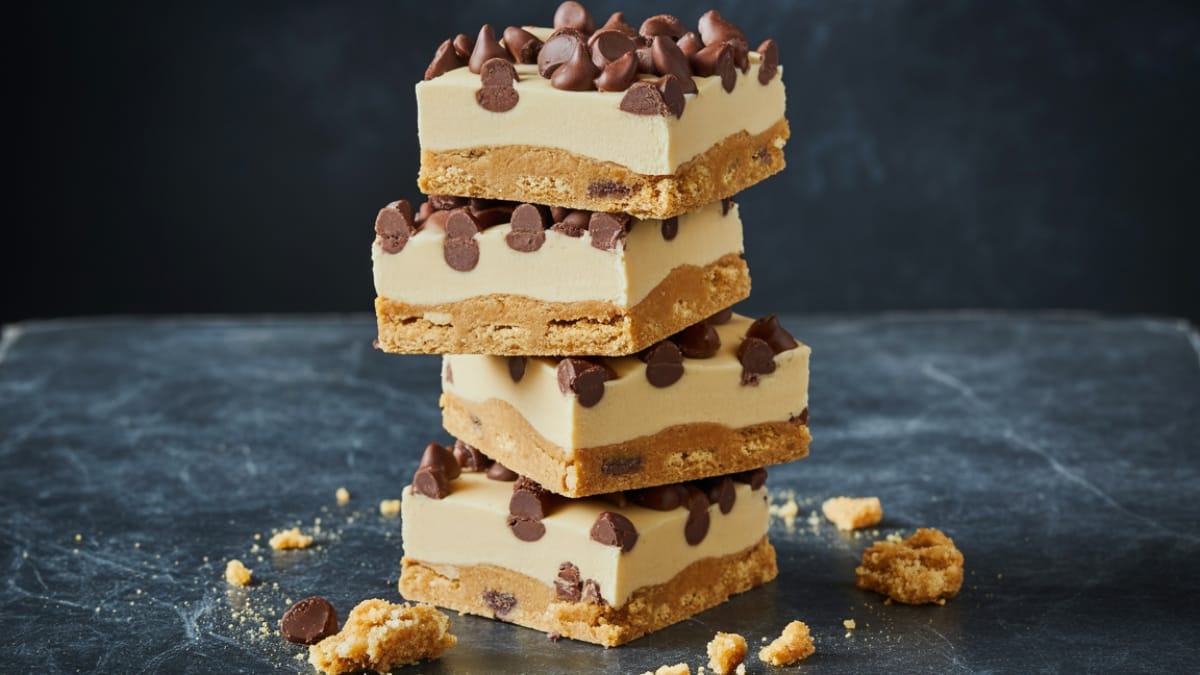
Cookie Dough Fudge
Ingredients
- 1 cup unsalted butter divided (½ cup for cookie dough layer, ½ cup for fudge layer)
- 1 cup light brown sugar packed
- ¼ cup granulated sugar
- 2 teaspoons vanilla extract
- 2 cups all-purpose flour heat-treated (see notes)
- ½ teaspoon salt
- 3 tablespoons milk
- 1 cup mini chocolate chips divided
- 1 can 14 oz sweetened condensed milk
- 2 cups white chocolate chips
- ½ teaspoon salt
Instructions
- Prepare your pan by lining an 8×8 inch baking dish with parchment paper, leaving overhang on the sides for easy removal later. This prevents sticking and makes clean-up a breeze.
- Heat-treat the flour by spreading it on a microwave-safe plate and microwaving in 30-second intervals, stirring between each, until it reaches 165°F (about 1-2 minutes total). Let cool completely before using.
- Make the cookie dough layer by creaming ½ cup of softened butter with brown sugar and granulated sugar in a large bowl until light and fluffy, about 2-3 minutes. Add vanilla extract and mix well.
- Add the dry ingredients by mixing in the cooled heat-treated flour and ½ teaspoon salt until just combined. Stir in milk until the mixture resembles cookie dough consistency. Fold in ½ cup of mini chocolate chips.
- Press the cookie dough evenly into the bottom of your prepared pan, creating a smooth layer. Place in the refrigerator while preparing the fudge layer.
- Create the fudge layer by combining the remaining ½ cup butter, sweetened condensed milk, white chocolate chips, and remaining ½ teaspoon salt in a microwave-safe bowl. Microwave in 30-second intervals, stirring between each, until smooth and fully melted.
- Pour the fudge mixture over the chilled cookie dough layer, spreading it evenly with a spatula. Work quickly as it will begin to set.
- Sprinkle the remaining chocolate chips over the top of the warm fudge layer, pressing them in gently so they stick but remain visible.
- Refrigerate the fudge for at least 2 hours, or until completely set and firm to the touch.
- Cut into squares by lifting the fudge out of the pan using the parchment paper overhang, then slicing with a sharp knife. For cleaner cuts, wipe the knife between slices.
Notes
- Heat-treating flour is essential for food safety as raw flour can contain harmful bacteria. Don’t skip this step!
- For a firmer fudge that holds its shape at room temperature longer, you can add ¼ teaspoon of cream of tartar to the fudge mixture.
- This fudge freezes beautifully for up to 3 months. Wrap individual pieces in plastic wrap, then store in an airtight container.
- For a more pronounced cookie dough flavor, try browning the butter for the cookie dough layer before creaming it with the sugars.
- The fudge will be quite soft at room temperature, so it’s best served cold from the refrigerator.
Calories & Nutritional Info
- Calories: Approximately 350 calories per square
- Fat: 19g (11g saturated)
- Carbohydrates: 42g (35g sugars)
- Protein: 4g
- Allergens: Contains dairy and wheat
- Not suitable for: Vegan, dairy-free, or gluten-free diets without modifications
Common Mistakes to Avoid
- Skipping heat-treating the flour – Raw flour can contain harmful bacteria, so don’t skip this crucial food safety step.
- Overheating the white chocolate – White chocolate burns easily! Use short microwave intervals and stir frequently to prevent scorching.
- Not letting layers set properly – Rushing the chilling process will result in messy, hard-to-cut fudge that doesn’t hold its shape.
- Using cold butter for the cookie dough – Room temperature butter creams much better with sugar, creating that authentic cookie dough texture.
- Cutting with a dull knife – A sharp knife makes clean cuts; dull knives drag through the fudge, creating messy edges.
Alternatives & Substitutions
- Gluten-free option: Substitute the all-purpose flour with a 1:1 gluten-free baking flour blend (still heat-treat it).
- Dairy-free version: Use plant-based butter, dairy-free chocolate chips, and coconut condensed milk.
- Mix-in variations: Try swapping mini chocolate chips for M&Ms, chopped Oreos, toffee bits, or chopped nuts for different flavor profiles.
- Flavor twists: Add ½ teaspoon of almond extract to the cookie dough layer for a marzipan-like flavor, or use brown butter in the fudge layer for a nutty depth.
- Lower sugar option: Reduce the granulated sugar to 2 tablespoons and use sugar-free white chocolate chips in the fudge layer.
FAQs
Why do I need to heat-treat the flour?
Raw flour can harbor harmful bacteria like E. coli, making it unsafe to consume without heating to 165°F. This quick heat treatment eliminates potential pathogens without changing the flour’s functionality in the recipe.
Can I make this recipe ahead of time?
Absolutely! This fudge actually benefits from being made 1-2 days in advance, as the flavors meld and develop. Store it covered in the refrigerator for up to a week, or freeze for longer storage.
Why did my white chocolate seize up when melting?
White chocolate is temperamental and can seize if overheated or if water gets into the mixture. Use low heat, stir constantly, and make sure all utensils are completely dry to prevent this issue.
Can I use milk chocolate instead of white chocolate for the fudge layer?
You can, but it will change both the flavor profile and appearance significantly. The milk chocolate will overpower the cookie dough flavor rather than complement it as the more neutral white chocolate does.
How do I know when my fudge is properly set?
When properly set, the fudge should feel firm to the touch and not indent when gently pressed with a finger. It should also cleanly release from the parchment paper when lifted.
Final Thoughts
Cookie Dough Fudge isn’t just a treat—it’s a conversation starter, a nostalgic journey, and a clever culinary hack all wrapped into one delicious package. Whether you’re making it for yourself or sharing with others, there’s something magical about transforming that forbidden spoonful of cookie dough into a legitimate dessert that everyone can enjoy worry-free. So go ahead, embrace your inner cookie dough lover!


