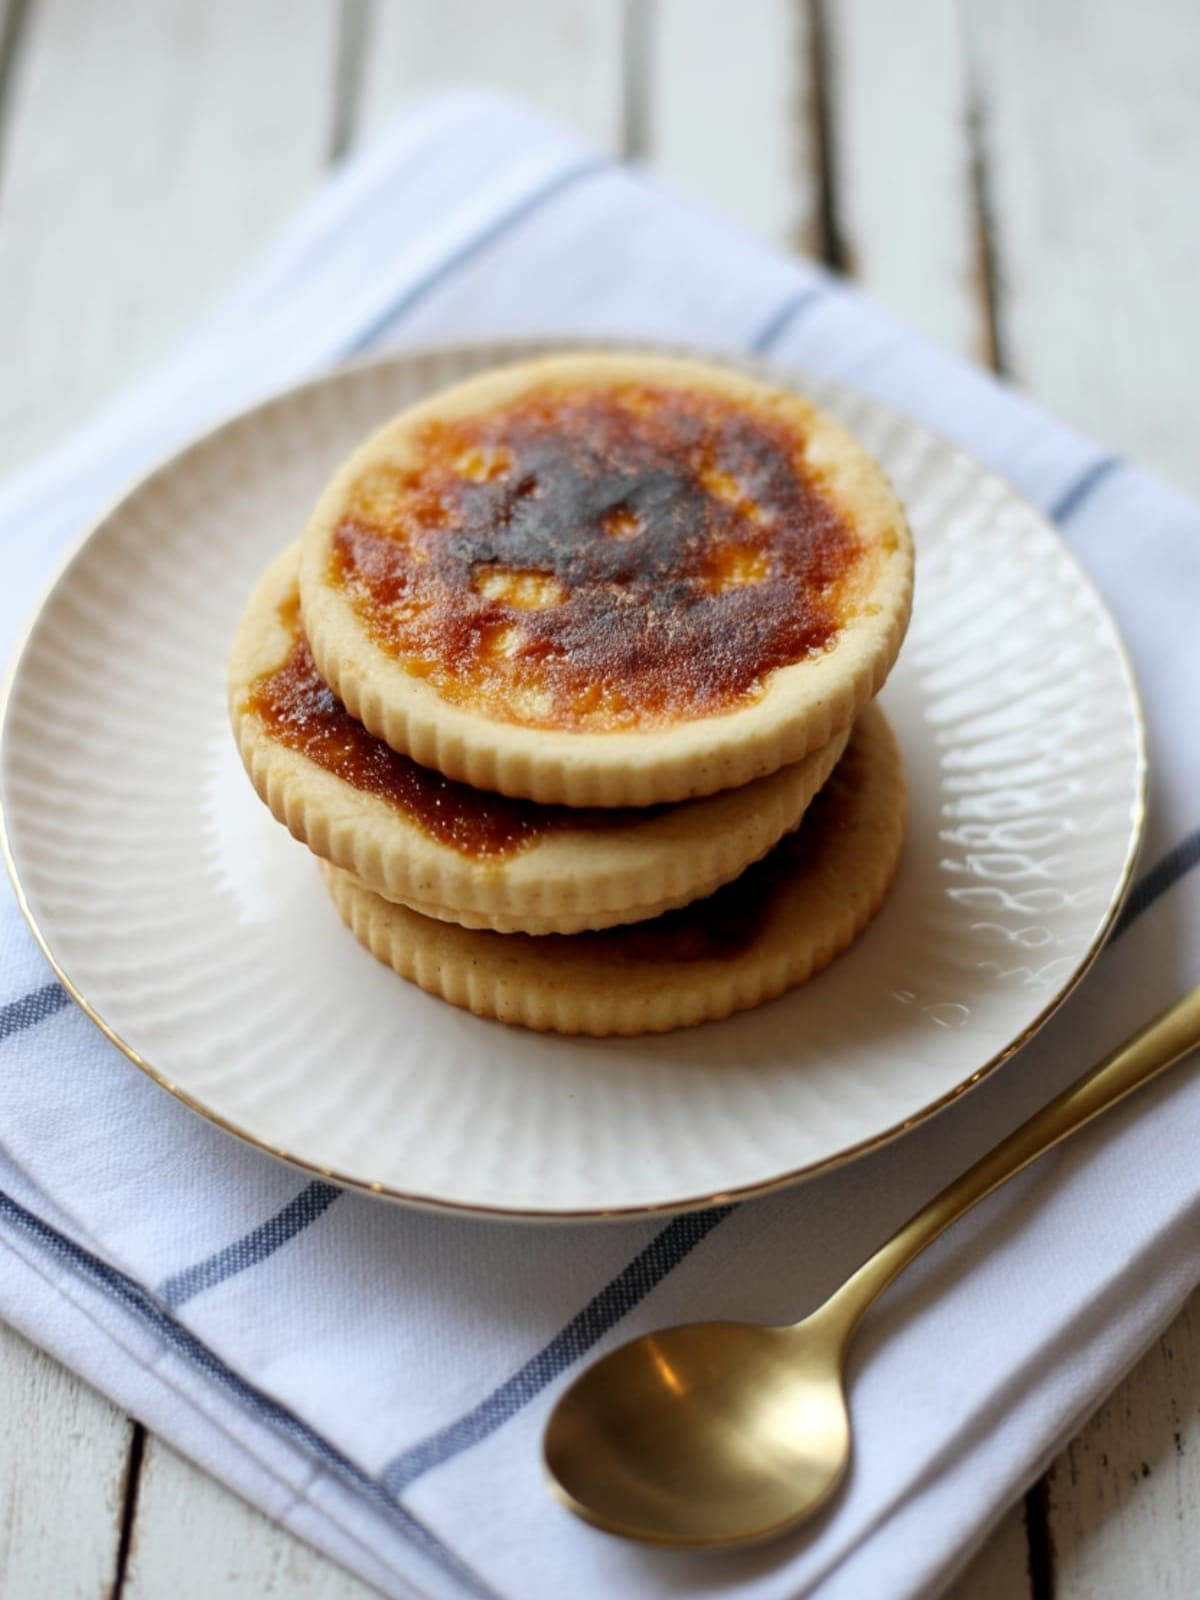
Imagine biting into a cookie that combines the buttery richness of a classic chocolate chip with the crackling sugar crust of a perfect creme brûlée. That magical combination is exactly what these Creme Brûlée Cookies deliver. They’re the conversation-starter dessert that makes everyone ask for your recipe while reaching for seconds.
These cookies transform a fancy French dessert into a handheld treat that’s surprisingly doable in your own kitchen. No culinary degree required—just a few special techniques that I’ll walk you through step by step.
Why This Recipe is Awesome

What makes these Creme Brûlée Cookies extraordinary is their brilliant contrast of textures—crisp caramelized tops giving way to soft, vanilla-infused centers that melt in your mouth. They capture the essence of the classic dessert while being infinitely more portable and shareable.
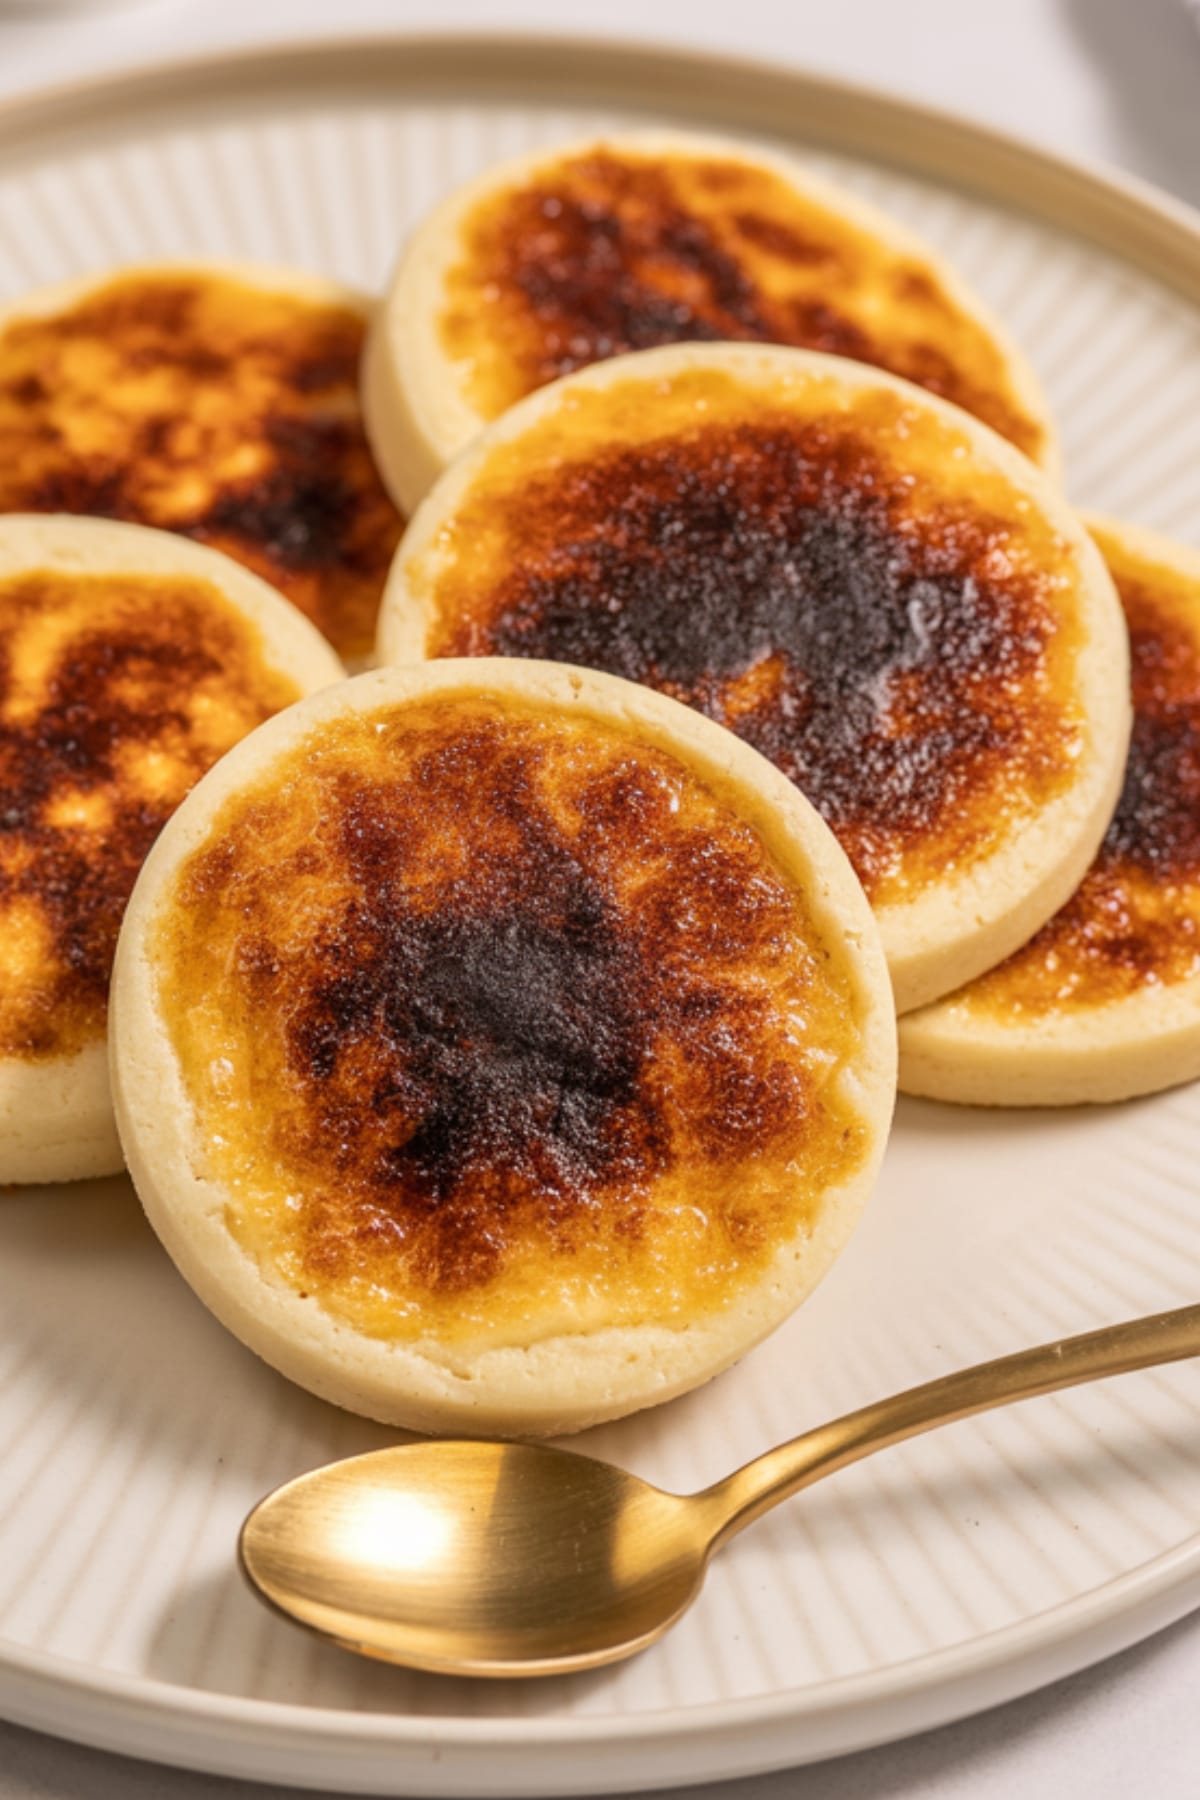
Unlike other cookie recipes that can be one-note, these cookies offer a multi-sensory experience: the satisfying crack as you bite through the torched sugar top, followed by the rich, custard-inspired cookie beneath. They’re sophisticated enough for a dinner party but approachable enough for a weekend baking project with the kids. The vanilla bean paste in the dough elevates these cookies beyond ordinary, giving them those authentic specks and intense flavor that vanilla extract alone can’t achieve.
Trust me, once you master these, they’ll become your signature dessert.
Equipment needed: Stand mixer or hand mixer, baking sheets, parchment paper, cookie scoop, kitchen torch
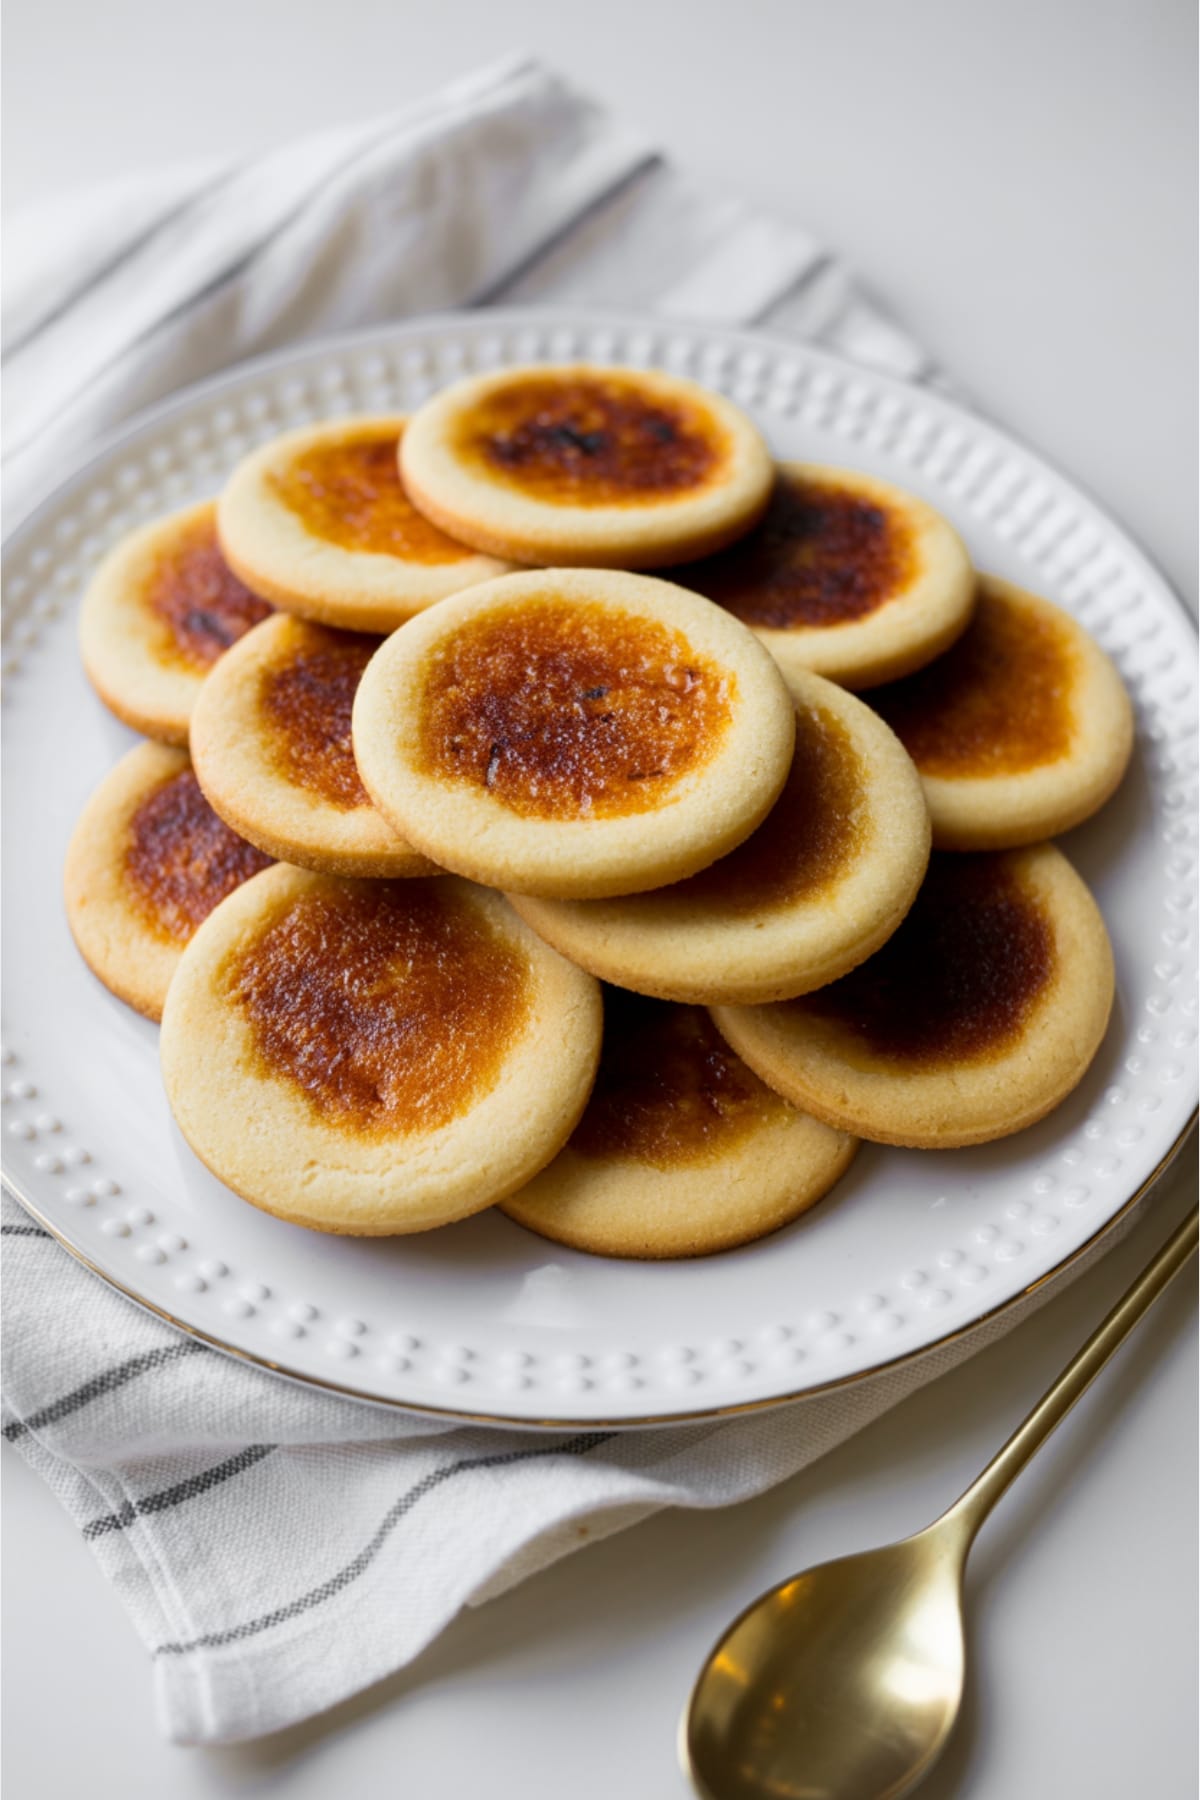
Creme Brûlée Cookies
Ingredients
- 1 cup 2 sticks unsalted butter, softened
- 1 cup granulated sugar
- ¼ cup light brown sugar packed
- 2 large eggs room temperature
- 2 teaspoons vanilla bean paste or 1 tablespoon vanilla extract
- 2¾ cups all-purpose flour
- 1 teaspoon baking soda
- ½ teaspoon salt
- ½ cup white chocolate chips
- ½ cup granulated sugar for brûlée topping
Instructions
- Prepare your workspace by preheating your oven to 350°F (175°C) and lining two baking sheets with parchment paper.
- Cream the butter and sugars together in the bowl of a stand mixer fitted with the paddle attachment until light and fluffy, about 3-4 minutes. This extended creaming process incorporates air that helps create the perfect texture.
- Add eggs one at a time, mixing well after each addition, then blend in the vanilla bean paste until fully incorporated. Scrape down the sides of the bowl to ensure everything is evenly mixed.
- Whisk the dry ingredients together in a separate bowl—flour, baking soda, and salt—then gradually add to the wet mixture on low speed until just combined. Overmixing will develop gluten and make your cookies tough.
- Fold in the white chocolate chips by hand using a rubber spatula. The chips add pockets of sweetness that complement the vanilla flavor.
- Scoop dough using a 2-tablespoon cookie scoop and place on prepared baking sheets about 2 inches apart. Slightly flatten the tops with your palm to create an even surface for the sugar topping later.
- Bake for 10-12 minutes until the edges are just set but the centers still look slightly underdone. They’ll continue cooking from residual heat after removal.
- Cool cookies completely on the baking sheet for 5 minutes, then transfer to a wire rack to finish cooling.
- Sprinkle each cooled cookie with a thin, even layer of granulated sugar, covering the entire top surface.
- Caramelize the sugar using a kitchen torch, moving in circular motions about 2-3 inches from the cookie surface until the sugar melts and turns amber. Watch carefully to avoid burning.
- Allow the caramelized sugar to harden completely for about 5 minutes before serving. This creates that signature crackling crust.
Notes
- For the best vanilla flavor, use real vanilla bean paste rather than extract if possible. The flavor difference is noticeable.
- If you don’t have a kitchen torch, you can place the sugar-topped cookies under a broiler for 1-2 minutes, but watch them like a hawk to prevent burning.
- These cookies are best enjoyed the same day they’re torched, as the caramelized sugar will soften over time.
- The cookie dough can be made ahead and refrigerated for up to 3 days, or frozen for up to 3 months. Just add the sugar topping and torch after baking.
- For a more authentic creme brûlée flavor, add a tiny pinch of ground cardamom to the cookie dough.
Calories & Nutritional Info
- Calories per cookie: Approximately 245 calories
- Fat: 12g (7g saturated)
- Carbohydrates: 32g (21g sugars)
- Protein: 3g
- Allergens: Contains wheat, dairy, eggs
- Dietary considerations: Vegetarian, not suitable for vegan or gluten-free diets without modifications
Common Mistakes to Avoid
- Rushing the butter-sugar creaming process – This crucial step creates the structure of your cookie. Give it the full 3-4 minutes to incorporate air.
- Overbaking the cookies – They should come out of the oven looking slightly underdone in the center to achieve that soft, custard-like interior.
- Applying sugar topping to warm cookies – The cookies must be completely cool before adding sugar, or it will absorb moisture and won’t caramelize properly.
- Holding the torch too close – Keep your kitchen torch 2-3 inches from the cookie surface to avoid burning the sugar (or worse, the cookie).
- Making cookies too thick – Flatten them slightly before baking to create an even surface for the caramelized sugar top.
Alternatives & Substitutions
- Vanilla bean alternatives: If vanilla bean paste is unavailable, use 1 tablespoon pure vanilla extract or the seeds scraped from 1 vanilla bean.
- Dairy-free option: Substitute plant-based butter sticks (not spread) for a dairy-free version, though texture may vary slightly.
- Chocolate variations: Try dark chocolate chips instead of white chocolate, or add 1 tablespoon of espresso powder to enhance the flavor complexity.
- Gluten-free adaptation: Substitute a 1:1 gluten-free flour blend, but add ¼ teaspoon xanthan gum if your blend doesn’t include it.
- Flavor infusions: Add 1 teaspoon of orange zest or 2 teaspoons of bourbon to the wet ingredients for a sophisticated flavor twist.
FAQs
Can I make these cookies without a kitchen torch?
Yes, you can use your oven’s broiler instead. Place the sugar-topped cookies on a baking sheet on the highest rack position, about 4 inches from the heat source. Broil for 1-2 minutes, rotating if needed, but don’t take your eyes off them—they can burn in seconds!
How do I store these cookies to keep the top crispy?
The caramelized sugar top will naturally soften after about 6-8 hours. For best results, store un-sugared cookies in an airtight container, then add the sugar topping and torch just before serving. If you must store completed cookies, arrange them in a single layer in a container with the lid slightly ajar.
Can I freeze the cookie dough?
Absolutely! Form the dough into balls, flatten slightly, and freeze on a baking sheet. Once solid, transfer to a freezer bag for up to 3 months. When ready to bake, add about 2 minutes to the baking time—no need to thaw first.
Why did my sugar topping melt into the cookie instead of caramelizing?
This typically happens when the cookies aren’t completely cool before adding the sugar. Another cause could be using sugar that’s too fine—regular granulated sugar works better than superfine or powdered sugar for creating that crackly top.
How thick should I spread the sugar on top?
Aim for a thin, even layer that completely covers the cookie top—about 1/16 inch. Too little won’t give you that satisfying crack, while too much can create bitter, burnt spots when torched.
Final Thoughts
These Creme Brûlée Cookies bring together the best of two beloved desserts in a treat that’s both impressive and approachable. The joy of cracking through that caramelized sugar crust into a soft, vanilla-rich cookie underneath is an experience worth sharing. Don’t be intimidated by the torch—embrace it! That moment of kitchen drama is part of what makes these cookies so special and memorable.


