
Imagine the aroma of cinnamon-spiced apples and buttery pastry filling your kitchen on a crisp autumn day. That’s the simple magic of an Apple Galette—the unfussy, rustic cousin of apple pie that delivers all the flavor with half the fuss. No need for perfect crimping or elaborate techniques here; this free-form tart celebrates beautiful imperfection while letting those juicy, caramelized apples shine.
Think of it as pie’s laid-back friend who somehow always manages to impress everyone at the gathering. The best part? You probably have everything you need to make it right now.
Why This Recipe is Awesome

The Apple Galette is a culinary triumph of simplicity.
Unlike traditional pies that demand precision, this rustic tart embraces a “perfectly imperfect” aesthetic that’s actually much more forgiving for home bakers. The exposed fruit caramelizes at the edges, creating concentrated pockets of flavor you just don’t get with covered pies. What truly sets this recipe apart is its adaptability.
You can make it with store-bought dough when pressed for time or craft a homemade pastry when you’re feeling ambitious. The filling requires just a handful of ingredients that enhance rather than mask the natural sweetness and subtle tartness of fresh apples. As someone who’s baked hundreds of desserts, I appreciate how this galette delivers professional-looking results without professional-level skills.
It’s my go-to recommendation for anyone intimidated by pastry—you’ll feel like a French pastry chef with a fraction of the effort!
Equipment Needed: Baking sheet, parchment paper, rolling pin, mixing bowl, pastry brush
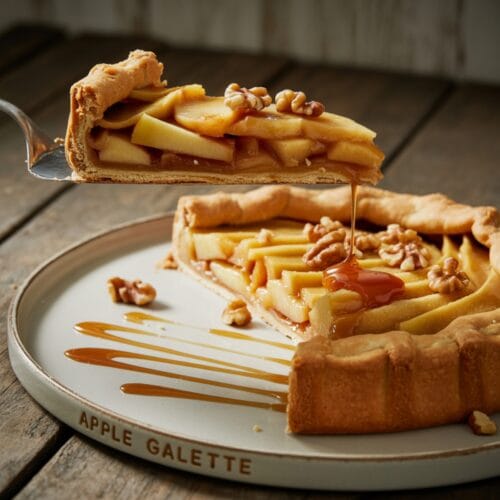
Apple Galette
Ingredients
- 1 refrigerated pie crust or homemade pastry dough
- 4-5 medium apples preferably a mix of sweet and tart varieties like Honeycrisp and Granny Smith
- 1/3 cup brown sugar packed
- 1 tablespoon all-purpose flour
- 1 teaspoon ground cinnamon
- 1/4 teaspoon ground nutmeg
- 1/8 teaspoon salt
- 1 tablespoon lemon juice
- 2 tablespoons cold butter cut into small pieces
- 1 egg beaten (for egg wash)
- 1 tablespoon turbinado or coarse sugar for sprinkling
- Optional: 1/3 cup apricot jam for glazing
Instructions
- Prepare your workspace and ingredients. Preheat your oven to 375°F (190°C) and line a baking sheet with parchment paper. Allow refrigerated dough to come to room temperature for about 15 minutes.
- Prepare the apples properly. Core, peel, and slice apples into thin, uniform slices about 1/8-inch thick. Toss them immediately with lemon juice in a large bowl to prevent browning.
- Create the filling mixture. In a small bowl, combine brown sugar, flour, cinnamon, nutmeg, and salt. Sprinkle this mixture over the apples and gently toss until evenly coated, being careful not to break the slices.
- Roll out your dough carefully. On a lightly floured surface, roll the pastry dough into a 12-inch circle about 1/8-inch thick. Transfer to your parchment-lined baking sheet.
- Arrange apple slices decoratively. Place the seasoned apple slices in the center of the dough, leaving a 2-inch border around the edges. You can create concentric circles or simply pile them in a rustic mound.
- Fold the edges with confidence. Gently fold the dough border over the apples, pleating as you go around. The center will remain open, showcasing the fruit.
- Add butter for richness. Dot the exposed apple filling with small pieces of cold butter – this will create pockets of richness as it bakes.
- Apply the egg wash thoroughly. Brush the folded dough border with beaten egg and sprinkle with turbinado sugar for a beautiful golden finish and sweet crunch.
- Bake until perfectly golden. Place in the preheated oven and bake for 40-45 minutes, or until the crust is golden brown and the apples are tender when pierced with a knife.
- Cool before serving. Allow the galette to cool for at least 15 minutes before slicing. If using, warm the apricot jam slightly and brush over the apples for a glossy finish.
Notes
- For a truly spectacular Apple Galette, try using a mix of apple varieties for complex flavor – Honeycrisp for sweetness, Granny Smith for tartness, and Pink Lady for floral notes.
- Don’t overfill your galette! Too many apples will create excess juice that can make your crust soggy.
- If your kitchen is warm, chill the assembled galette for 15 minutes before baking to help maintain the pastry’s structure.
- The galette can be assembled up to 24 hours in advance and kept refrigerated until ready to bake.
- For extra flavor, try adding 1/2 teaspoon of vanilla extract or a tablespoon of bourbon to the apple mixture.
Calories & Nutritional Info
- Calories: Approximately 280 calories per serving
- Carbohydrates: 42g per serving
- Fat: 12g per serving
- Protein: 2g per serving
- Dietary considerations: Contains gluten, dairy, and eggs; can be adapted for vegan diets with plant-based butter and pastry
Common Mistakes to Avoid
- Slicing apples too thick – This prevents them from cooking through properly. Aim for consistent, thin slices.
- Skipping the flour in the filling – The flour helps absorb excess moisture from the apples and prevents a soggy bottom crust.
- Rolling the dough too thin – This can lead to tears and leaks during baking. Maintain about 1/8-inch thickness.
- Overfilling the center – A mound too high will collapse and potentially overflow during baking.
- Not allowing cooling time – Cutting into the galette too soon will result in a filling that runs everywhere instead of setting properly.
Alternatives & Substitutions
- Gluten-free option: Use your favorite gluten-free pie crust recipe or store-bought version.
- Vegan adaptation: Substitute the butter with plant-based butter and use plant milk mixed with a little maple syrup instead of egg wash.
- Fruit variations: This galette format works beautifully with pears, peaches, plums, or a mix of berries (reduce the sugar for very sweet fruits).
- Spice alternatives: Try cardamom, ginger, or apple pie spice instead of cinnamon and nutmeg.
- Sweetener options: Maple syrup or honey can replace brown sugar (reduce to 1/4 cup as they’re more liquid).
- Add-ins: Sprinkle 1/3 cup chopped nuts or 1/4 cup dried cranberries over the apples before folding the edges.
FAQs
Can I make the Apple Galette ahead of time?
Absolutely! You can prepare the galette completely, up to the point of baking, and refrigerate it for up to 24 hours. Alternatively, bake it earlier in the day and serve at room temperature, or gently reheat at 300°F for about 10 minutes before serving.
Why is my galette leaking juice onto the baking sheet?
This usually happens when the apples release too much moisture. Next time, try tossing your apple slices with the sugar mixture and letting them sit for 15 minutes, then draining excess liquid before arranging them on the dough.
Can I freeze an Apple Galette?
Yes! You can freeze it either before or after baking. To freeze unbaked, assemble on a parchment-lined tray, freeze until solid, then wrap well. Bake from frozen, adding 10-15 minutes to the baking time. To freeze after baking, cool completely, wrap well, and freeze for up to 3 months.
What’s the difference between a galette and a pie?
The main difference is structure—pies are baked in a dish with a defined shape, while galettes are free-form with the edges simply folded over the filling. Galettes are more rustic, generally have a higher crust-to-filling ratio, and tend to have less filling to prevent overflow.
What are the best apples to use for a galette?
Apples that hold their shape when baked are ideal. I recommend using a mix of firm, tart apples (Granny Smith, Braeburn) and sweeter varieties (Honeycrisp, Gala, Fuji) for balanced flavor and texture. Avoid softer varieties like McIntosh or Red Delicious, which can become mushy.
Final Thoughts
The Apple Galette represents what I love most about cooking—it’s approachable, adaptable, and creates moments of joy with minimal fuss. There’s something deeply satisfying about transforming simple ingredients into something so beautiful and delicious. Whether you’re a baking novice or seasoned pro, this rustic tart deserves a place in your dessert rotation. The slight imperfections only add to its charm, reminding us that in both baking and life, perfection is overrated.


