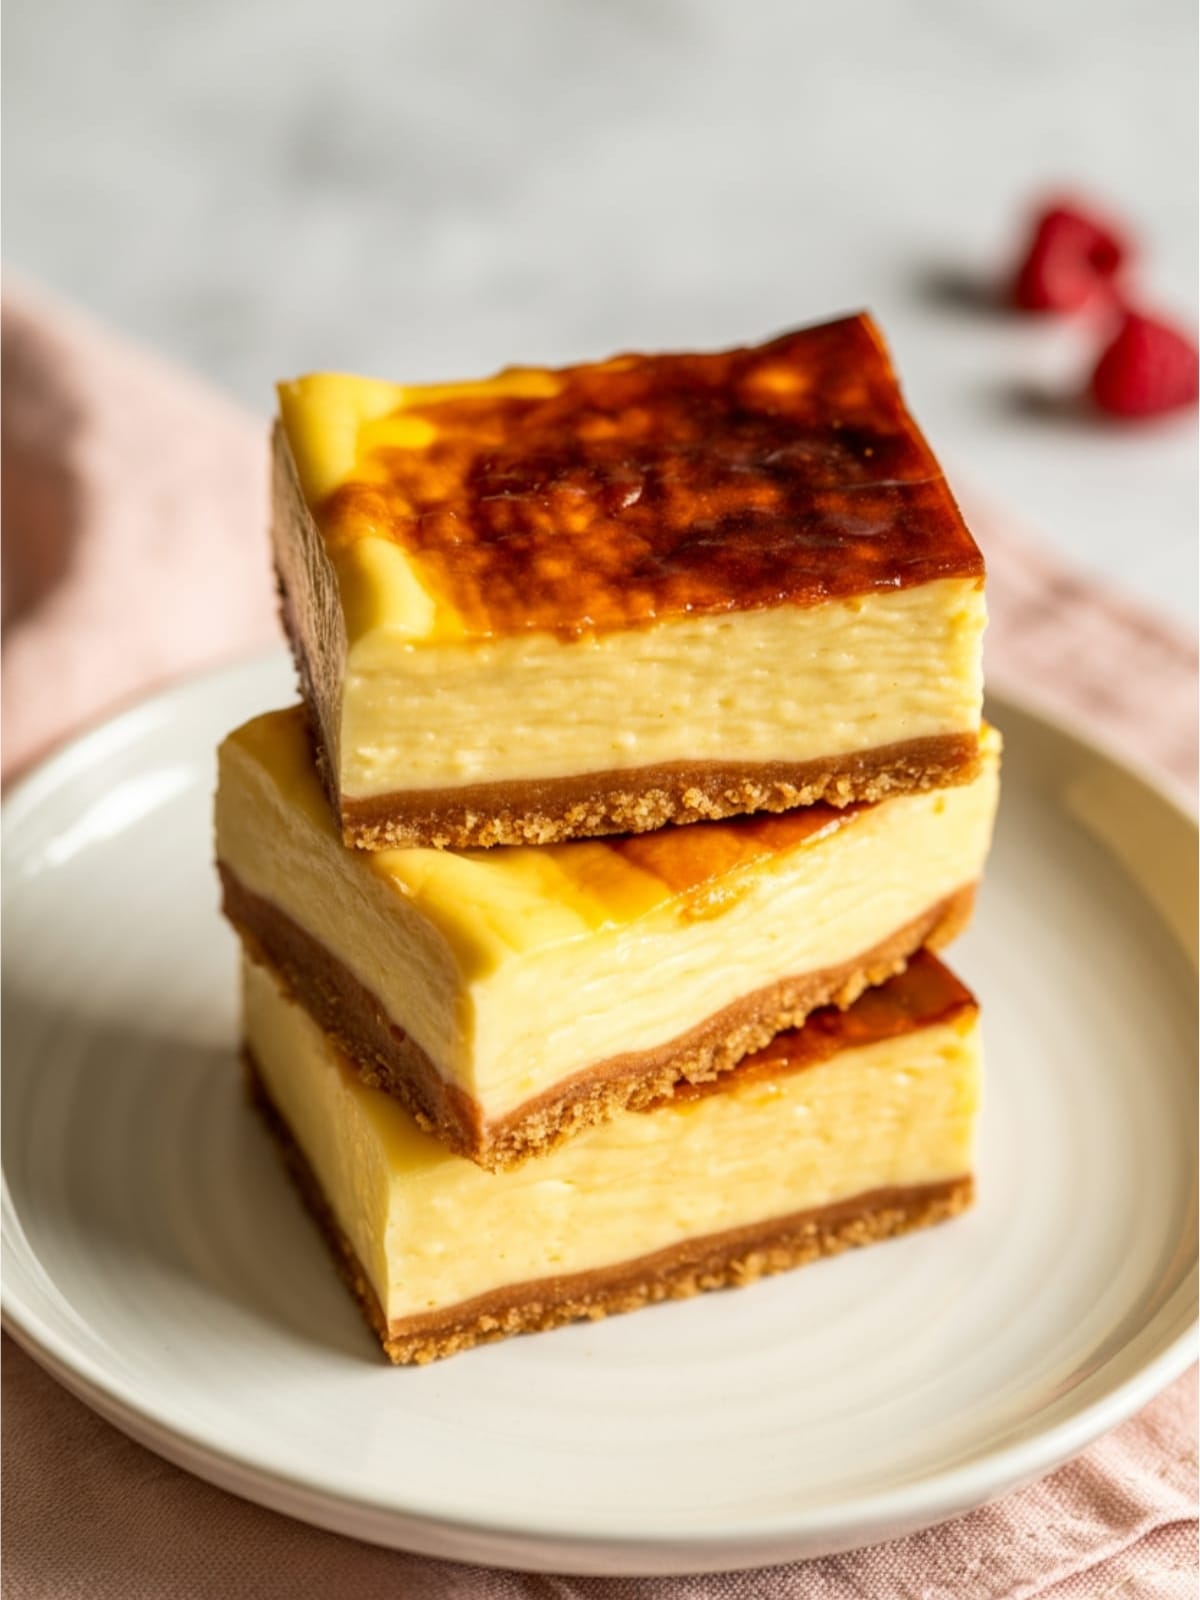
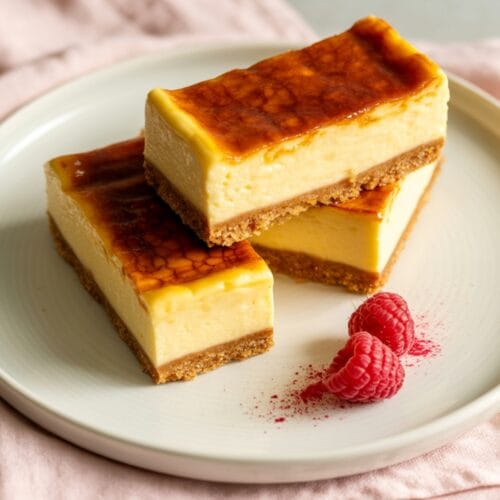
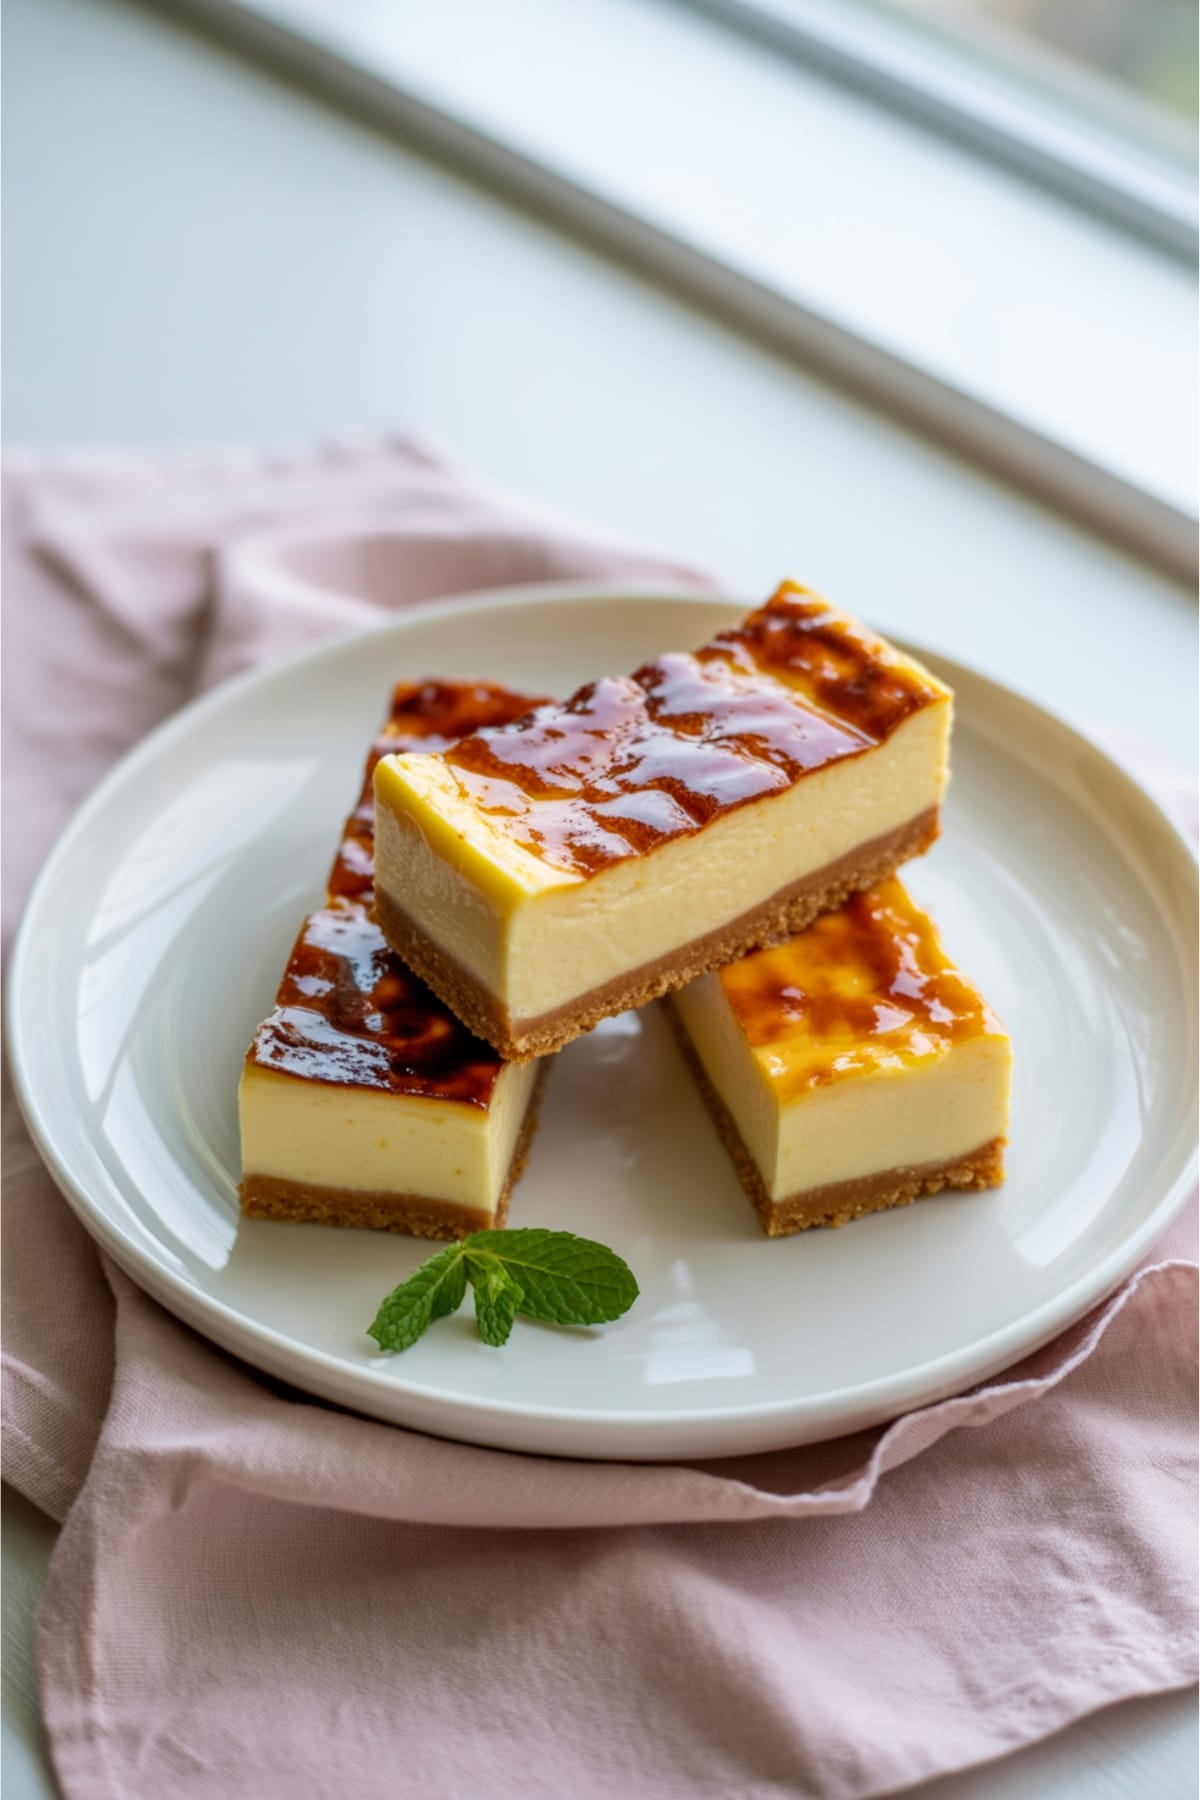
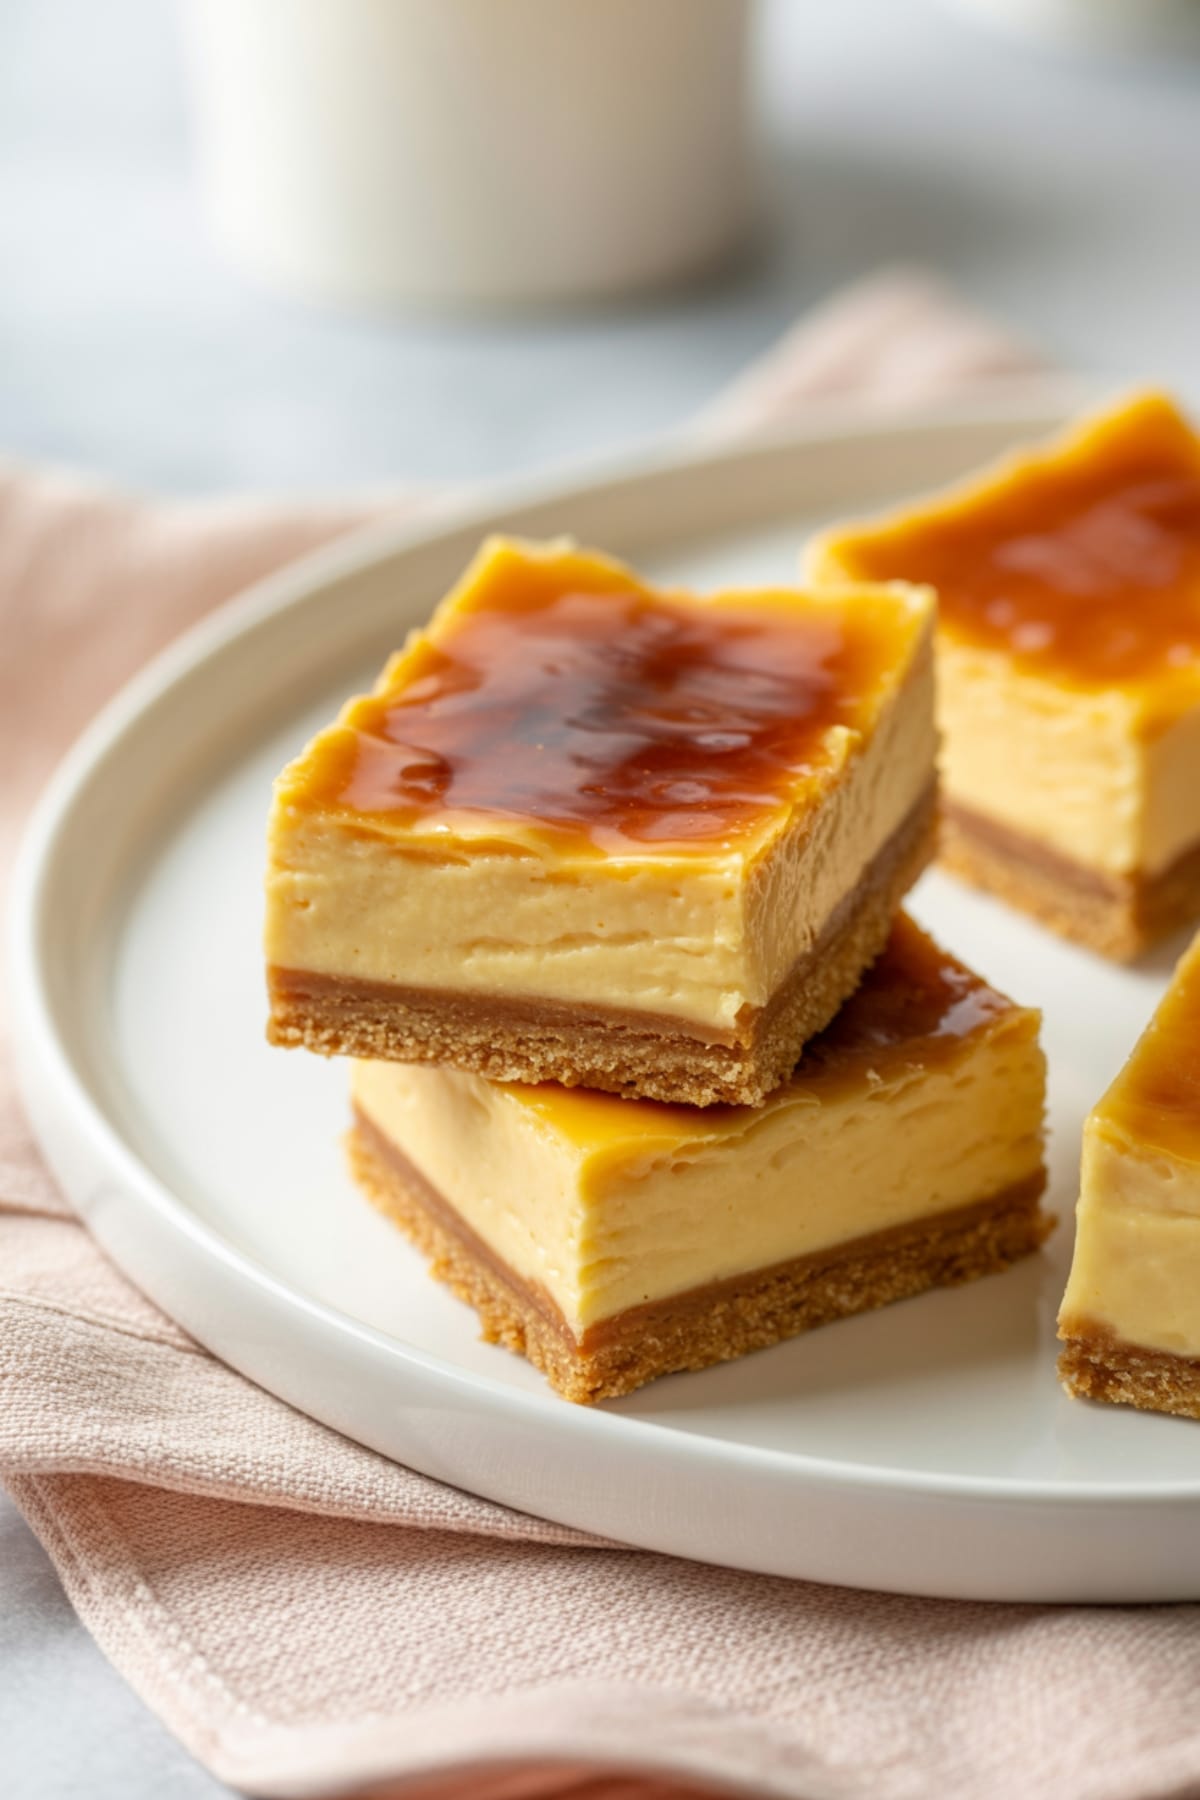
Have you ever found yourself torn between two beloved desserts? That’s exactly where I was when I first discovered Crème Brûlée Cheesecake Bars. This ingenious creation marries the silky, vanilla-infused custard and that iconic caramelized sugar top of crème brûlée with the rich, tangy indulgence of cheesecake—all in a convenient, party-friendly bar format.
What makes these bars truly special is how they transform two typically fussy desserts into something you can easily slice and serve.
The contrast between the crunchy torched sugar top and the velvety cheesecake beneath creates a textural experience that will have everyone asking for your recipe.
Why This Recipe is Awesome

These Crème Brûlée Cheesecake Bars represent the best of both worlds—you get all the sophisticated flavor of traditional crème brûlée without needing individual ramekins or a water bath. The cheesecake base adds a delightful tanginess that balances the sweet caramelized top perfectly.
What really sets this recipe apart is its impressive-yet-approachable nature. While it looks and tastes like something from a high-end bakery, the preparation is surprisingly straightforward.
You can make these bars a day ahead, which makes them perfect for entertaining.
The moment of torching the sugar top just before serving also adds a bit of culinary theater that guests absolutely love. That satisfying crack when a spoon breaks through the caramelized sugar into the creamy cheesecake below? Pure dessert magic.
Equipment needed: 9×13-inch baking pan, parchment paper, food processor, mixing bowls, hand or stand mixer, kitchen torch
Crème Brûlée Cheesecake Bars
Ingredients
- For the Crust:
- 2 cups graham cracker crumbs about 16 full sheets
- 1/3 cup granulated sugar
- 1/2 cup unsalted butter melted
- Pinch of salt
- For the Cheesecake Filling:
- 4 packages 8 oz each cream cheese, softened to room temperature
- 1 1/2 cups granulated sugar
- 4 large eggs at room temperature
- 1/4 cup heavy cream
- 1/4 cup sour cream
- 2 tablespoons all-purpose flour
- 2 teaspoons vanilla extract
- 1 vanilla bean seeds scraped (or an additional 1 teaspoon vanilla extract)
- For the Brûlée Topping:
- 1/3 cup granulated sugar for torching
Instructions
- Prepare your baking pan by lining a 9×13-inch baking dish with parchment paper, leaving overhang on the sides for easy removal later. Preheat your oven to 325°F (165°C).
- Make the crust by combining graham cracker crumbs, sugar, melted butter, and salt in a bowl until the mixture resembles wet sand. Press firmly and evenly into the bottom of the prepared pan.
- Pre-bake the crust for 10 minutes until slightly golden. Remove from oven and set aside while preparing the filling. Keep the oven on.
- Beat the cream cheese and sugar in a large bowl using a hand mixer or stand mixer on medium speed until completely smooth and fluffy, about 2-3 minutes. Scrape down the sides of the bowl frequently to ensure no lumps remain.
- Add eggs one at a time, mixing on low speed after each addition just until incorporated. Overmixing will incorporate too much air and cause your cheesecake to crack.
- Mix in the remaining ingredients – heavy cream, sour cream, flour, vanilla extract, and vanilla bean seeds. Mix on low speed until just combined and smooth.
- Pour the filling over the pre-baked crust and smooth the top with a spatula. Tap the pan gently on the counter a few times to release any air bubbles.
- Bake for 35-45 minutes until the edges are set but the center still has a slight jiggle when the pan is gently shaken. Do not overbake—the cheesecake will continue to set as it cools.
- Cool completely at room temperature for about 1 hour, then refrigerate for at least 4 hours or preferably overnight.
- Just before serving, lift the cheesecake out of the pan using the parchment paper overhang and cut into 16 bars.
- Sprinkle each bar with a thin, even layer of granulated sugar (about 1 teaspoon per bar).
- Caramelize the sugar using a kitchen torch, moving it continuously across the surface until the sugar melts and turns amber. Allow the caramelized sugar to harden for 1-2 minutes before serving.
Notes
- For the smoothest cheesecake filling, ensure all refrigerated ingredients are completely at room temperature before mixing.
- If you don’t have a kitchen torch, you can place the sugar-topped bars under a broiler for 1-2 minutes, watching very carefully to prevent burning.
- The bars can be made up to 3 days ahead and stored in the refrigerator, but add the sugar topping and torch it just before serving.
- For cleaner cuts, dip your knife in hot water and wipe clean between slices.
- If vanilla beans are too expensive, substitute with vanilla bean paste or additional extract.
Calories & Nutritional Info

- Calories: Approximately 420 calories per bar
- Fat: 28g (17g saturated)
- Carbohydrates: 38g (32g sugars)
- Protein: 6g
- Allergens: Contains dairy, eggs, and wheat
- Dietary notes: Can be made gluten-free by using gluten-free graham crackers
Common Mistakes to Avoid
- Cold ingredients: Using cold cream cheese will result in a lumpy batter. Always bring dairy ingredients to room temperature.
- Overmixing the batter: This incorporates too much air, leading to cracks and a less creamy texture. Mix just until ingredients are combined.
- Overbaking: The center should still have a slight jiggle when done. Overbaking leads to dry, cracked cheesecake.
- Rushing the cooling process: Not allowing sufficient chilling time will result in soft bars that don’t hold their shape when cut.
- Using too much sugar for brûlée: A thin, even layer caramelizes better than a thick one, which can become bitter or remain granular.
Alternatives & Substitutions
- Crust options: Try Oreo cookies, shortbread, or digestive biscuits instead of graham crackers for different flavor profiles.
- Dairy alternatives: Use dairy-free cream cheese and coconut cream for a non-dairy version (texture may vary slightly).
- Flavor variations: Add 2 tablespoons of citrus zest (lemon, orange, or lime) to the filling for a bright twist.
- Topping alternatives: If you prefer to skip the brûlée topping, these bars are delicious with fresh berries or a fruit compote.
- Lower sugar option: Reduce the sugar in the filling to 1 cup and use a sugar substitute that works for baking (results may vary).
FAQs
Can I make these bars without a kitchen torch?
Yes! You can use your oven’s broiler to caramelize the sugar topping. Place the sugar-topped bars on the highest rack, about 4 inches from the broiler, and watch carefully for 1-2 minutes until the sugar melts and caramelizes. Be vigilant as it can burn quickly.
Why did my cheesecake crack?
Cracks usually form from overmixing (incorporating too much air), overbaking, or rapid temperature changes. Mix the ingredients just until combined. Don’t overbake, and allow the cheesecake to cool gradually at room temperature before refrigerating.
Can I freeze these Crème Brûlée Cheesecake Bars?
Absolutely! Freeze the bars without the caramelized sugar topping. Wrap them individually in plastic wrap, then foil, and freeze for up to 2 months. Thaw overnight in the refrigerator, then add the sugar topping and torch just before serving.
How far in advance can I make these?
The cheesecake portion can be made up to 3 days ahead and stored in the refrigerator. However, for the best experience, add the sugar and torch it just before serving, as the caramelized top will begin to soften after a few hours.
My caramelized sugar top got soft after a while—what happened?
This is normal! The moisture from the cheesecake will eventually soften the caramelized sugar layer. This is why it’s best to brûlée the tops just before serving, or at most 1-2 hours ahead.
Final Thoughts
These Crème Brûlée Cheesecake Bars bring together the best of two classic desserts in a format that’s perfect for sharing. The contrast between the creamy cheesecake and that satisfying crack of caramelized sugar creates a dessert experience that feels both familiar and exciting. Whether you’re looking to impress guests or simply treat yourself, these bars deliver restaurant-quality results with home kitchen simplicity.


