Let’s talk pork tenderloin – that magical cut of meat that somehow manages to be both lean AND succulent when treated right. Unfortunately, it’s also the cut most likely to be criminally overcooked in home kitchens across America. But not today, friends. Not on my watch.
If you’ve been disappointed by dry, sad pork tenderloin in the past, I’m about to change your meat-cooking life. This roasted pork tenderloin recipe hits the trifecta: it’s ridiculously easy, impressively elegant, and ready in about 30 minutes. It’s the dinner party hero you never knew you needed and the weeknight savior you’ve been searching for.
Why This Roasted Pork Tenderloin Will Make You Look Like a Kitchen Genius
Let’s get one thing straight – pork tenderloin is NOT the same as pork loin. The tenderloin is a smaller, more tender cut (hence the name) that cooks much faster and requires different treatment. When cooked properly, it’s meltingly tender with a flavor that’s subtle enough to pair with virtually any seasoning profile you fancy.
What makes this recipe spectacular is the perfect balance of high-heat roasting to create a caramelized exterior, while maintaining that juicy, slightly pink center that’s both safe and sublime. The herb and garlic rub creates incredible flavor without overwhelming the meat, and the quick cooking time means this can be your ace in the hole for those “I need dinner in 30 minutes” situations.

Roasted Pork Tenderloin
Equipment
- Oven-safe skillet (cast iron works beautifully)
- Tongs
- Kitchen twine (optional)
- Meat thermometer (highly recommended)
- Sharp knife
- Cutting board
- Aluminum foil
Ingredients
- 1 pork tenderloin approximately 1 to 1.5 pounds
- 2 tablespoons olive oil divided
- 4 cloves garlic minced
- 1 tablespoon fresh rosemary chopped (or 1 teaspoon dried)
- 1 tablespoon fresh thyme leaves or 1 teaspoon dried
- 1 teaspoon dijon mustard
- 1 teaspoon salt
- 1/2 teaspoon freshly ground black pepper
- 1/2 teaspoon paprika smoked paprika adds amazing flavor!
- 1/4 teaspoon dried oregano
- 2 tablespoons butter
- 2 cloves garlic whole but peeled
- 2 sprigs fresh herbs rosemary, thyme, or sage
- Optional: 1 tablespoon maple syrup or honey for a touch of sweetness
Instructions
- Prep your workspace. Preheat your oven to 400°F (200°C). Remove the pork tenderloin from the refrigerator 20-30 minutes before cooking to take the chill off. This helps it cook more evenly.
- Trim and prep the pork. Using a sharp knife, remove any silver skin (the shiny, tough connective tissue) from the surface of the tenderloin. Just slide your knife under it and cut it away – don't skip this step or you'll end up with chewy bits! If your tenderloin has a thinner end, tuck it under and secure with kitchen twine to create an even thickness throughout.
- Create the flavor base. In a small bowl, mix together 1 tablespoon olive oil, minced garlic, chopped rosemary, thyme leaves, dijon mustard, salt, pepper, paprika, and dried oregano to form a paste. If using maple syrup or honey, add it now.
- Season generously. Pat the tenderloin dry with paper towels (super important for a good sear!), then rub the herb mixture all over the meat, covering all sides. Don't be shy – really massage it in there!
- Get searing. Heat the remaining tablespoon of olive oil in your oven-safe skillet over medium-high heat until it's almost smoking. Using tongs, carefully place the tenderloin in the hot skillet and sear for 2-3 minutes on each side until beautifully browned all over. This step is crucial for flavor development!
- Add the finishing touches. Just before transferring to the oven, add butter, whole garlic cloves, and fresh herb sprigs to the pan. As the butter melts, quickly spoon it over the pork along with the pan juices.
- Roast to perfection. Transfer the skillet to the preheated oven and roast for 12-15 minutes, depending on the size of your tenderloin. THE MOST IMPORTANT STEP: Use a meat thermometer inserted into the thickest part to check for doneness. You're aiming for 145°F (63°C) for a perfectly juicy, slightly pink center.
- Rest – seriously, don't skip this! Remove from oven and transfer the tenderloin to a cutting board. Tent loosely with foil and let rest for 5-10 minutes. This allows the juices to redistribute throughout the meat instead of running all over your cutting board when you slice it.
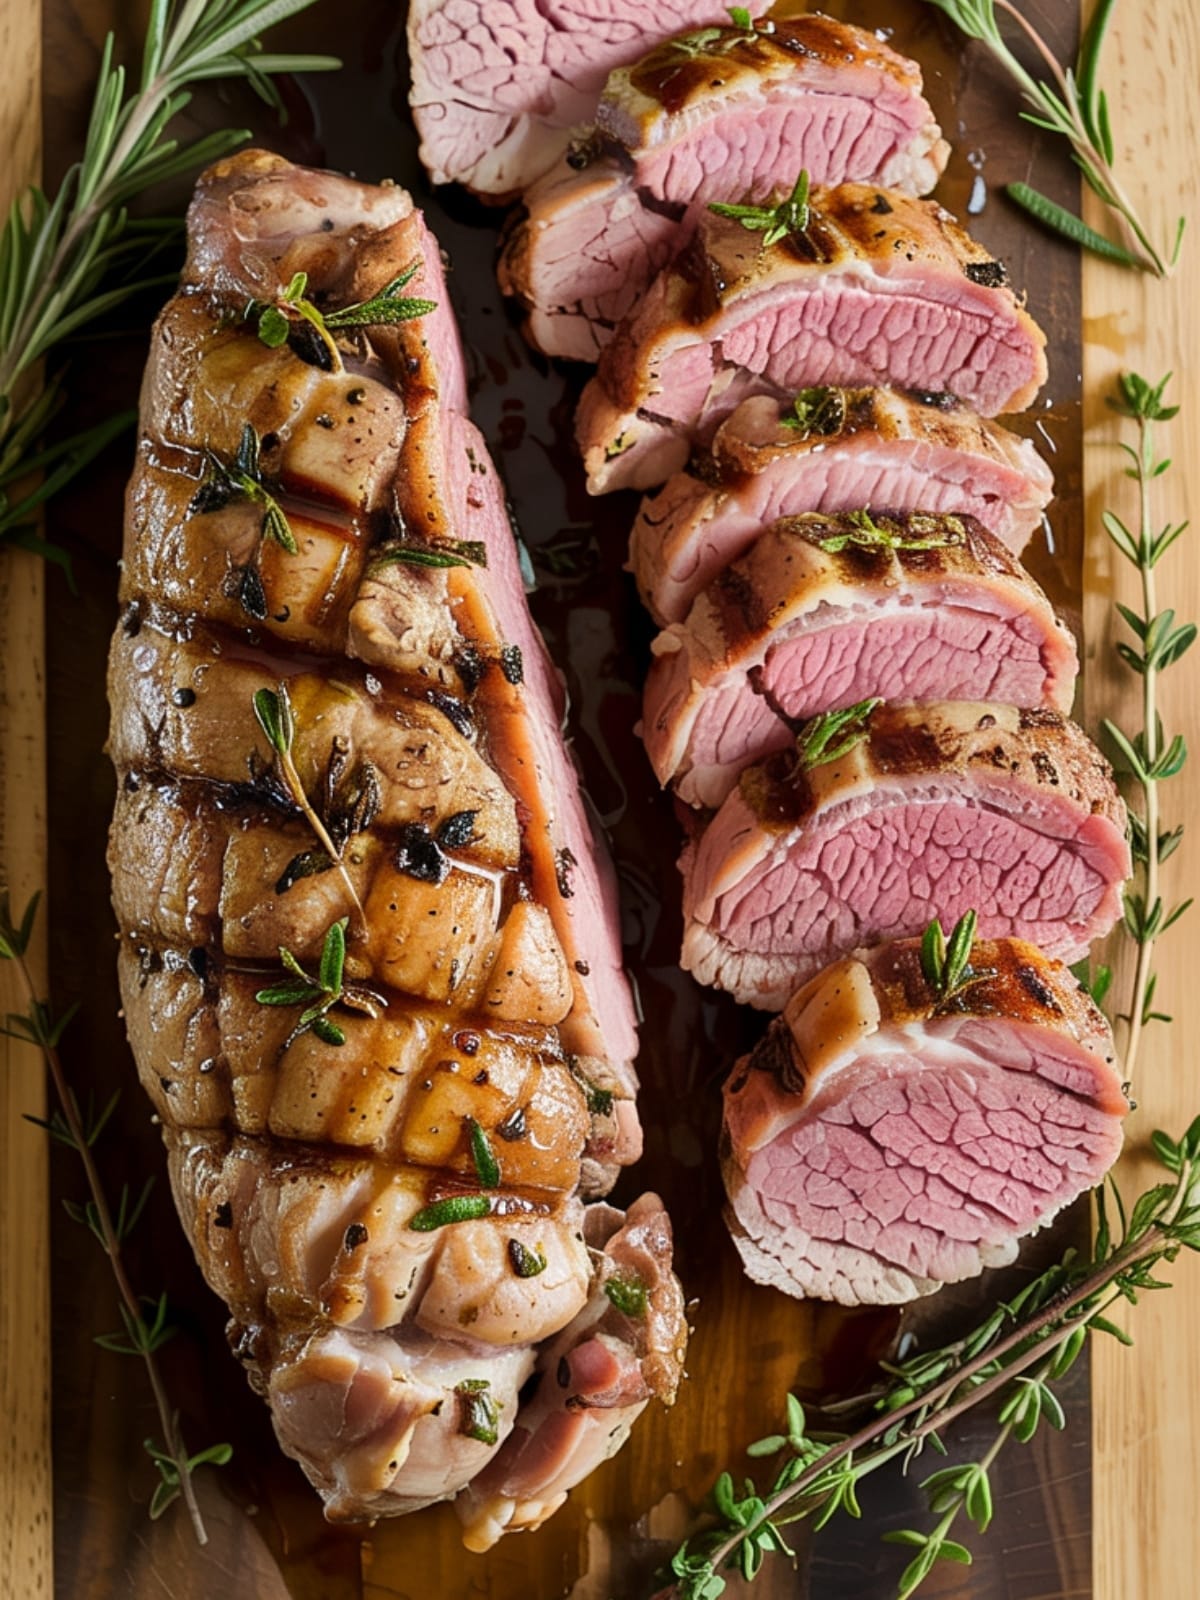
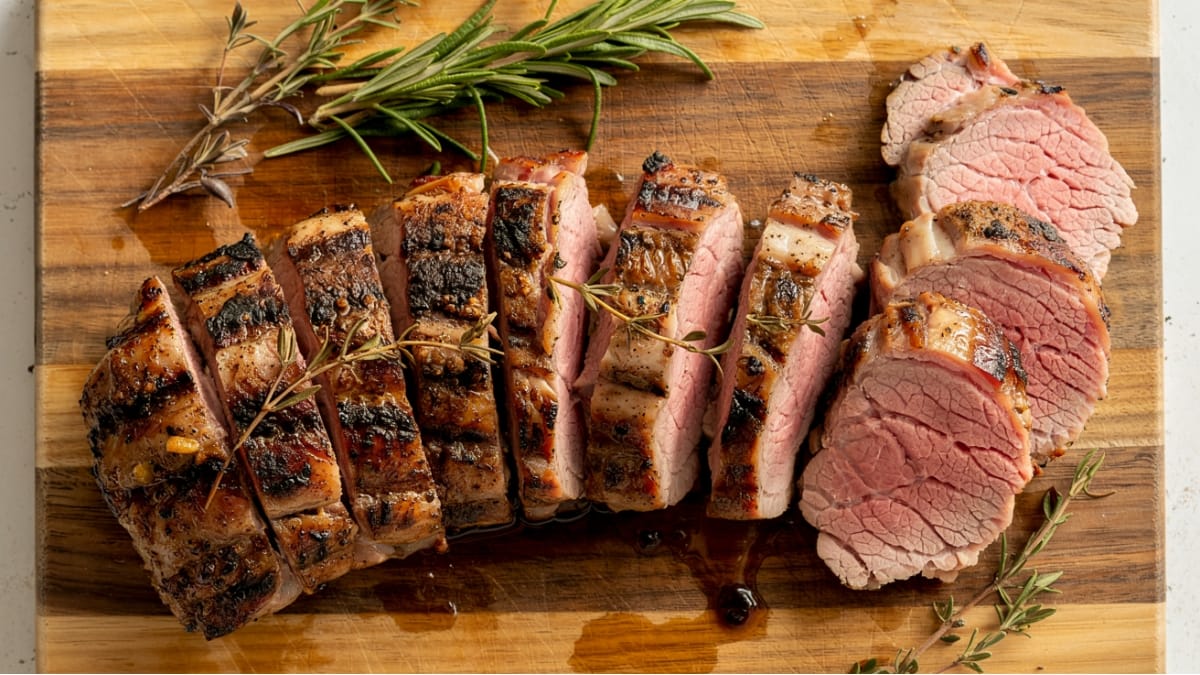
- Slice and serve. Cut the tenderloin into medallions about 1/2-inch thick. Spoon any remaining pan juices over the sliced meat for an extra flavor boost. Stand back and accept the compliments!
Notes
- Temperature is key! 145°F (63°C) is the USDA-recommended safe internal temperature for pork, and yes, it will be slightly pink in the center. This is perfectly safe and results in much juicier meat.
- For extra flavor: Marinate the tenderloin for 4-24 hours before cooking. A simple zip-top bag with olive oil, garlic, herbs, and a splash of balsamic vinegar works wonders.
- Make ahead tip: Prepare the herb rub and trim the tenderloin up to 24 hours in advance. Store separately in the refrigerator until ready to cook.
- Pan sauce bonus: After removing the cooked pork, place the skillet back on the stovetop over medium heat. Add 1/4 cup white wine or chicken broth and scrape up all the flavorful bits from the bottom of the pan. Simmer for 2-3 minutes until slightly reduced, then swirl in 1 tablespoon of cold butter for a quick, luxurious sauce.
Common Mistakes to Avoid
- Confusing tenderloin with loin. These are different cuts that cook differently! Tenderloin is smaller (usually about 1-1.5 pounds) and cooks much faster than a pork loin.
- Overcooking is the cardinal sin. Pork tenderloin becomes dry and tough when cooked past 150°F internal temperature. Invest in a good meat thermometer and trust it!
- Not removing the silver skin. This tough connective tissue doesn’t break down during cooking and will leave you with chewy spots. Take the extra minute to remove it.
- Skipping the searing step. That initial sear creates tremendous flavor through the Maillard reaction (fancy talk for the chemical reaction that creates that delicious browned exterior). Don’t rush or skip this step!
Variations & Customizations
- Asian-Inspired: Substitute the herbs with a mixture of ginger, garlic, soy sauce, and a touch of honey. Serve with a sprinkle of green onions and sesame seeds.
- Mediterranean Style: Use oregano, lemon zest, and minced olives in your rub. Serve with a side of tzatziki sauce for dipping.
- Spice-Lover’s Version: Add chipotle powder or cayenne to the rub for heat, plus a touch of brown sugar for balance. Finish with a fruit salsa (mango or pineapple works great).
FAQs
How do I know when pork tenderloin is done without a meat thermometer?
While a meat thermometer is your best friend for perfectly cooked pork, you can use the “touch test” in a pinch. When touched in the thickest part, properly cooked pork tenderloin should feel firm but slightly springy, similar to the resistance when you touch the base of your thumb to your middle finger and press on the fleshy part of your thumb. Another method is to make a small cut into the thickest part – properly cooked tenderloin should be barely pink in the center with clear juices (not red or very pink). That said, a $10 digital thermometer is one of the best kitchen investments you’ll ever make!
Can I cook pork tenderloin in a slow cooker or Instant Pot instead?
Absolutely! For a slow cooker, sear the tenderloin as directed, then transfer to a slow cooker and cook on low for 1.5-2 hours until it reaches 145°F. For an Instant Pot, use the sauté function to sear, then pressure cook on high for just 5 minutes with a 10-minute natural release. Both methods work beautifully, though you won’t get quite the same caramelized exterior as the oven method. For slow cooker versions, consider adding a bit of liquid (broth, wine, or apple juice works well) to keep things moist during the longer cooking time.
What are the best side dishes to serve with roasted pork tenderloin?
Pork tenderloin is incredibly versatile, which makes pairing sides easy! For starchy sides, consider garlic mashed potatoes, roasted sweet potatoes, or wild rice pilaf. Vegetable companions that work beautifully include roasted Brussels sprouts, sautéed green beans with almonds, or a simple arugula salad with lemon vinaigrette. Applesauce or roasted apples make a classic pairing that plays off the slight sweetness of the pork. For a complete meal with minimal effort, toss baby potatoes and carrots with olive oil, salt and pepper, and roast them on a separate rack in the oven while your pork cooks!
Final Thoughts
Roasted pork tenderloin is one of those magical dishes that delivers maximum impact with minimal effort – perfect for those moments when you want to impress without stressing. The key is treating this lean cut with respect: searing for flavor, cooking to the proper temperature, and allowing it to rest before slicing. Master these simple steps, and you’ll never suffer through dry, overcooked pork again. Whether you’re serving a casual family dinner or hosting friends, this foolproof method creates a meal that feels special while being surprisingly simple. And with endless seasoning variations possible, it’s a recipe that can evolve with your tastes and never get boring. Now go forth and cook pork tenderloin that would make any chef proud!


