There’s nothing quite like the first sip of an ice-cold Watermelon Juice Cooler on a sweltering summer day. That moment when the sweet, vibrant flavor of perfectly ripe watermelon washes over your taste buds, carrying with it memories of backyard barbecues and lazy afternoons. This isn’t just any drink—it’s summer captured in a glass, offering both hydration and a flavor celebration that’s impossible to resist.
Why This Recipe is Awesome
What makes this Watermelon Juice Cooler stand out is its beautiful simplicity paired with maximum impact.
Using just a handful of ingredients, you’ll create a drink that outshines any store-bought option. The natural sweetness of watermelon means you need minimal added sugar, making this a healthier alternative to sodas or pre-packaged juices. The versatility is another winning aspect—serve it as is for a family-friendly refresher, or transform it into a sophisticated cocktail base for summer entertaining.
I’ve been perfecting this recipe for years, and the balance of flavors creates that perfect sweet-tart harmony that keeps everyone coming back for refills. Plus, it’s a brilliant way to use up that giant watermelon taking up space in your refrigerator!
Equipment needed: Blender or food processor, fine-mesh strainer, pitcher, citrus juicer
Watermelon Juice Cooler
Ingredients
- 8 cups seedless watermelon cubed (about half a medium watermelon)
- 2-3 tablespoons fresh lime juice from approximately 2 limes
- 1-2 tablespoons honey or agave nectar optional, depending on watermelon sweetness
- 10 fresh mint leaves plus extra for garnish
- Pinch of salt enhances watermelon flavor
- Ice cubes for serving
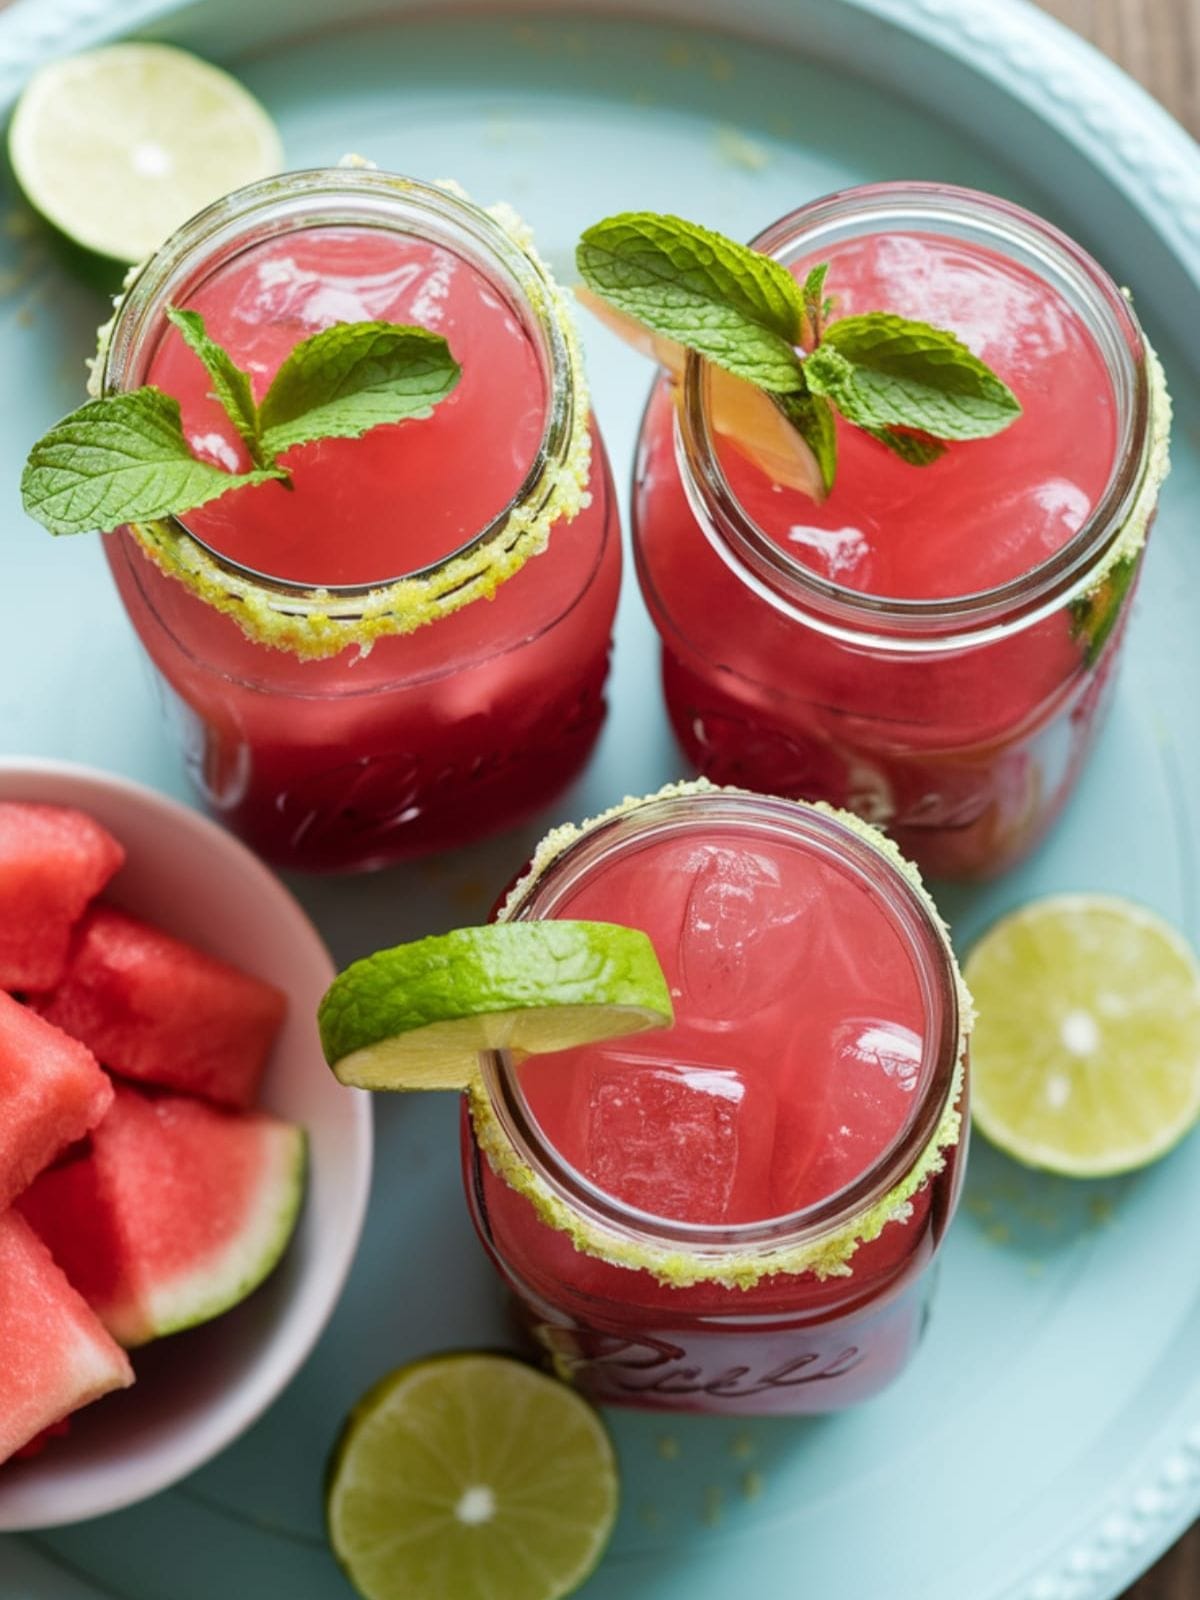
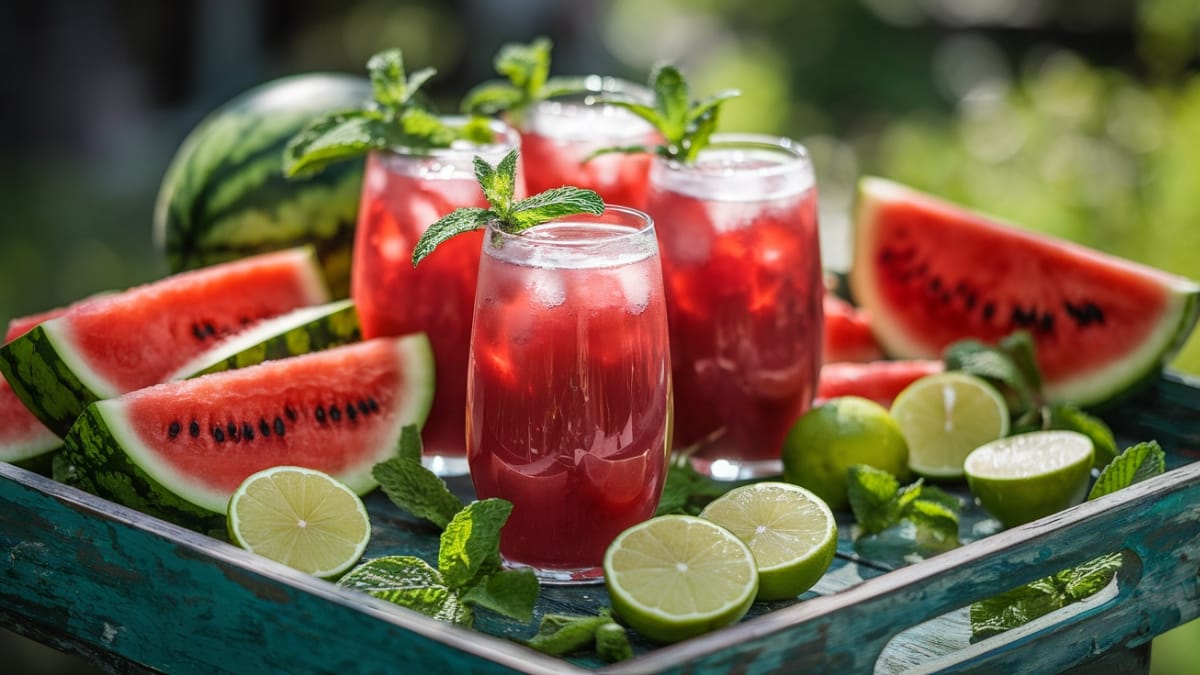
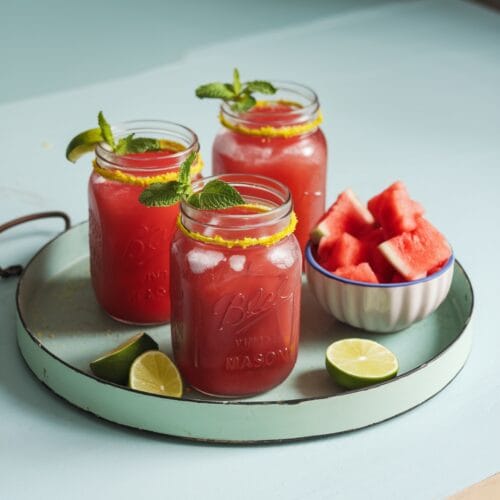
- Lime slices and watermelon wedges for garnish
Instructions
- Prepare the watermelon by cutting it into 1-inch cubes, removing any black seeds if not using seedless. The smaller the cubes, the easier they’ll blend into smooth juice.
- Add watermelon cubes to your blender along with the mint leaves and blend on high speed until completely smooth, about 30-45 seconds. Work in batches if needed to avoid overloading your blender.
- Strain the mixture through a fine-mesh sieve into a pitcher, using the back of a spoon to gently press and extract all the juice while leaving behind any pulp. This step ensures a smoother texture.
- Stir in the lime juice and taste test your cooler. Add honey or agave if needed, depending on the natural sweetness of your watermelon. Add a tiny pinch of salt to enhance the watermelon flavor.
- Refrigerate for at least 30 minutes to chill thoroughly. The flavors will meld together and develop during this time.
- Serve over ice in tall glasses, garnished with fresh mint leaves, lime slices, and small watermelon wedges for a picture-perfect presentation.
Notes
- For the best flavor, use a perfectly ripe watermelon that feels heavy for its size and sounds hollow when tapped.
- This cooler can be made up to 24 hours ahead and stored in an airtight container in the refrigerator—just stir well before serving.
- For a slushy version, freeze the watermelon cubes before blending, reducing or eliminating the ice.
- The optional pinch of salt doesn’t make the juice salty—it actually enhances the watermelon’s natural sweetness.
- If you prefer a pulp-free drink, strain twice or use a nut milk bag for ultra-smooth results.
Calories & Nutritional Info
- Calories: Approximately 85-95 calories per 8-ounce serving
- Carbohydrates: 22g (mostly natural fruit sugars)
- Vitamin A: 30% of daily value
- Vitamin C: 25% of daily value
- Potassium: 5% of daily value
- Naturally gluten-free, vegan (if using agave instead of honey), and dairy-free
Common Mistakes to Avoid
- Using underripe watermelon – This results in watery juice lacking sweetness and vibrant color. Always choose watermelon that’s heavy and sounds hollow when tapped.
- Skipping the straining step – While it takes a bit more time, straining creates that smooth, restaurant-quality texture that elevates the drink.
- Adding too much sweetener initially – Watermelon’s natural sweetness varies greatly, so always taste before adding honey or agave and adjust gradually.
- Blending too long – Over-processing can create foam and a bitter taste from the seeds. Blend just until smooth.
- Serving immediately after making – Allowing the juice to chill helps the flavors develop and meld together for a better-tasting cooler.
Alternatives & Substitutions
- For an adult version: Add 1.5 oz white rum, vodka, or tequila per serving for a refreshing cocktail
- Mint alternatives: Try basil, a small sprig of rosemary, or even a few leaves of lemon balm
- Citrus options: Substitute lemon juice or even orange juice for the lime
- Sweetener choices: Use simple syrup, maple syrup, or stevia instead of honey/agave
- Add-ins: Try a splash of coconut water, cucumber slices, or fresh ginger for different flavor profiles
- Bubble factor: Add a splash of sparkling water just before serving for a fizzy version
FAQs
How long will Watermelon Juice Cooler last in the refrigerator?
Fresh Watermelon Juice Cooler is best enjoyed within 24 hours for optimal flavor and color. After that, natural separation occurs and the vibrant nutrients begin to diminish. Store it in an airtight container and give it a good stir before serving.
Can I use frozen watermelon to make this cooler?
Absolutely! Using frozen watermelon cubes creates a naturally slushy texture that’s perfect for hot days. You might need to add a small amount of water to help with blending, and you can reduce or eliminate the ice when serving.
Why is my watermelon juice separating?
Separation is completely natural with fresh juices. The heavier fruit solids sink while the water rises to the top. Simply stir or shake before serving to recombine. If it bothers you, adding a tiny bit of honey or agave can help stabilize the mixture.
Is it necessary to strain the watermelon juice?
While not strictly necessary, straining creates that smooth, elegant texture that makes this cooler feel special. If you prefer a more rustic drink with more fiber, you can skip straining or use a coarser strainer.
How can I tell if my watermelon will make good juice?
The best watermelons for juicing are heavy for their size, have a uniform shape, and display a creamy yellow (not white) spot where they rested on the ground. When tapped, they should produce a deep, hollow sound rather than a dull thud.
Final Thoughts
This Watermelon Juice Cooler is more than just a drink—it’s a celebration of summer’s finest offering. Whether you’re serving it poolside, at a backyard gathering, or simply enjoying a quiet moment of refreshment, it delivers pure joy in every sip. The beautiful thing about homemade juice is knowing exactly what goes into it—pure, simple ingredients that let nature’s sweetness shine through.


